


GPEC PCMs (Global Powertrain Engine Controller) are a type of PCM or ECU found in Dodge, Jeep, Ram, Chrysler, and a few other vehicles like Fiat in the United States. Originally manufactured by Continental and later by a company called Batesco, these ECUs come in several different versions. This guide focuses on the GPEC2A, which is found in many U.S. vehicles, including the Hellcat.
Why Unlocking Is Necessary
All GPEC2A ECUs come locked from the factory, meaning you cannot OBD flash the ECU unless it has been unlocked. The unlocking process requires opening the ECU case and flashing it first in boot mode. If your shop has an AutoTuner tool, you can complete this entire process in-house without sending the ECU away.
Once the ECU is unlocked, you can flash it over OBD using the AutoTuner tool or any other tuning platform, including HP Tuners, Diablo Sport, Super Chips, SCT, or other handheld devices. The process keeps the ECU completely open—there is nothing proprietary that locks you into the AutoTuner ecosystem.
We will walk through the complete process: opening the ECU, connecting the Universal Harness and Universal Box, locating the boot pin, identifying the ECU, applying the OBD patch, and reinstalling the case.
This process allows equipped tuning shops to perform GPEC unlocks completely in-house with no additional unlock fee from AutoTuner and no subscription required.
AutoTuner currently supports GPEC2, GPEC2A, GPEC3, GPEC4, and GPEC4LM ECUs found across many Dodge, Ram, Jeep, Chrysler, and Fiat applications.
Always check the latest AutoTuner compatibility guide before opening an ECU, as new OBD and Bench methods are continually being added.
Tools Required
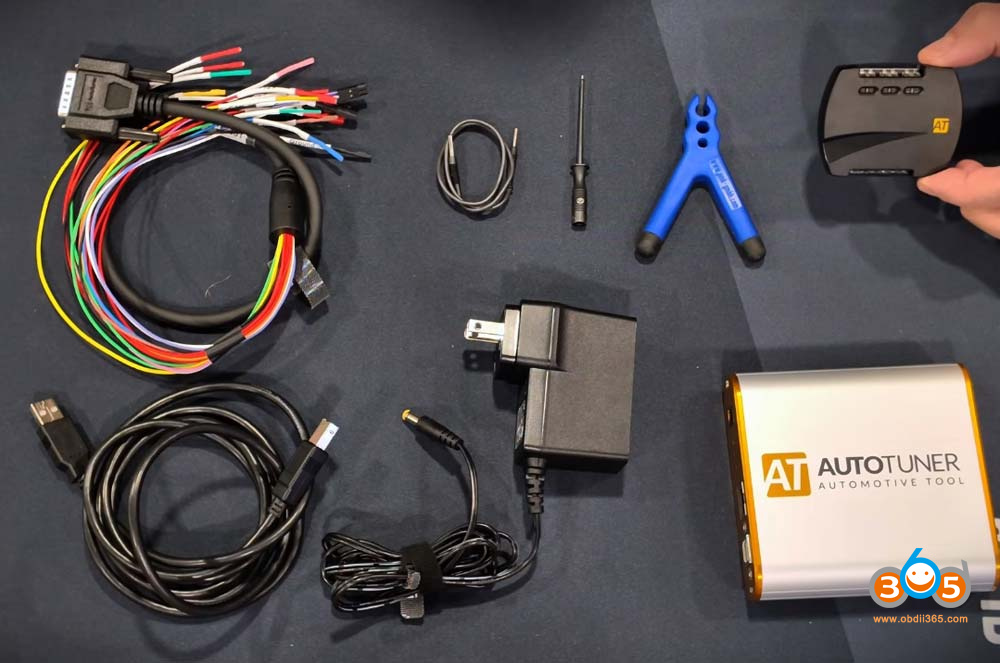
Everything needed to make the electrical connection to the ECU is included with the AutoTuner tool:
- AutoTuner tool itself
- Power supply
- USB cable
- Universal black cable
- Universal box
- Probe positioner
- Test probe
- Banana to banana cable
For opening the ECU, you will also need:
- The ECU itself
- A small flathead screwdriver
- A larger flathead screwdriver
- A pair of pliers
- Something approximately 3x3x3 inches to rest the ECU on (a 3D-printed box or even a roll of duct tape works)
Step 1: Selecting the Protocol
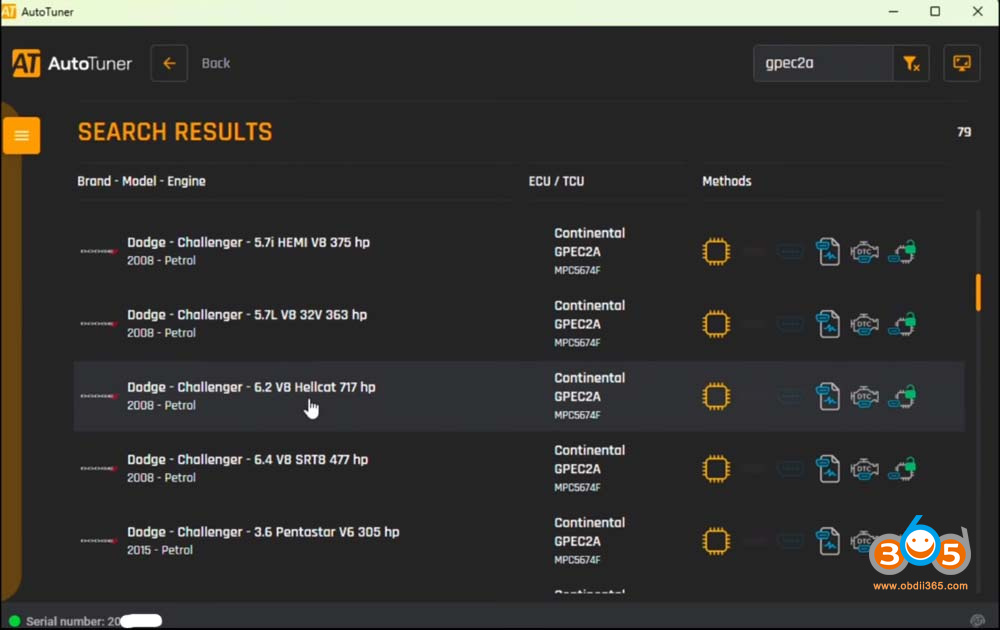
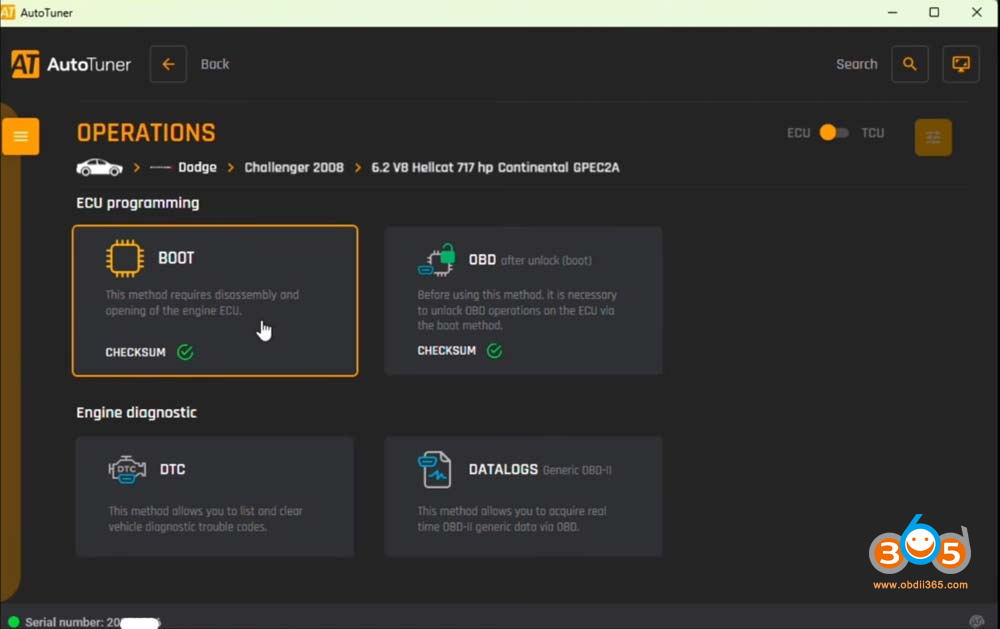
Load the AutoTuner program and search for “GPEC2A” Select the appropriate ECU—for example, the Hellcat. The available options will show boot and OBD after boot. Proceed with opening the ECU.
Step 2: Opening the ECU
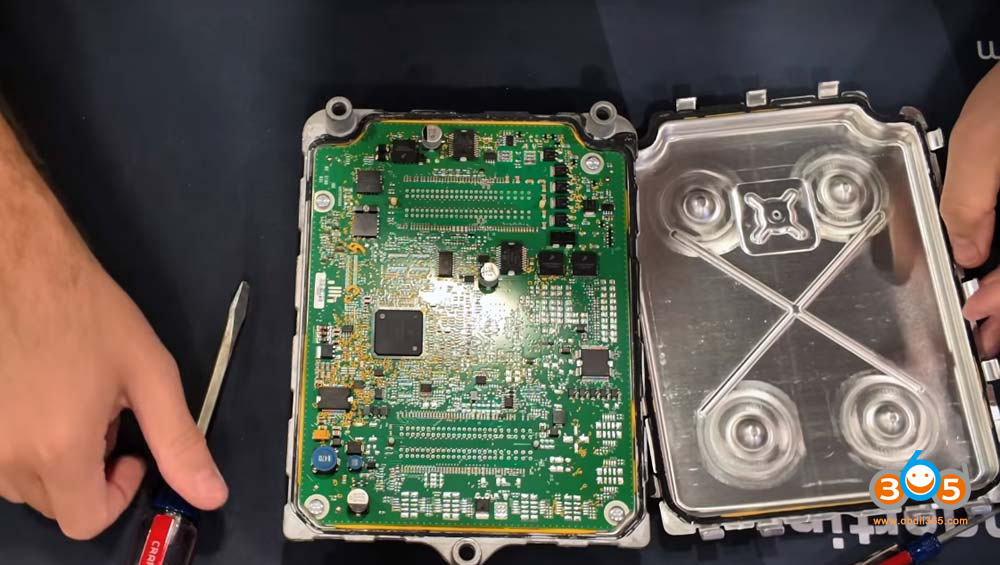
Release the small metal tabs around the ECU using pliers. Since the case is aluminum, the tabs pry up easily. You only need to move each tab out slightly—no need to go too far. Work your way around the case.
Flip the ECU over and start in a corner. Insert a small flathead screwdriver into the side and lift up slightly. The case will bend a little. Follow up with the larger screwdriver, inserting it only about half a centimeter because the PCB board is very close to the edge. Twist to break the seal, then work your way around the case, pushing up slightly and inserting the screwdriver at the next point. Once enough space is created, simply pull the case open. It does not take much force.
Be careful not to insert the screwdriver too far beyond the edge of the PCB, as this could scratch the board.
Step 3: Pinning Out the ECU
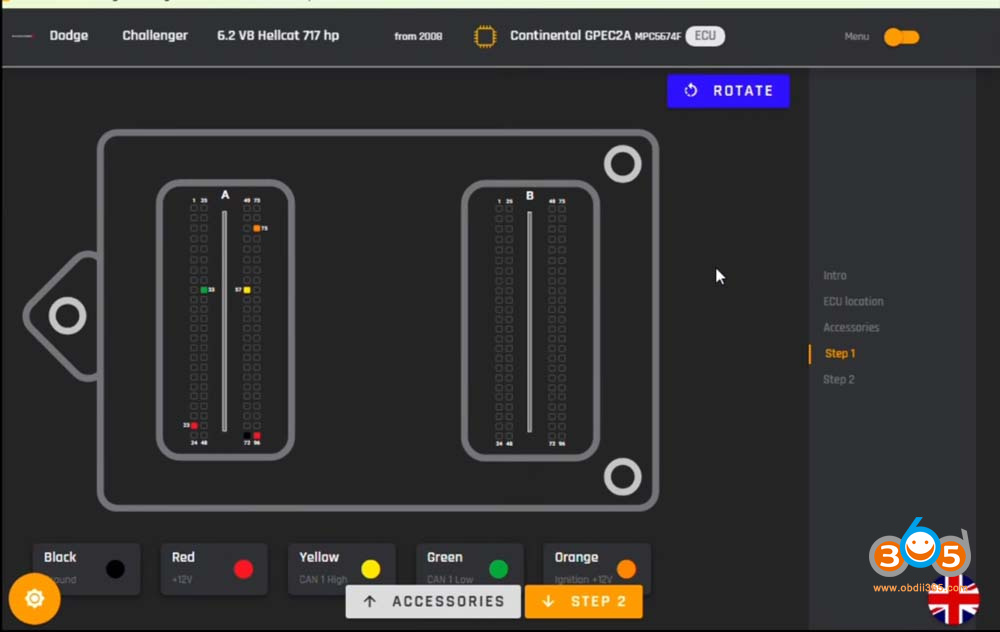
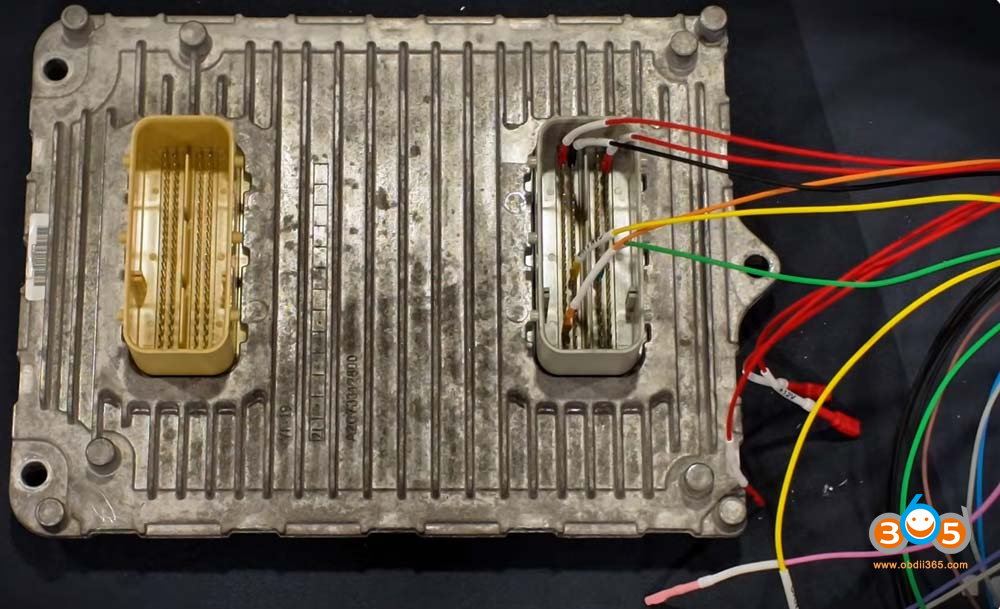
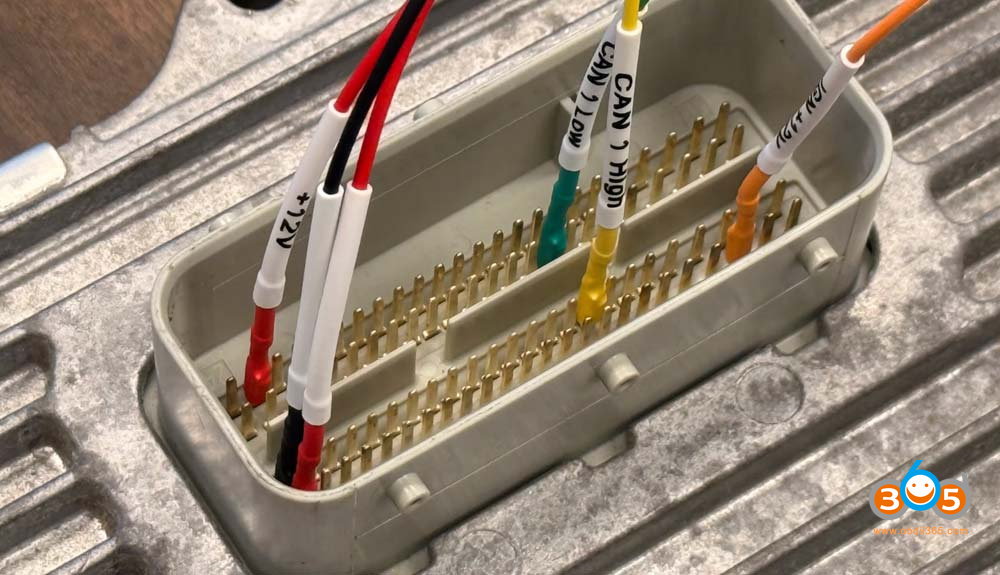
In the AutoTuner program, select boot and go to the instructions. The GPEC2A ECU requires connecting only six pins on the light gray ECU connector using the universal black harness.
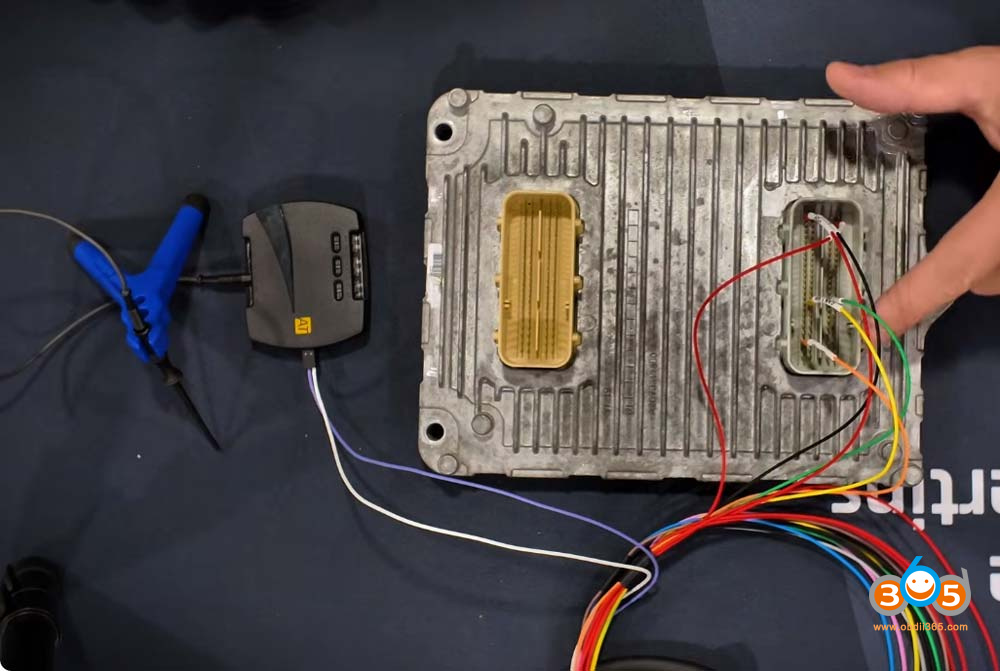
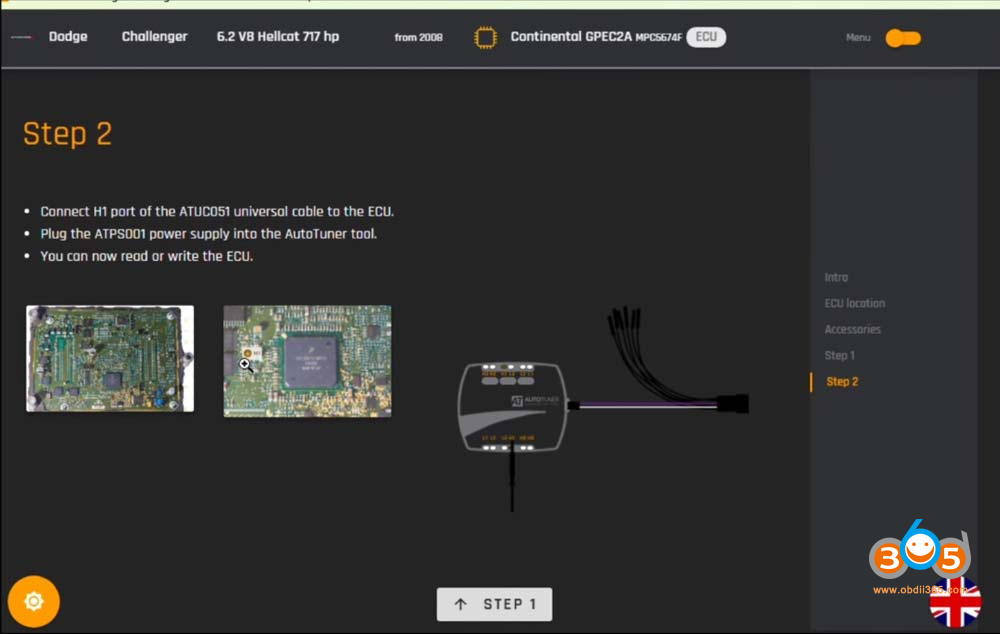
Connect each of the pins to the ECU harness. Connect the universal box to the purple and white cable. Connect the banana cable to the test probe and into the H1 port on the universal box, then place it into the probe positioner bipod.
Flip over the ECU and rest it on the 3×3 box (or similar object) so the pins are not bent.
Step 4: Connecting the Boot Pin
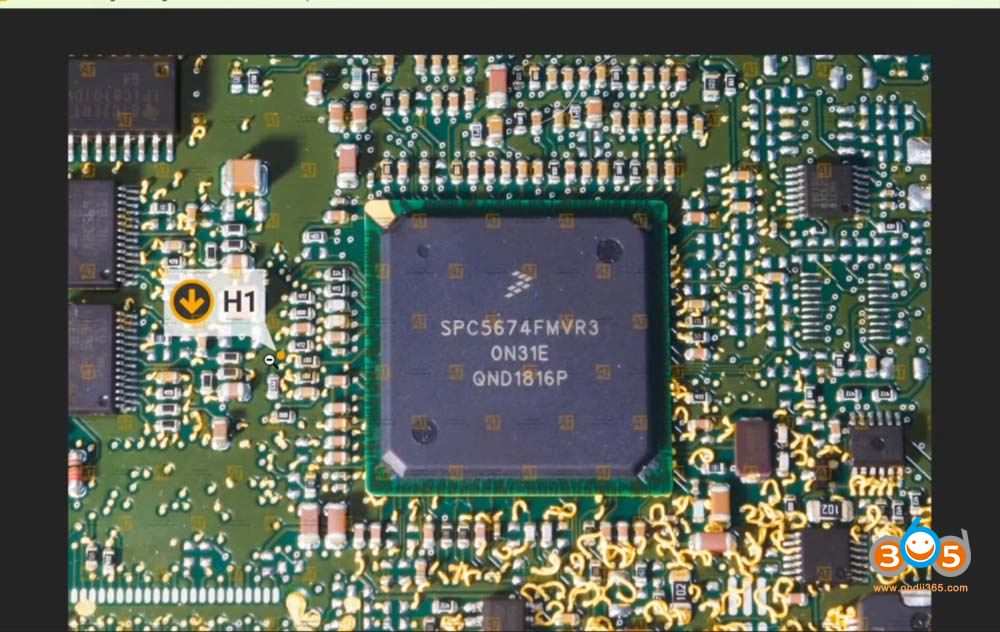
Connect the purple and white wire to the side of the universal box. The H1 connector goes into the designated spot for the boot pin.
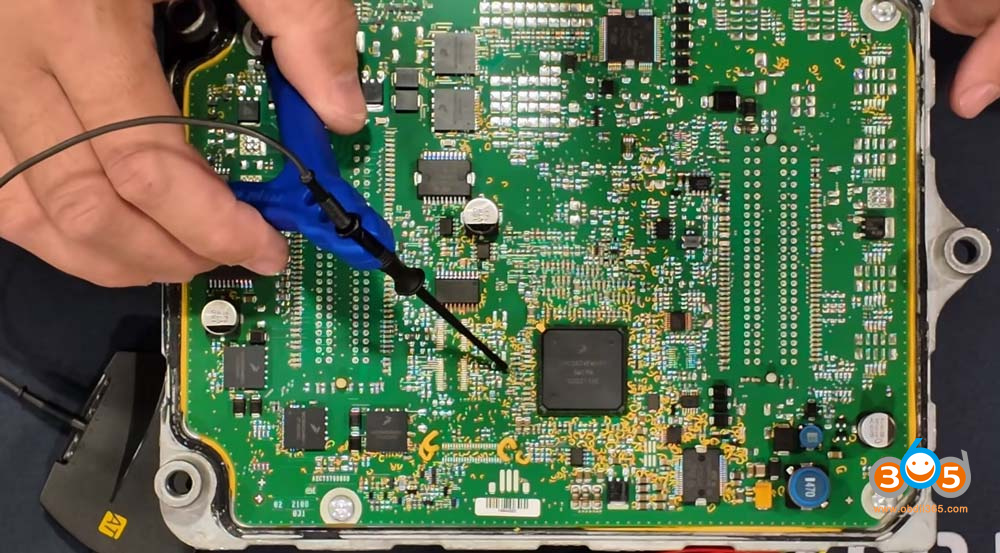
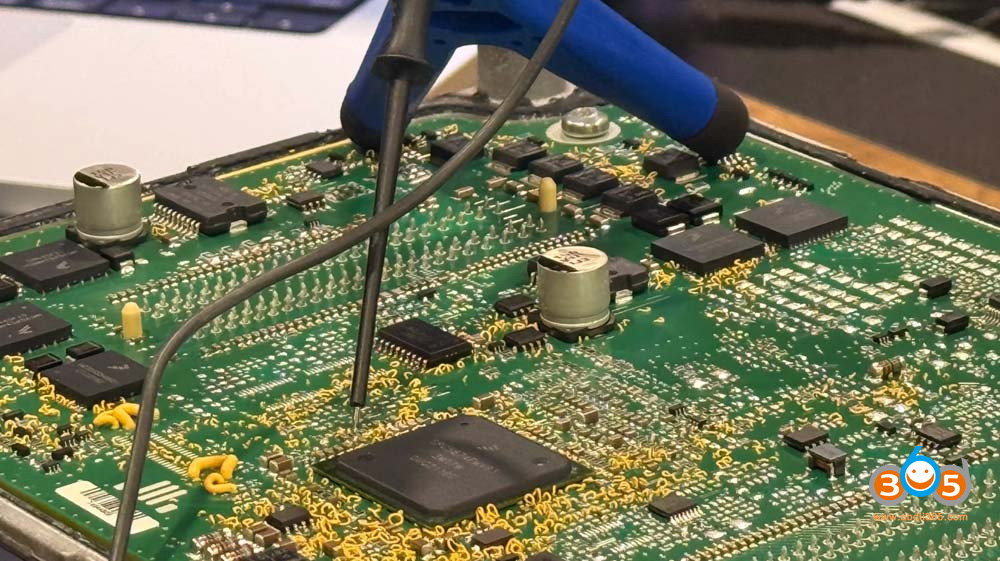
Locate the boot pin on the ECU. On the board, count one, two, three, four little components—the boot pin is the pad right after that, the fifth pad. There may be some yellow coating on the board that needs to be scratched away to access the boot pin.
Place the test probe directly on top of the boot pin.
Step 5: Identifying and Unlocking the ECU
With the boot pin connection in place, identify the ECU in the AutoTuner program. If no errors appear, everything is connected correctly.
You can read the ECU and perform a backup, but in this case it is not necessary because the OBD patch automatically backs up the ECU. Go to “Write ECU.” At this stage you could write a tuned file if desired, but instead apply the OBD patch.
The tool will first connect to the ECU and run a full backup, then unlock the ECU.
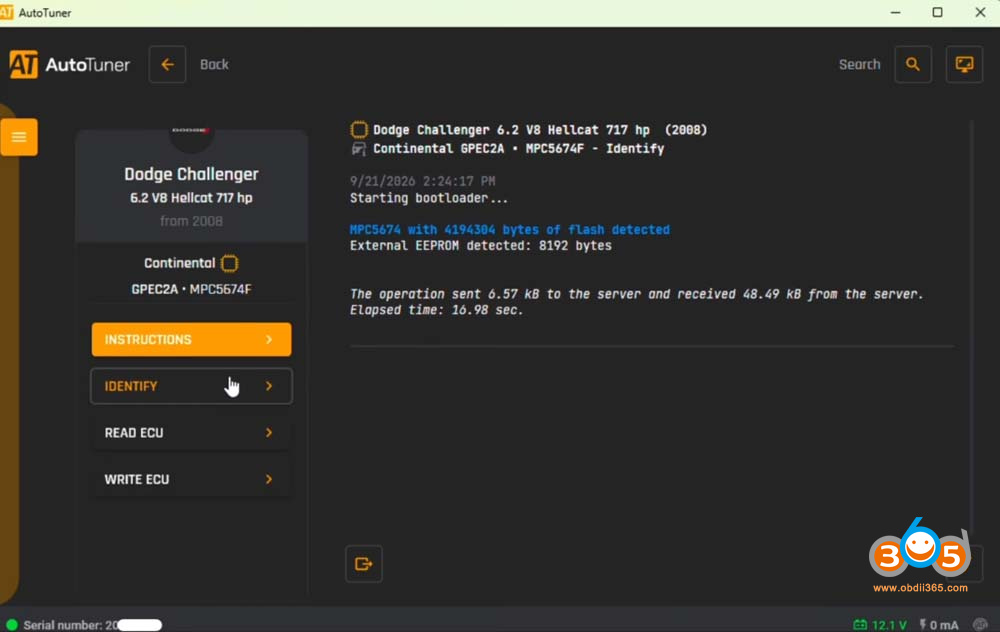
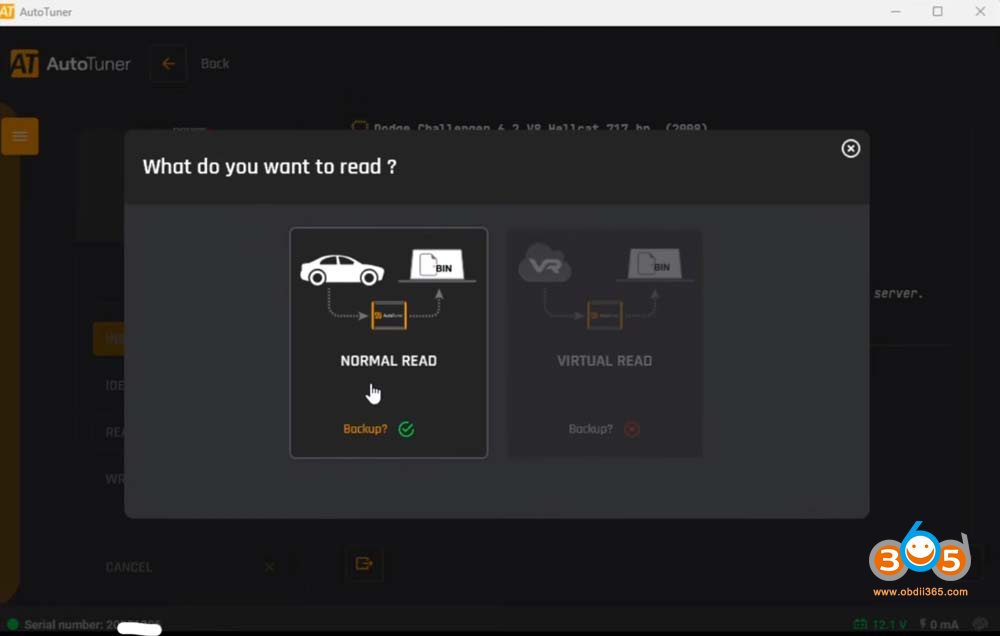
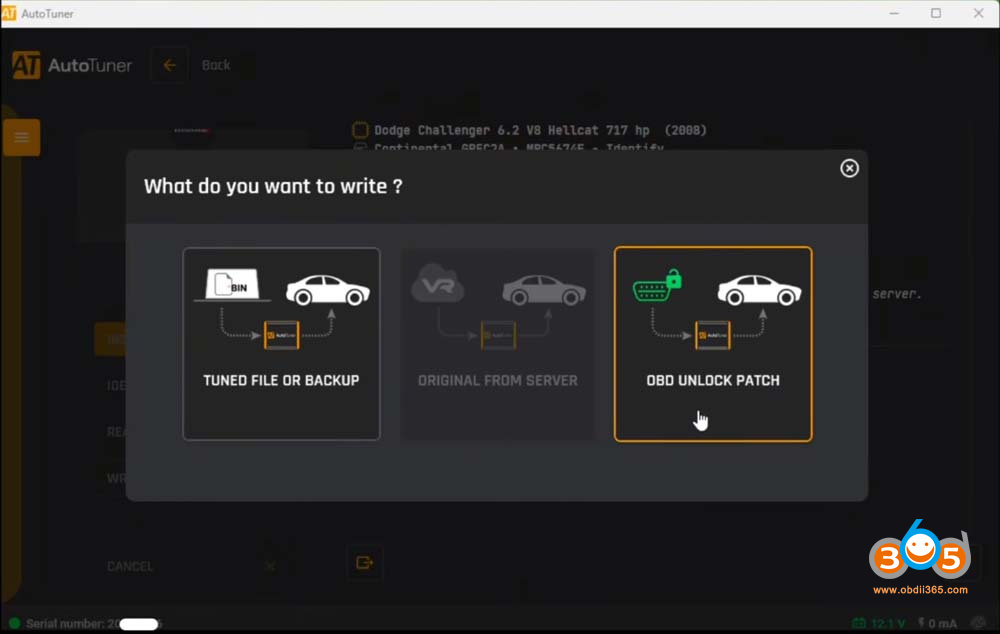
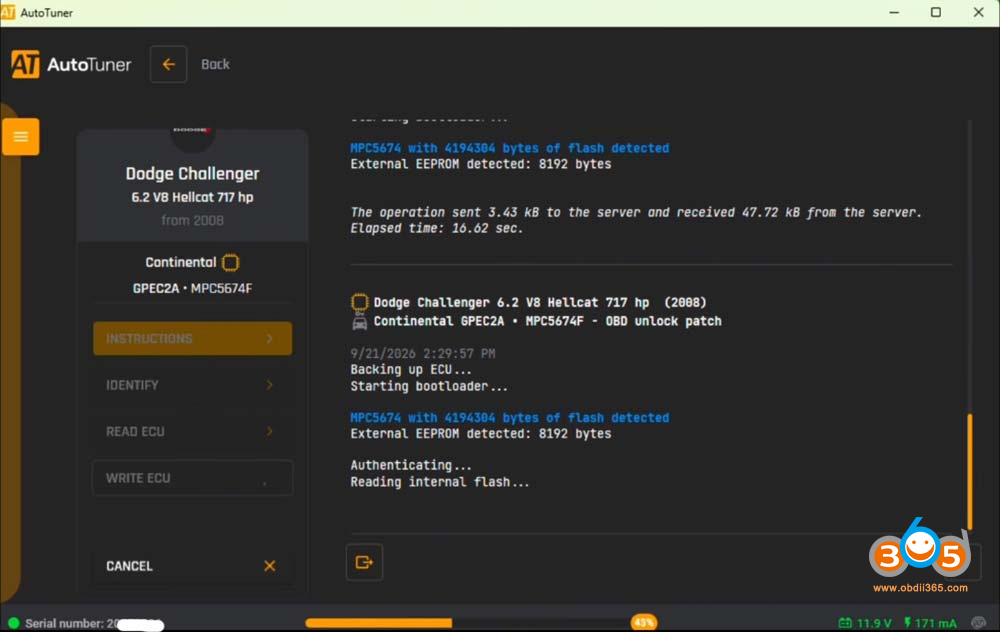
Step 6: Verifying and Reinstalling
Once finished, hit “Identify” again to confirm everything works. Then seal up the ECU and put it back in the vehicle.
After Unlocking
Your GPEC2A ECU is now unlocked. You can reinstall it in the vehicle and start flashing over OBD using the AutoTuner tool or any other tool. There is nothing proprietary about the process.
Experienced shops report completing hundreds of these ECUs in just a couple of minutes each. If you are not comfortable doing it yourself, you can send your ECU to AutoTuner for the service. If you have the AutoTuner tool, you can do it in-house at no additional cost—there is no subscription or credits required.