


Purpose of downgrade: xprog clone v5.5.5 cannot read or write BMW FRM3 reliably.
Solution: Downgrade to X-Prog v5.5.1 and use a dump from the Internet (v5.5.1 can’t read D-flash) or buy a new Xprog v5.6 or newer (latest v5.84).
Version needs to be updated: decided to update (downgrade) to 5.5.1 because 5.5.5 was not stable, Verification failed more often than succeeded or other versions (v5.74) that does not have valid certificates. 5.5.1 is stable for FRM repair job.
Version desired: V5.5.1
All software discussed below, is located here.
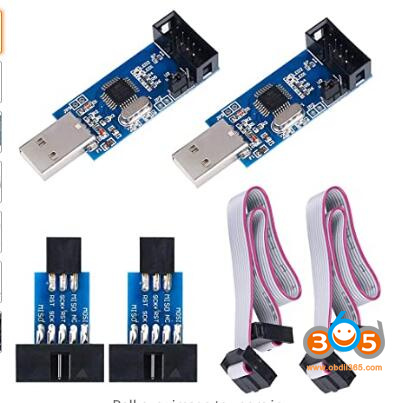
1. In order to flash the XProg, you need at Atmel programmer. The cheapest Atmel programmer you could find was the USBASP. You will want to pick up the two-pack from Amazon
UPDATE USBASP FIRMWARE
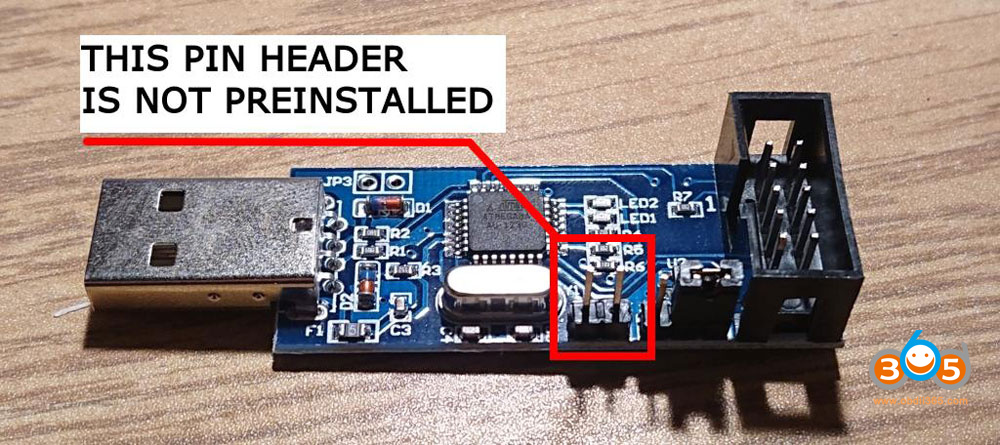
2. Most of the cheap Atmel programmers come with outdated firmware, this one came with firmware from 2008 – Even though the most recent firmware available, was last updated in 2011! To update the firmware, you will need to:
- Solder a pin header onto JP2
- Download the latest firmware from: https://www.fischl.de/usbasp/
- Install AVRDUDE (Command Line) or AVRDUDESS (GUI)
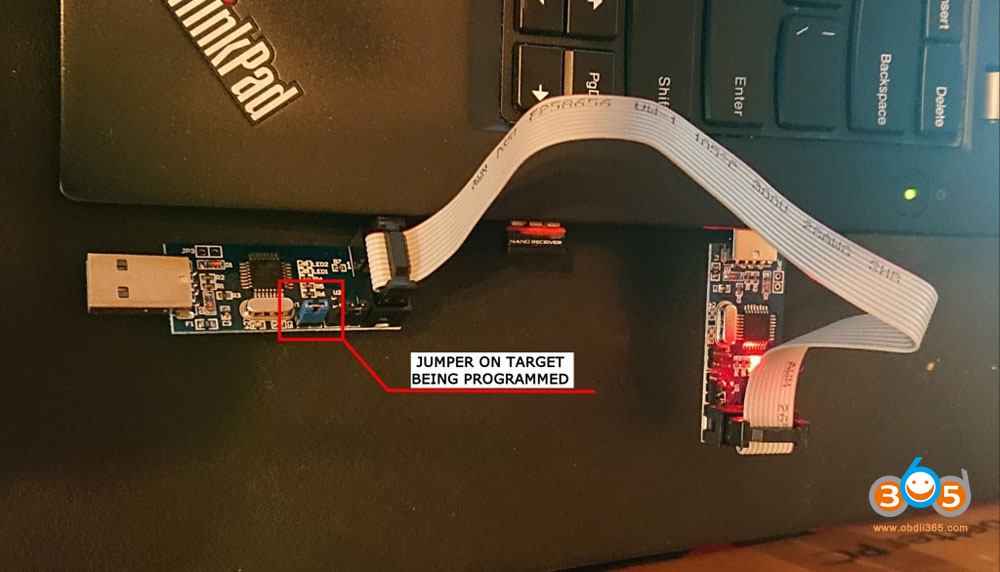
- Put a jumper on the JP2 pin header of the TARGET (the USBASP) that you will be programming
- Connect the two USBASPs with the 10-wire cable
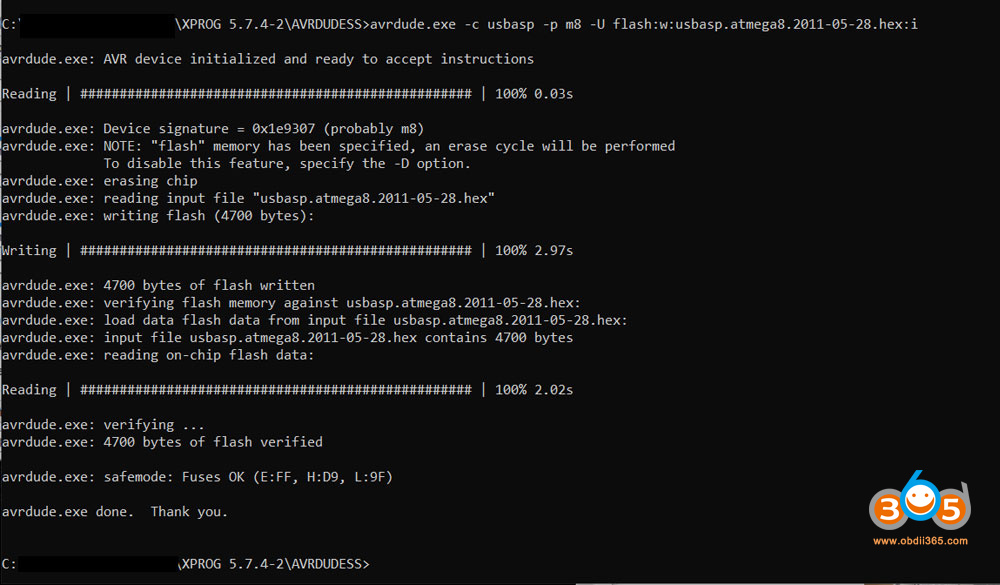
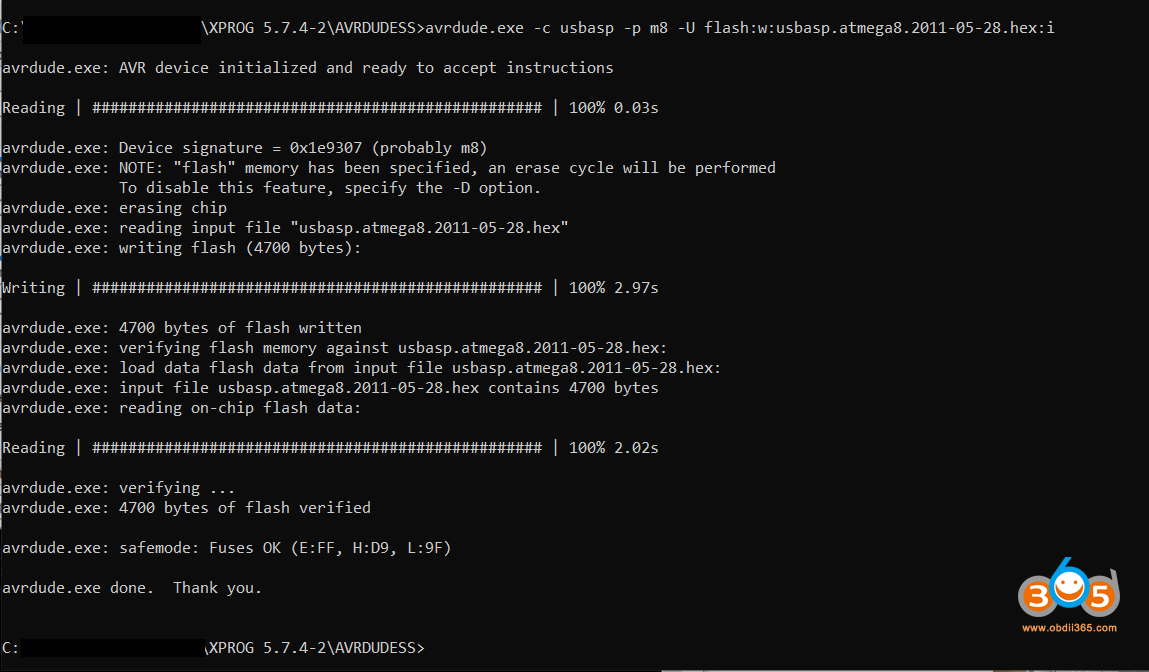
- Copy the “usbasp.atmega8.2011-05-28.hex” firmware to the AVRDUDE folder. I used the command line AVRDUDE to upgrade the USBASP, since it was a short command.
-
Code:
avrdude.exe -c usbasp -p m8 -U flash:w:usbasp.atmega8.2011-05-28.hex:i
- You will receive an error “sck cannot be set”, this is the reason we are performing the firmware update, and it will be corrected following the firmware update.
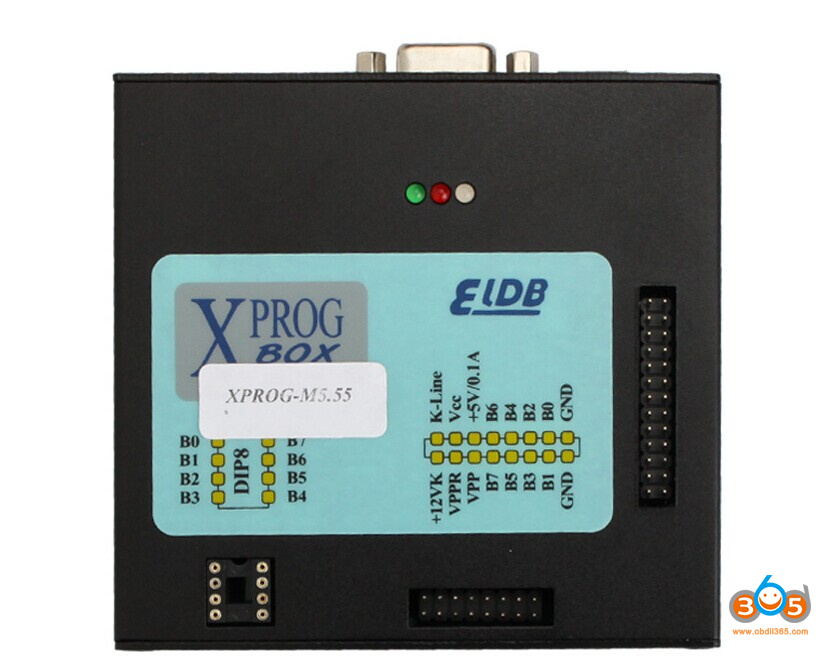
CONNECT USBASP AND XPROG HARDWARE
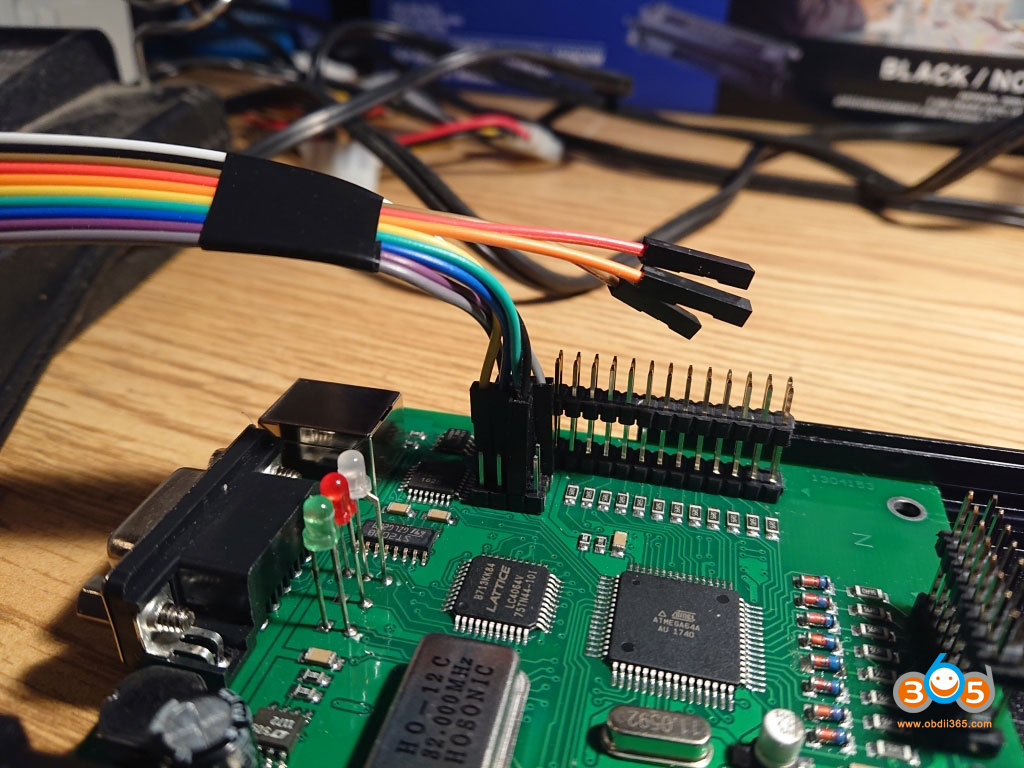
3. Now that the USBASP has been updated, we can work on connecting the USBASP and XProg hardware.
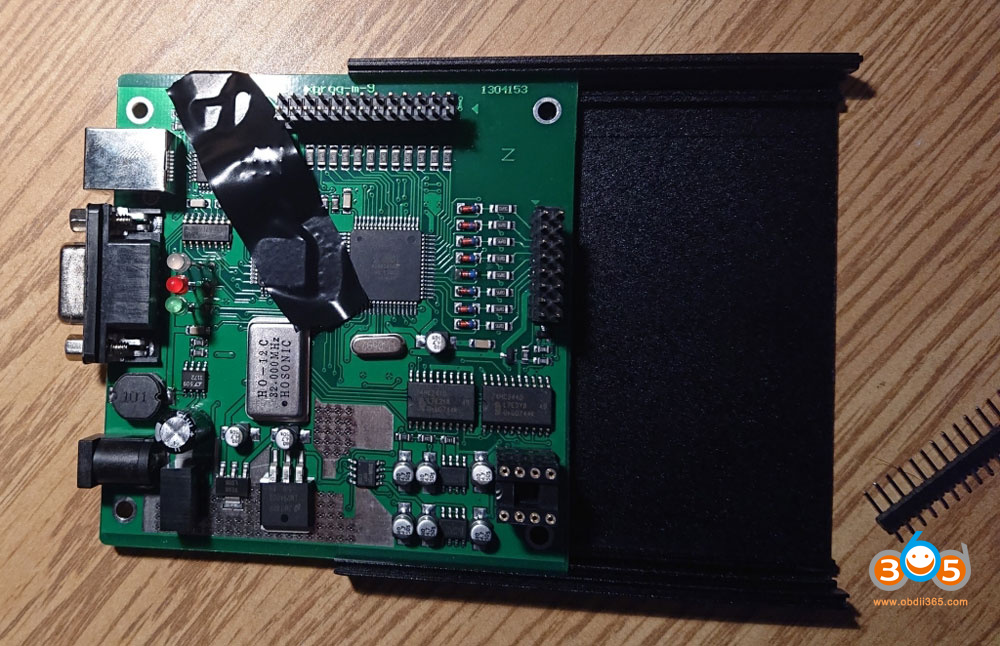
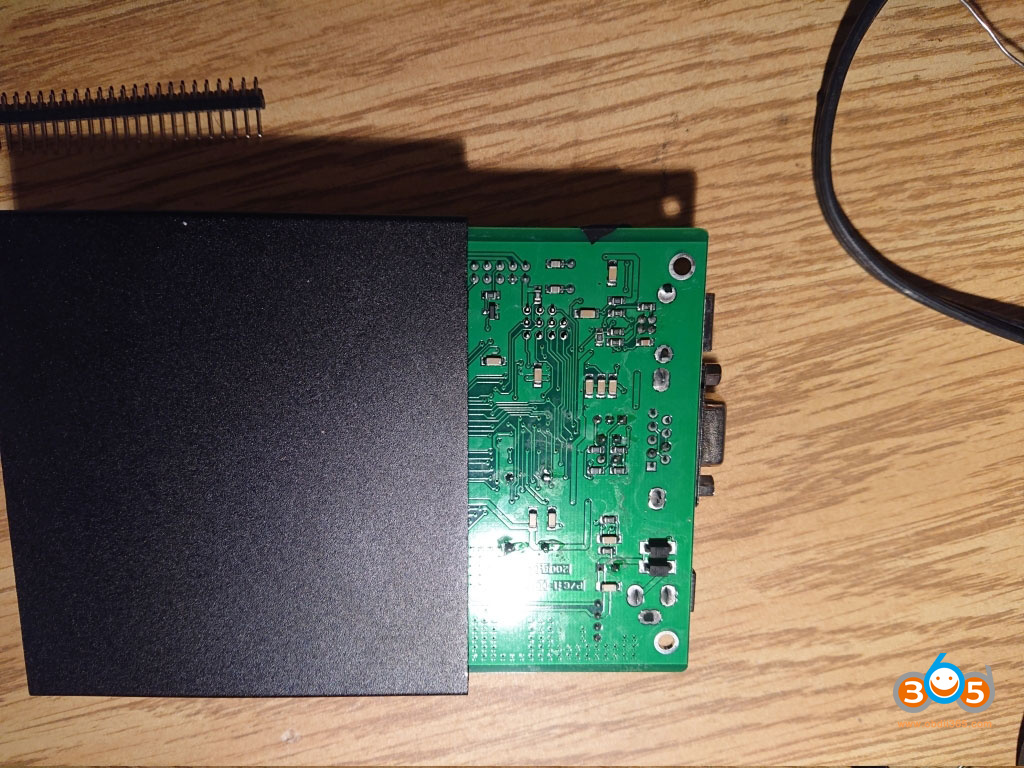
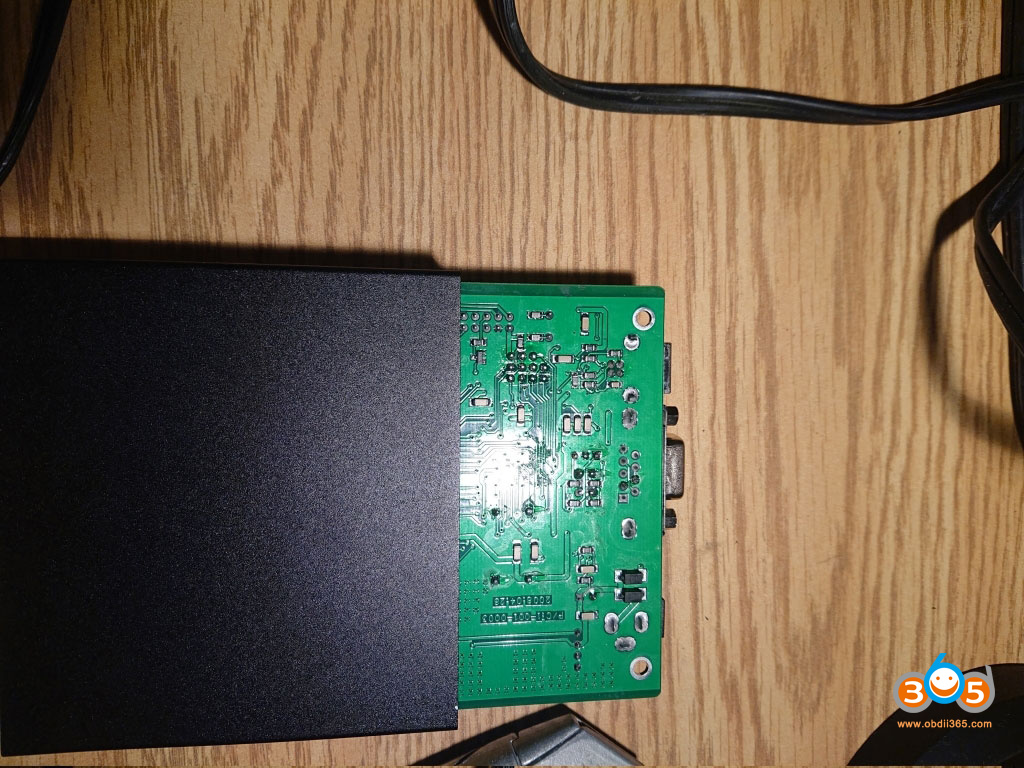
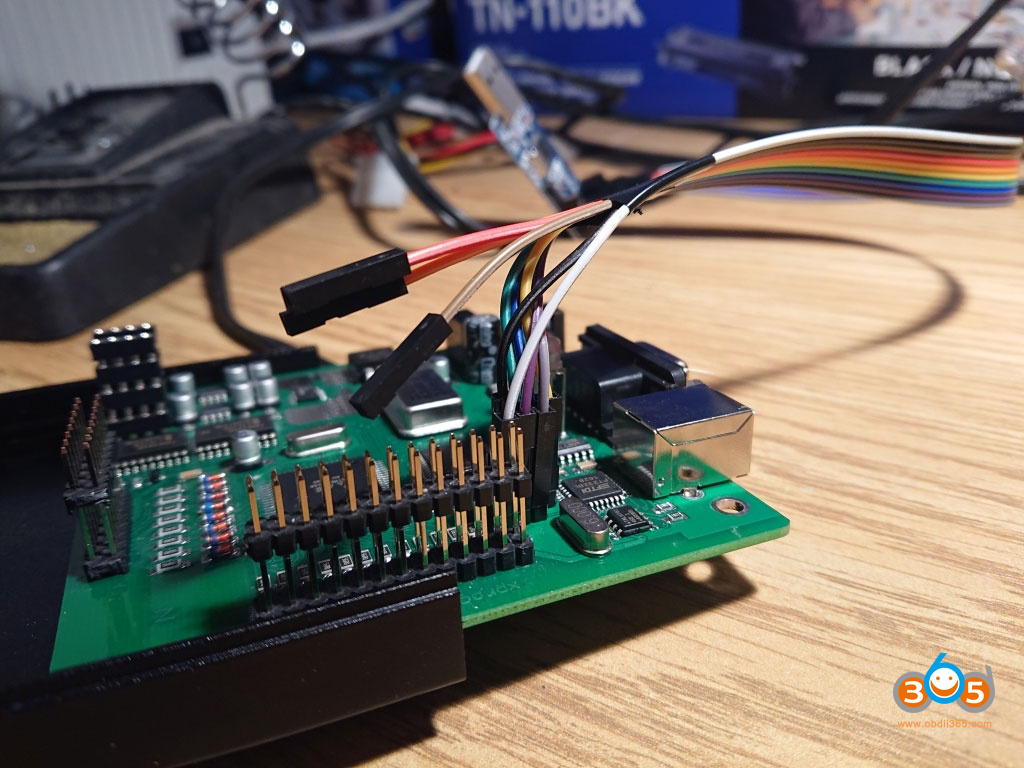
- Open the XProg (If you have a metal case, there are 8 screws, four on each side. Then the XProg just slides out.
- Solder the pin header onto the 11 pins on the XProg. I taped the pin header in place in order to solder it, as the top components are taller than the pin header.
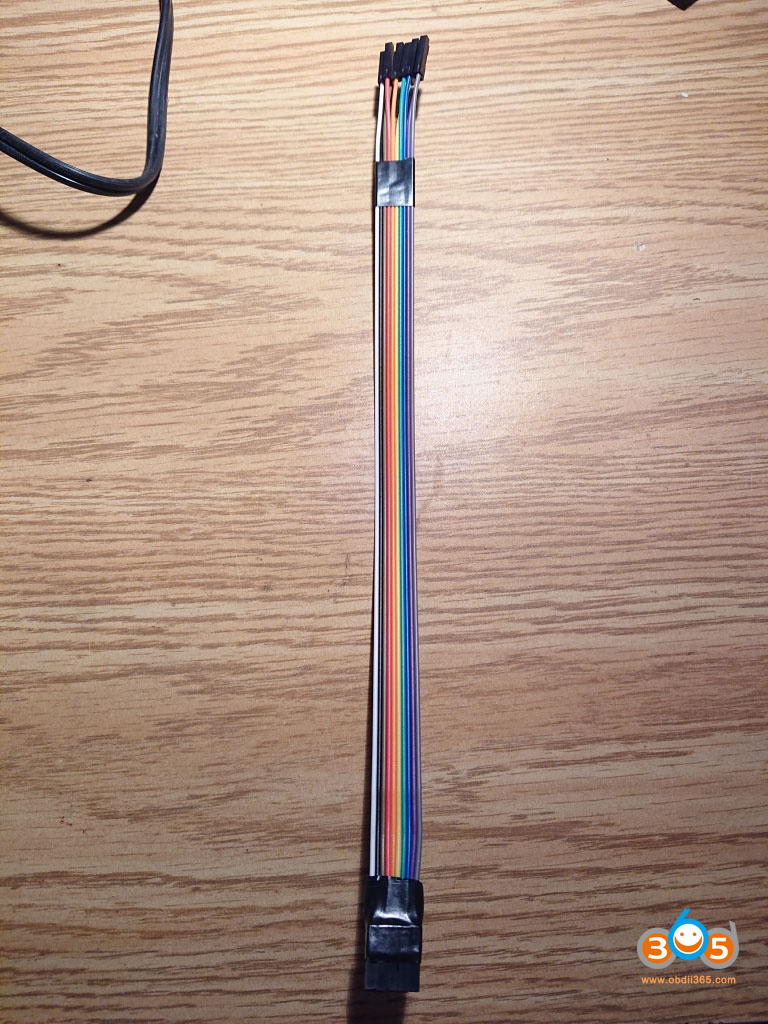
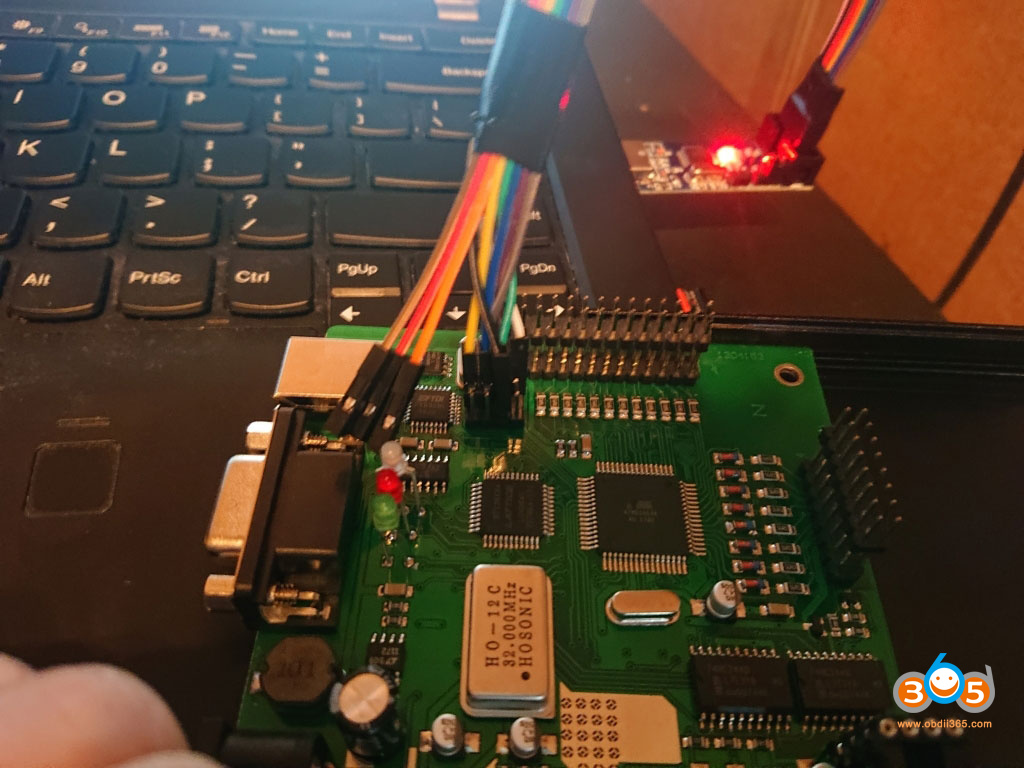
- Create a 10-pin female-to-female cable in order to connect the USBASP to the XProg. I used a colour coded cable to keep track of the pins.
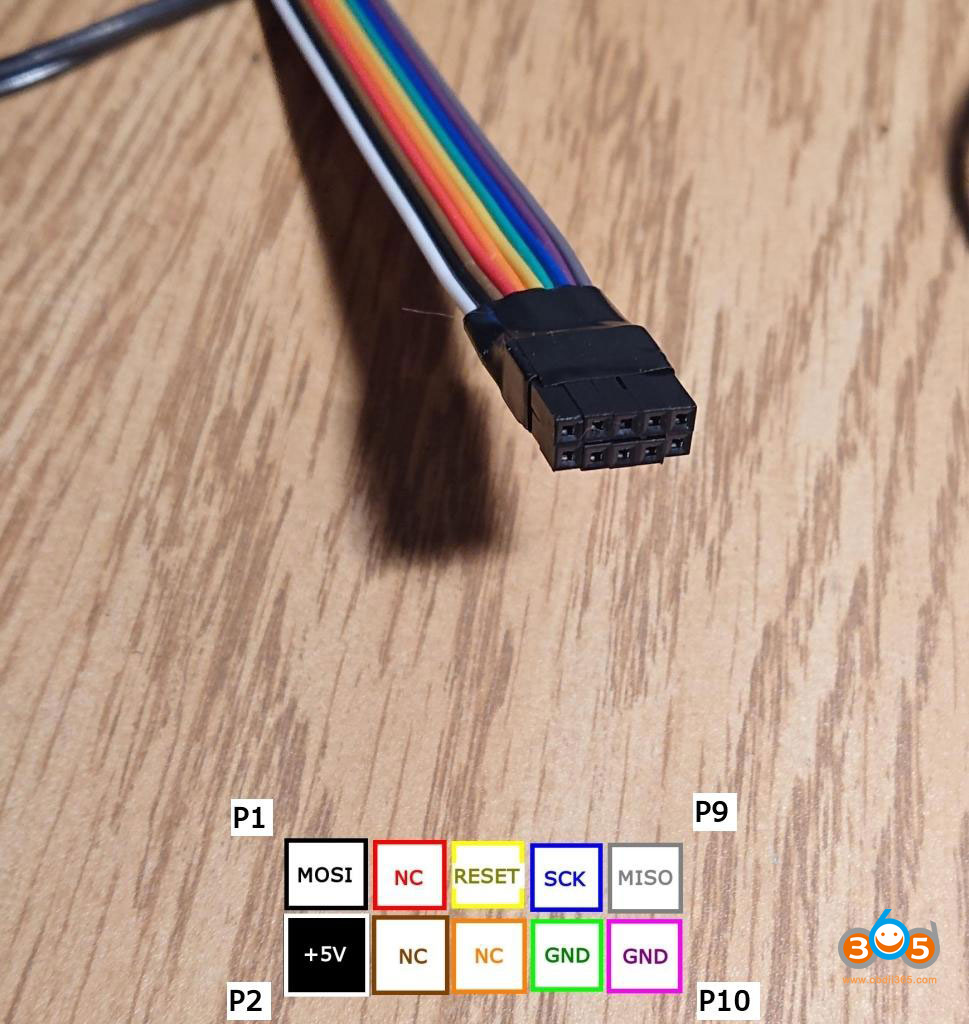
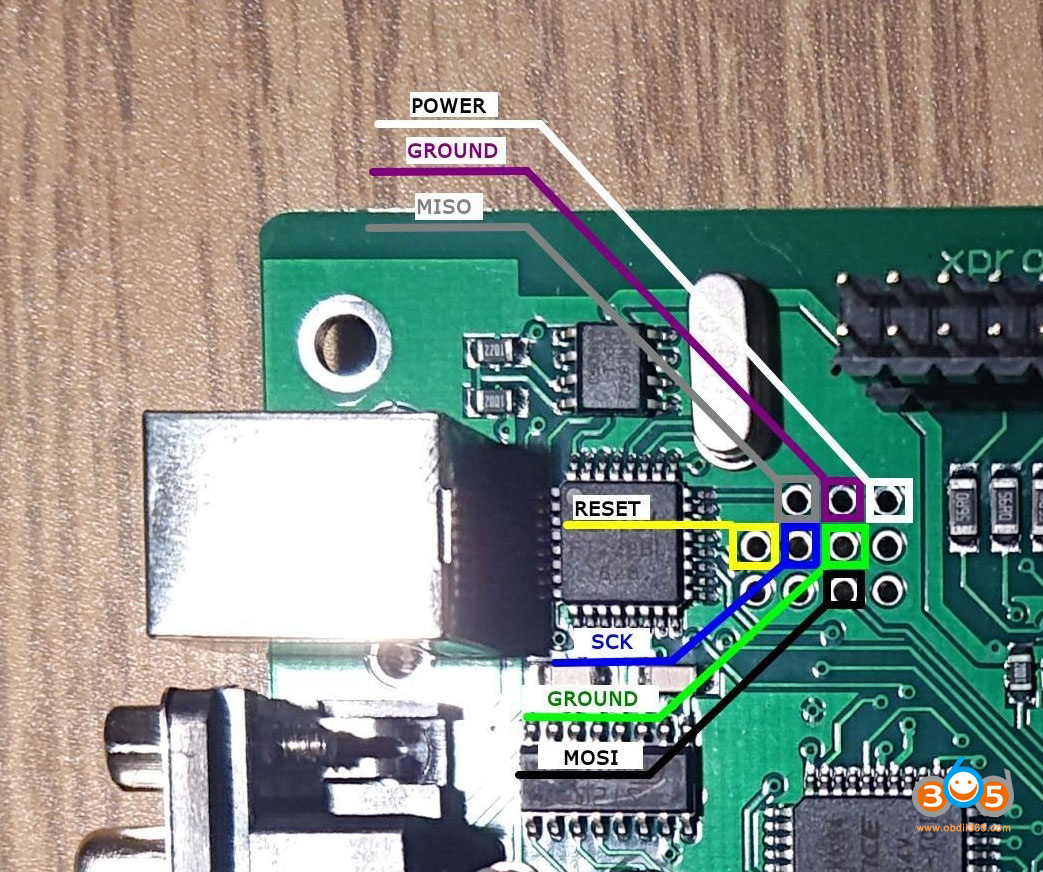
- Connect the XProg to the USBASP. You will be using Power (+5V), 2xGround, MISO, MOSI, RESET, and SCK. Start with the USBASP, then the XProg. Check your connections. Check them again.

FLASH THE XPROG
4. The USBASP and XProg are linked together, now to program the XProg.
- Open AVRDUDESS.
- Click “Detect” The console output should show “Detected … = ATmega64”
- Under “Flash” open “atmega flash.bin”. You will need to change the dropdown to “all files” as it autofilters .hex
- Under “Flash” open “eep.bin”
- Under Options, select “Erase Flash and EEPROM (-e)”
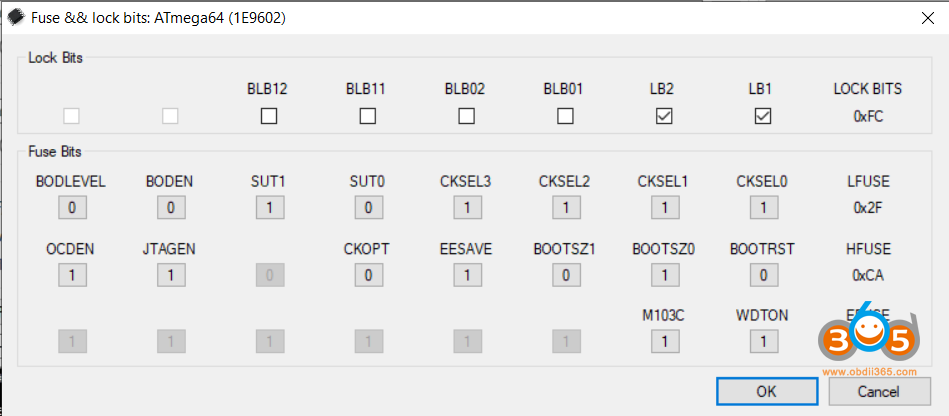
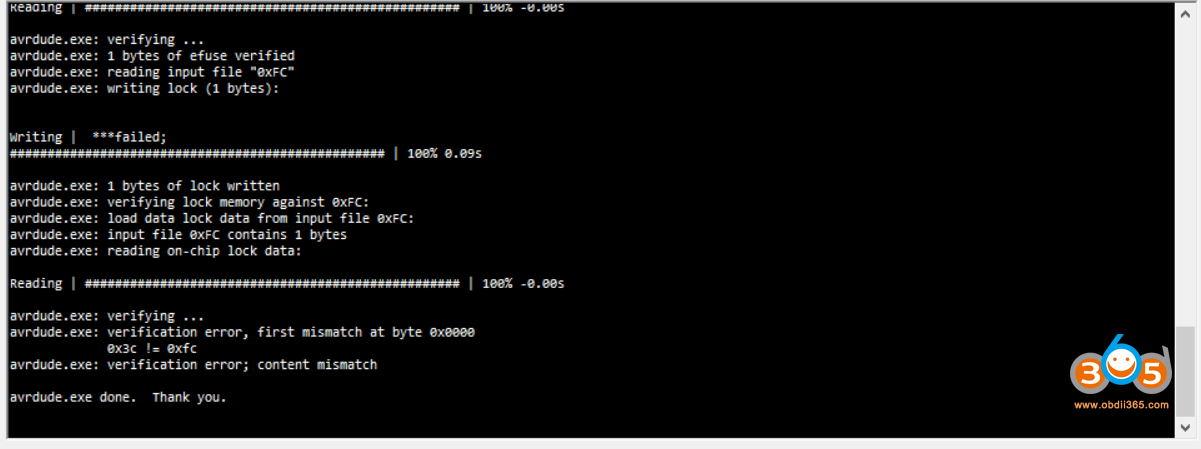
- Under “Fuses & Lock Bits”, check “Set fuses” and “Set lock”. Set the following values:
L = 0x2F
H = 0xCA
E = 0xFF
LB = 0xFC - The command line should now show:
Code:
-c usbasp -p m64 -B 0.5 -e -U flash:w:"C:...\XProg5.51\atmega\atmega flash.bin":a -U eeprom:w:"C:...\XProg5.51\atmega\eep.bin":a -U lfuse:w:0x2F:m -U hfuse:w:0xCA:m -U efuse:w:0xFF:m -U lock:w:0xFC:m
- Click “Program!”. The console output will show that the Lock Fuse and Final Verification failed. This is expected, if the MCU is not locked, XProg will not work.
INSTALL XPROG-M SOFTWARE IN A VM
5. I decided to install XProg into a VM, to avoid having to do this all again in some time. XProg has rudimentary VM detection, but is easily circumvented.
- Create a Windows 7 (x64) VM in VMWare Workstation.
- Do not install the VM Drivers. This means you will be limited to USB 2.0. (This is OK, XProg m box uses an FTDI USB <-> Serial adapter, so its not like USB 2.0 will be a limiting factor)
- Copy the XProg 5.5.1 Program, Drivers and weird Chinese Acrobat Reader to the VM. (I don’t know if it has to be this one, but it won’t work without Acrobat >10 installed)
- Install Adobe Acrobat
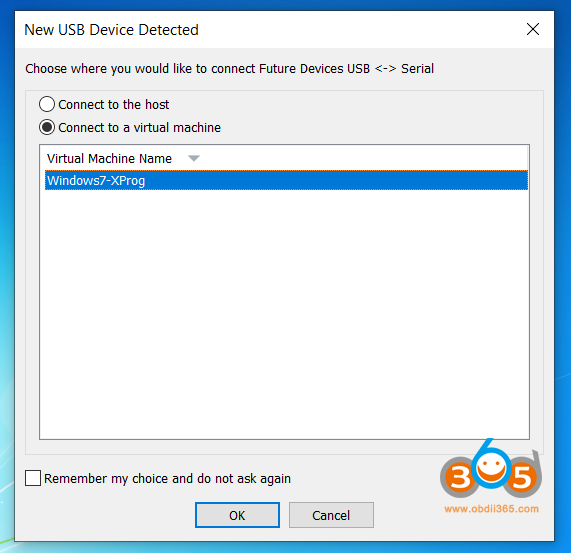
- Plug in the XProg, and attach the USB to the VM. Open “Device Manager” and under “Other Devices”, “USB <-> Serial” should be listed with an exclamation mark. Right click and choose “Update Driver Software”. Choose “Manually” and navigate to the “XProg Driver” directory. Choose “Install this driver software anyway”. Disconnect XProg
- Shut down the VM, and add the following lines to the VMX file to stop the VM detection.
Code:
monitor_control.virtual_rdtsc = "false"
monitor_control.restrict_backdoor = "true"
isolation.tools.getPtrLocation.disable = "true"
isolation.tools.setPtrLocation.disable = "true"
isolation.tools.setVersion.disable = "true"
isolation.tools.getVersion.disable = "true"
monitor_control.disable_directexec = "true"
- Start up, plug in XProg and verify that “USB Serial Port” appears in Device Manager. Note the COM Port.
- Copy the XProg 5.5.1 folder to “Program Files (x86). Open C:\Program Files (x86)\XProg 551\ and add “xprognew.reg” to the registry.
- In VMWare Workstation, change Network settings, and uncheck “Connected” and “Connected at power on
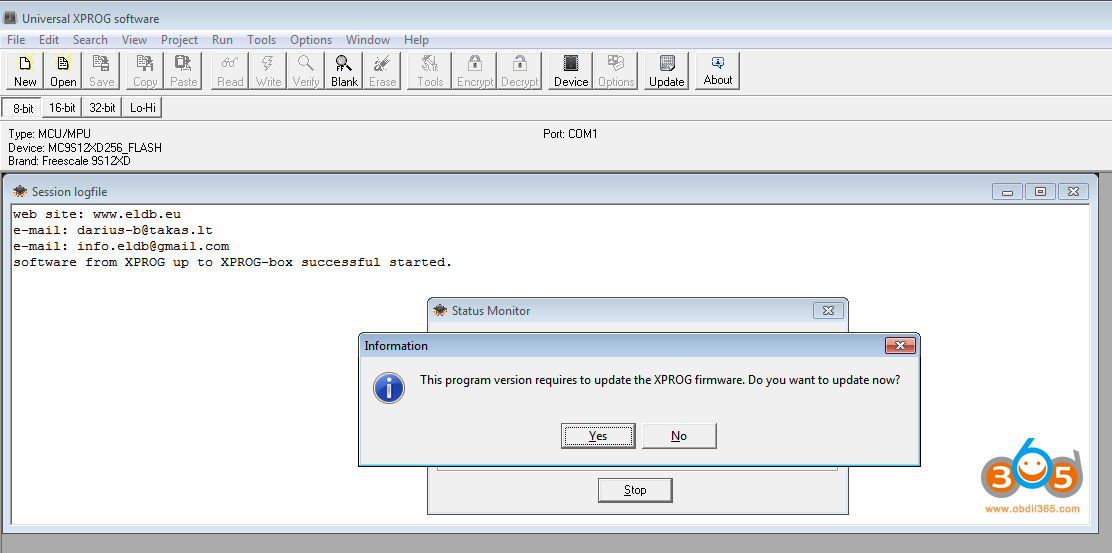
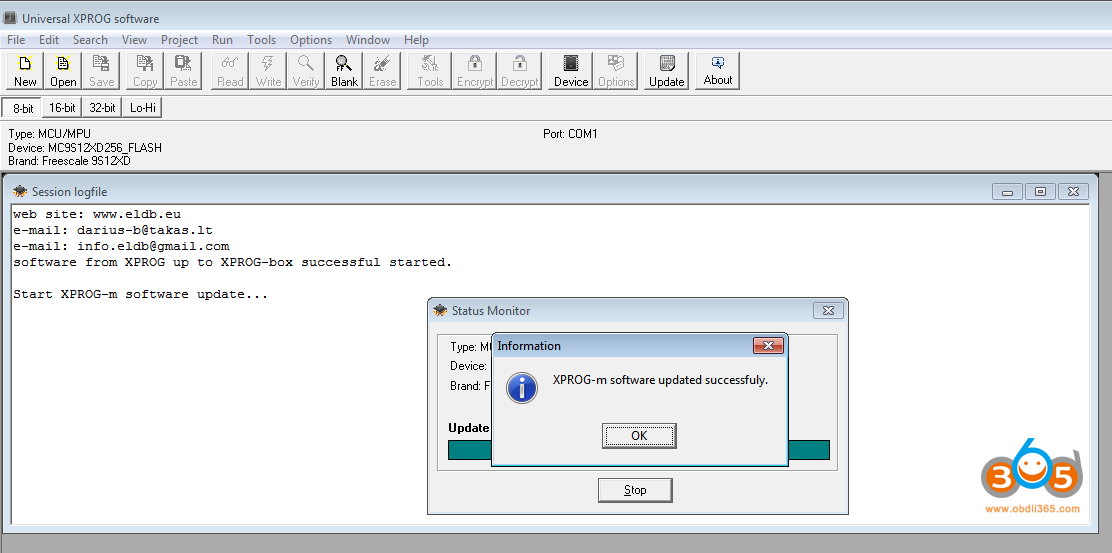
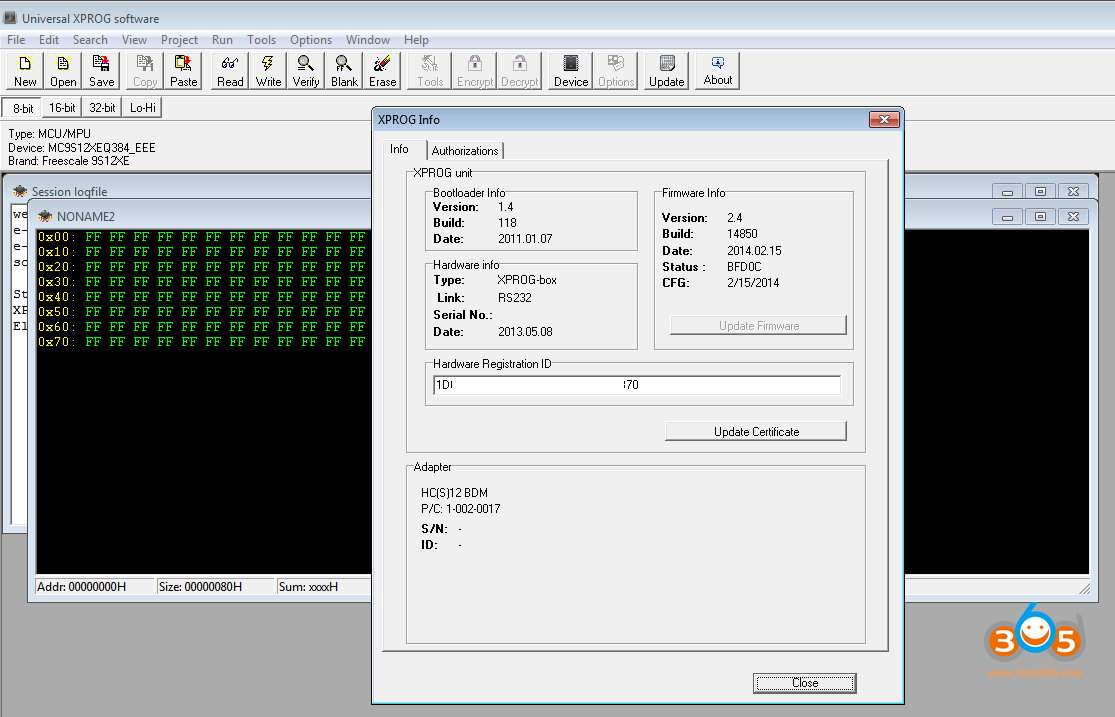
- Plug in XProg. Open XProgDesktop.exe. Click “Help” and “Hardware Info”. The XProg will tell you that your firmware needs to be updated. Update the firmware.
- Connect the FRM and daughterboard. Click “Help” -> “Hardware Info” and it will show the HC(S)12 BDM.

CONNECT THE FRM
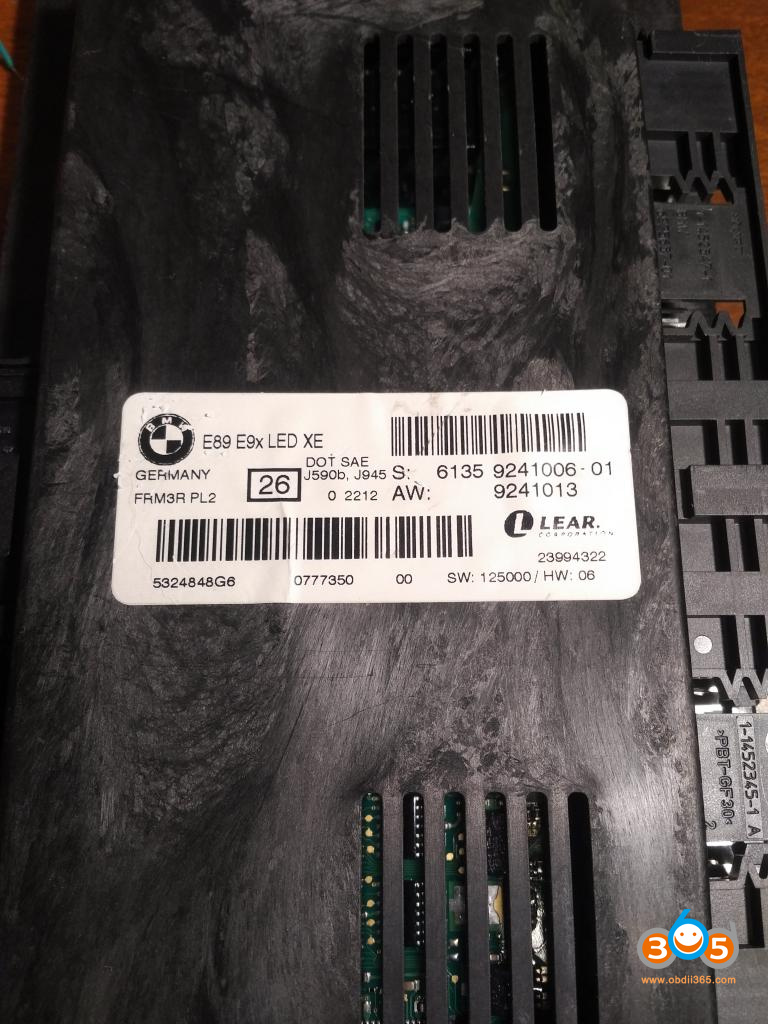
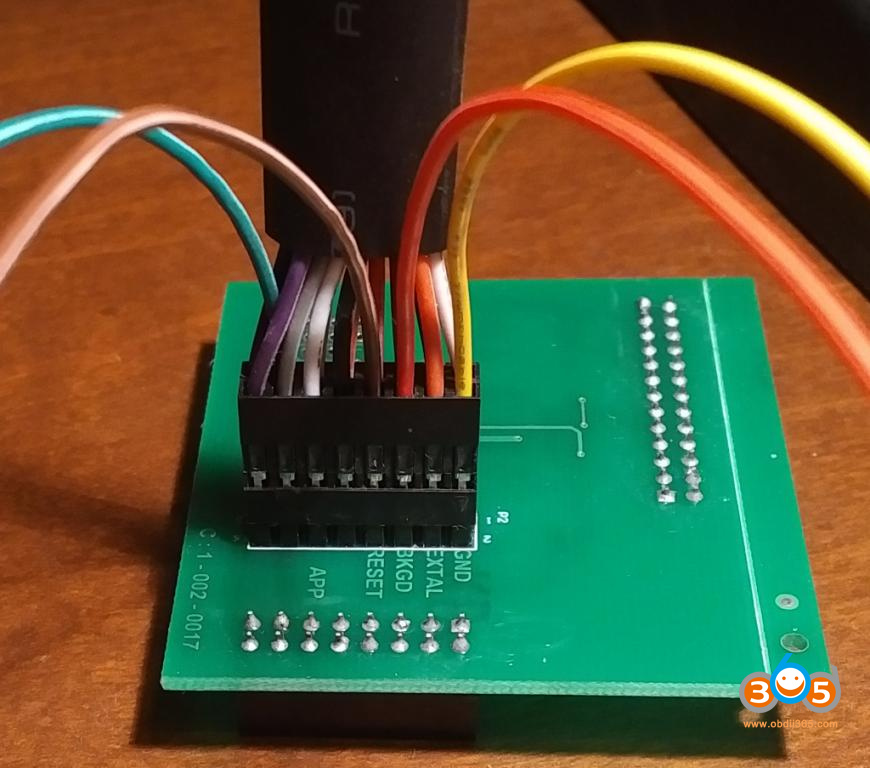
6. Physically connect your FRM.
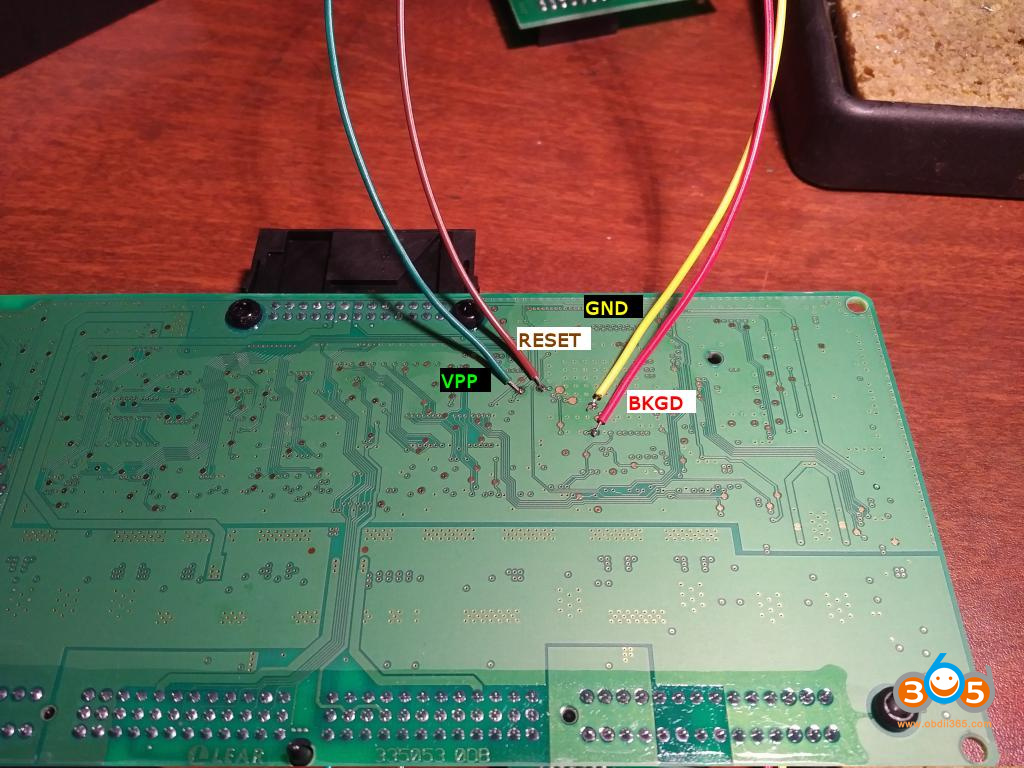
- Prep the solder points. They are large test points that take rosin-core solder quite readily – Nice and easy to solder.
- Solder the wires to the test points. Your colours may vary, if you received a different wiring harness with your XProg.
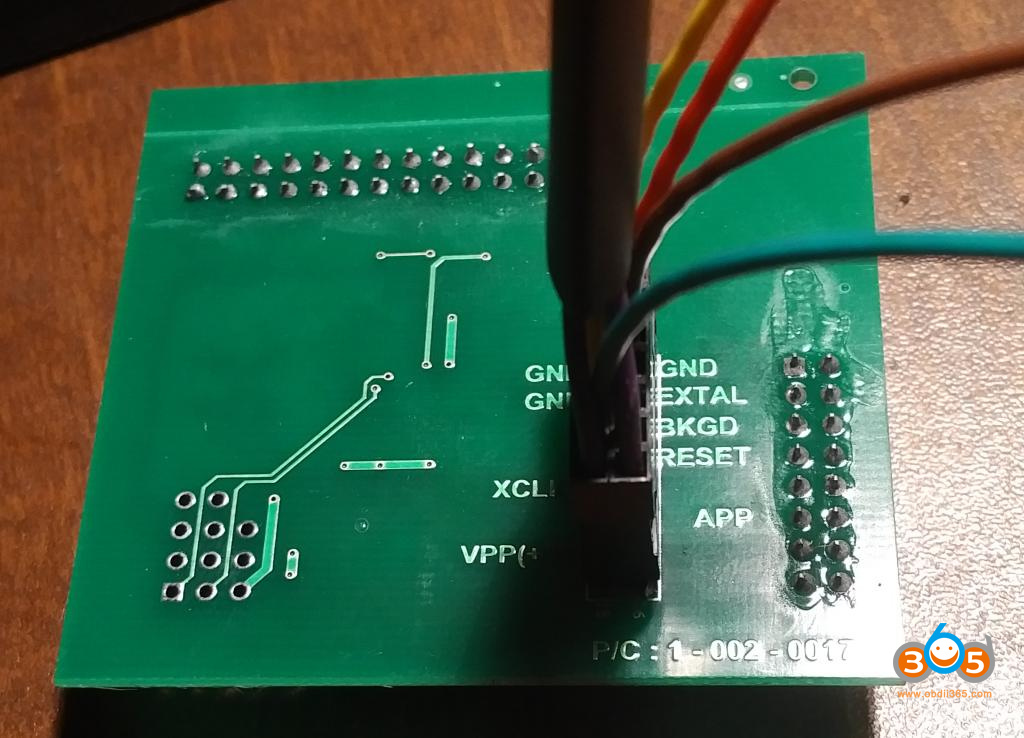
- You don’t need to use the daughterboard, but I figured it wouldn’t hurt. Here are the labels from the HC(S)12 adapter board:
- Wire colours, if you have a matching harness are pictured below.

PROGRAM THE FRM
7. Now you can finally program your FRM: (Check detail guide: Repair BMW FRM3 with xprog)
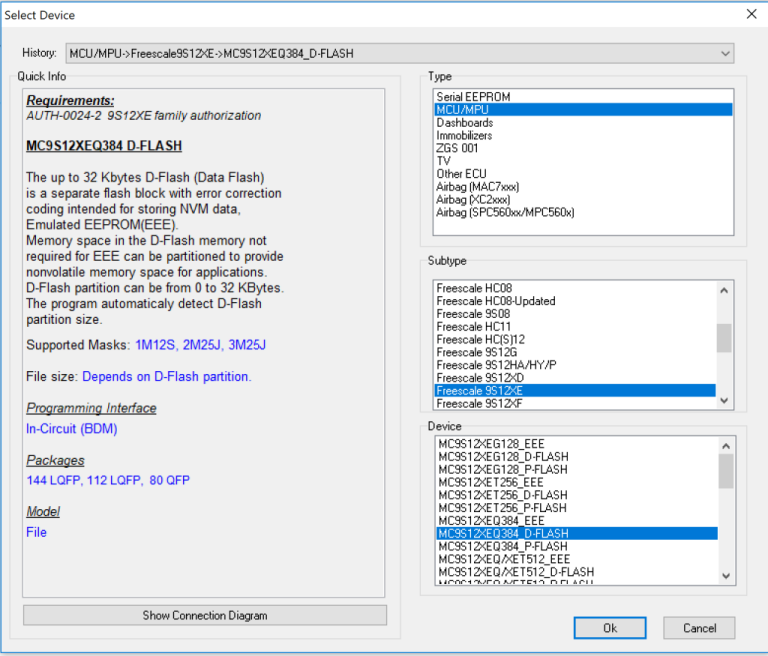
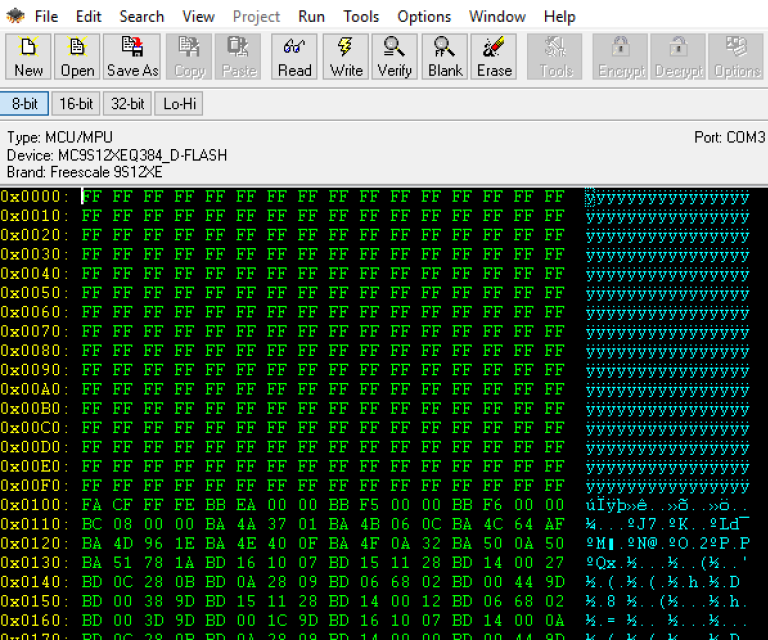
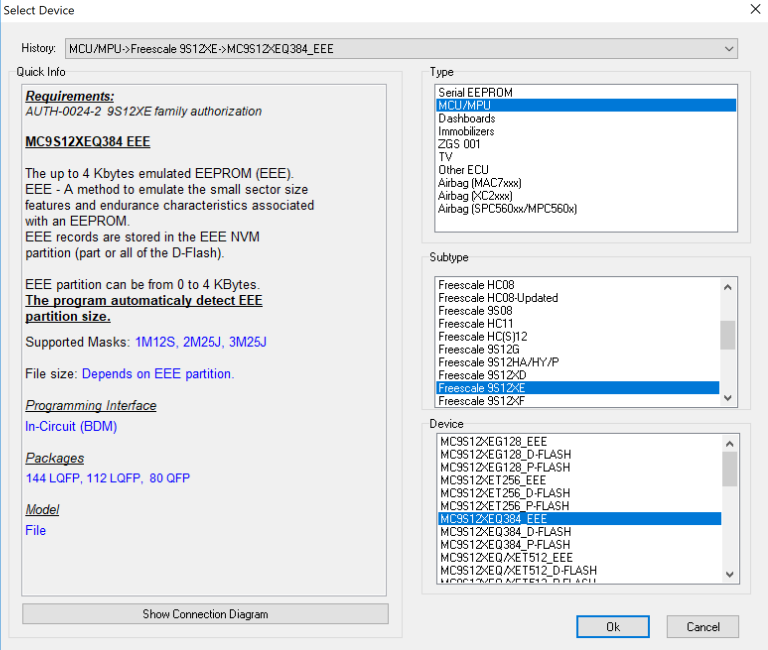
- Open XProg and select: “MCU/MPU” -> “Freescale 9S12XE” -> “MC9S12XEQ384_D-FLASH”
- Open a new hex file to download the D-FLASH. Click “New”. Click “Read”
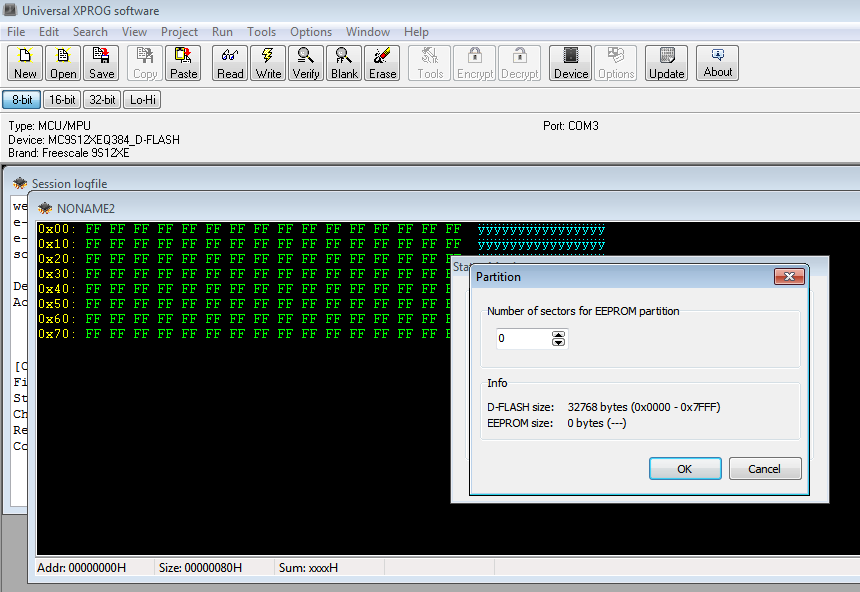
At this point XProg will connect, check certificates, then set up BDM. It will probably tell you the flash is corrupted, you need to select 0k of EEPROM and 32k of FLASH (This is the default).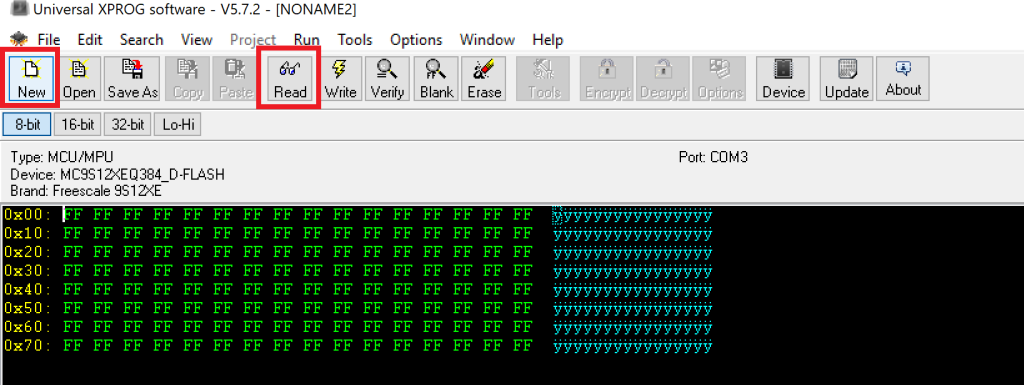
- Once the download is complete, save the D-FLASH. Open the D-FLASH using tomvleeuwen’s app or webpage – http://tlvps.tomvanleeuwen.nl/frm/ . If you use the app it will ask you to open the D-FLASH you just saved, then ask you where you want to store the new EEPROM (I used the app, as my computer needed to be offline to use XProg)
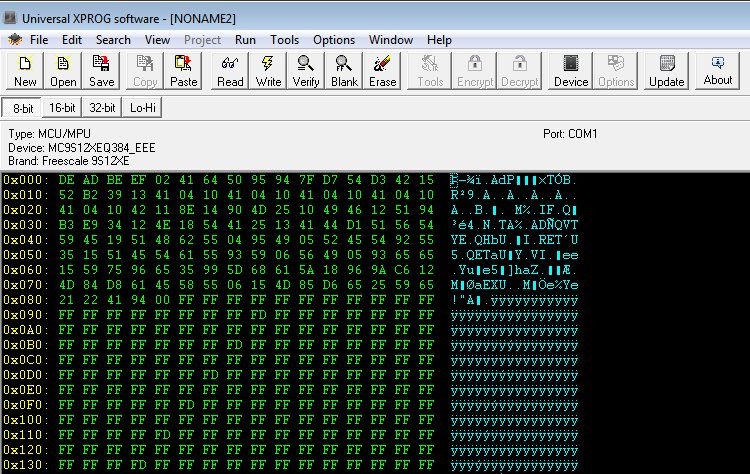
- Open the newly created EEPROM file in XProg
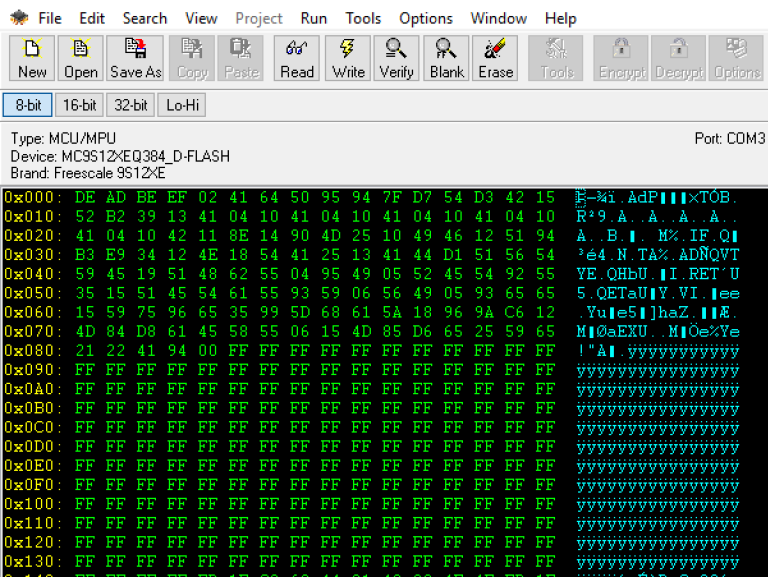
- Change the device to: “MCU/MPU” -> “Freescale 9S12XE” -> “MC9S12XEQ384_EEE”
- Erase the FRM. Change “Sectors” to “16”.
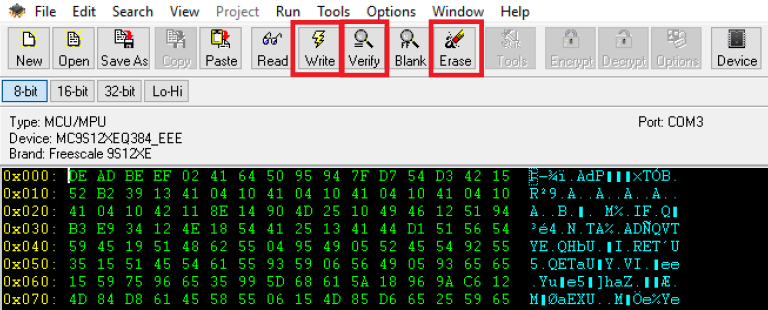
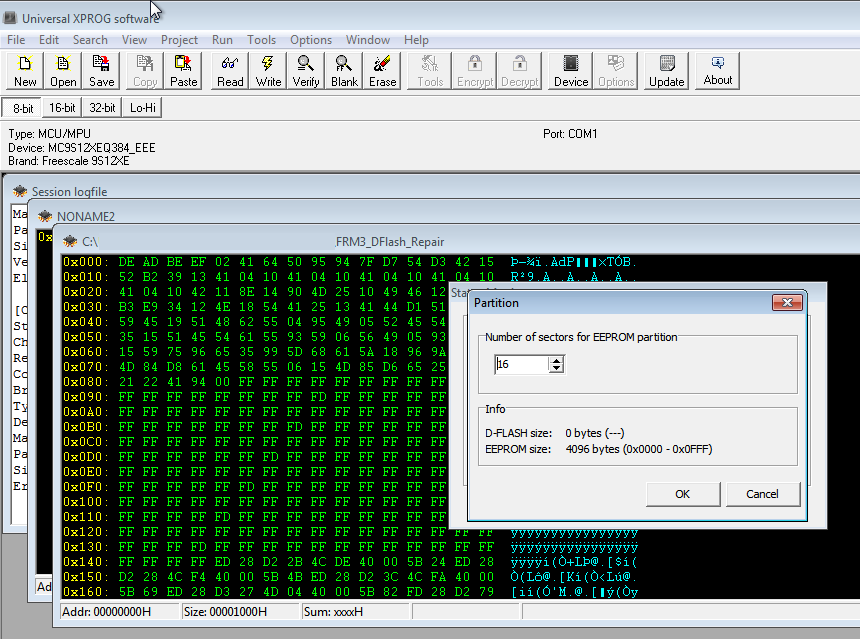
- Click “Write”
- Click “Verify”. You may need to run the “Erase”/”Write”/”Verify” sequence multiple times before it verifies correctly. If you get a “device silent” error, try again. This is typically caused by a lower quality USB cable, or the XProg/FRM cables are slightly too long.
- Click “New”. Click “Read” Your newly read FRM EEE should match. If you read the D-Flash again, it should come back empty (0x0). This is good.
Reinstall in the car, and you should be good to go!
Credit to Jagaer from BMWSport.


