


PCM released another great update: Sid208/Sid209 BSL instructions BSL.
SID208/SID209 BSL Brief Guide in Software App
SID208/SID209 Step-by-step guide
PSA Citroen Peugeot SID208 BSL Instruction
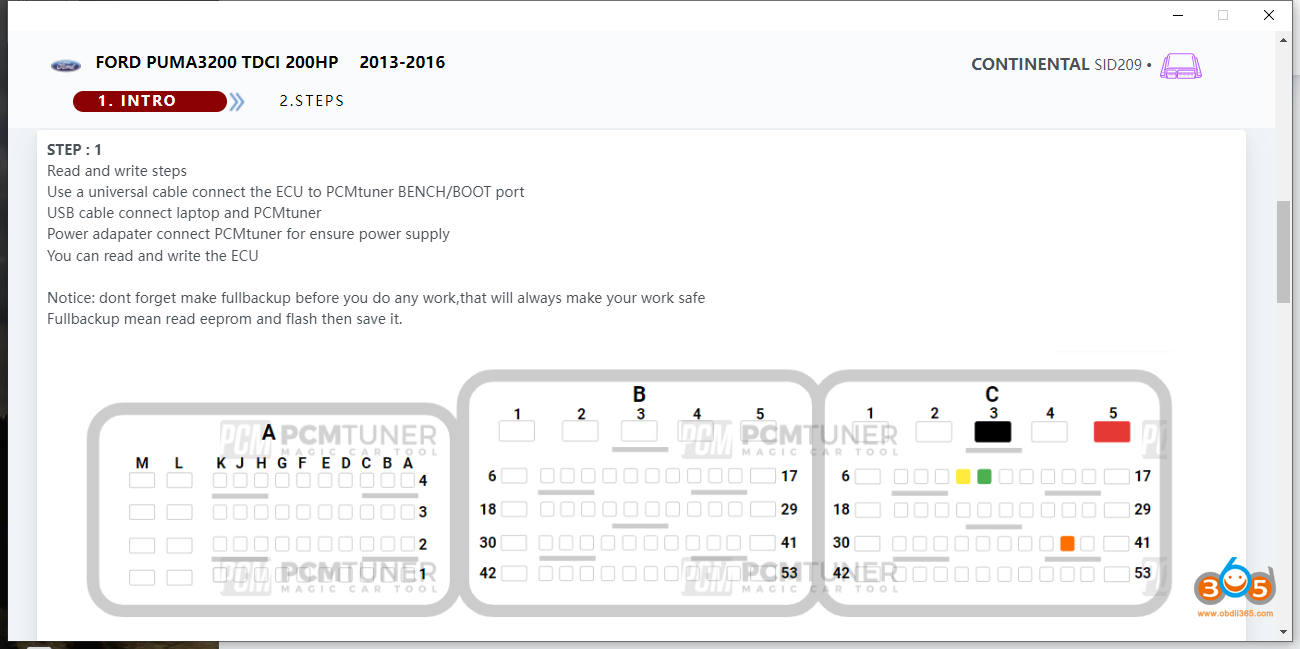
Step 1: Read and Write steps
Use a universal cable connect the ECU to pcm bench/boot port
USB cable connect laptop and pcm
Power adapter connect PCM for ensure power supply
You can read and write the ECU
NOTE: Don’t forget to make full backup before you do any work, that will make you work safe. Full backup mean read eeprom and flash then save it.
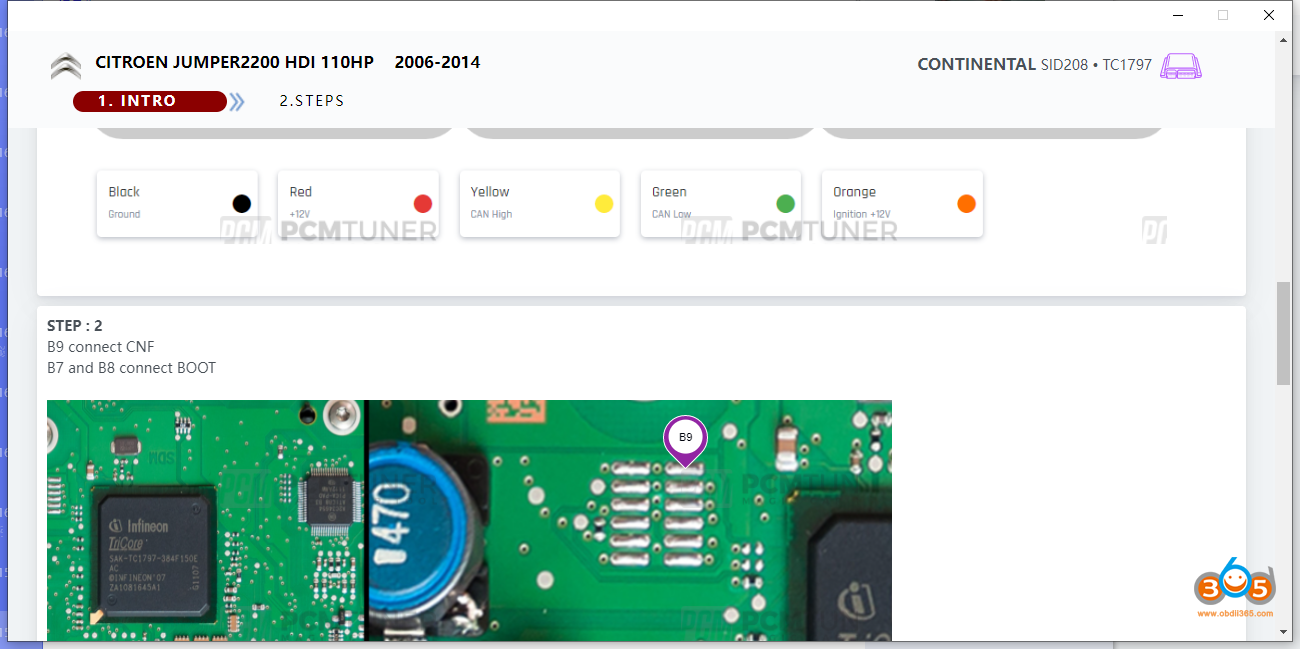
Step 2:
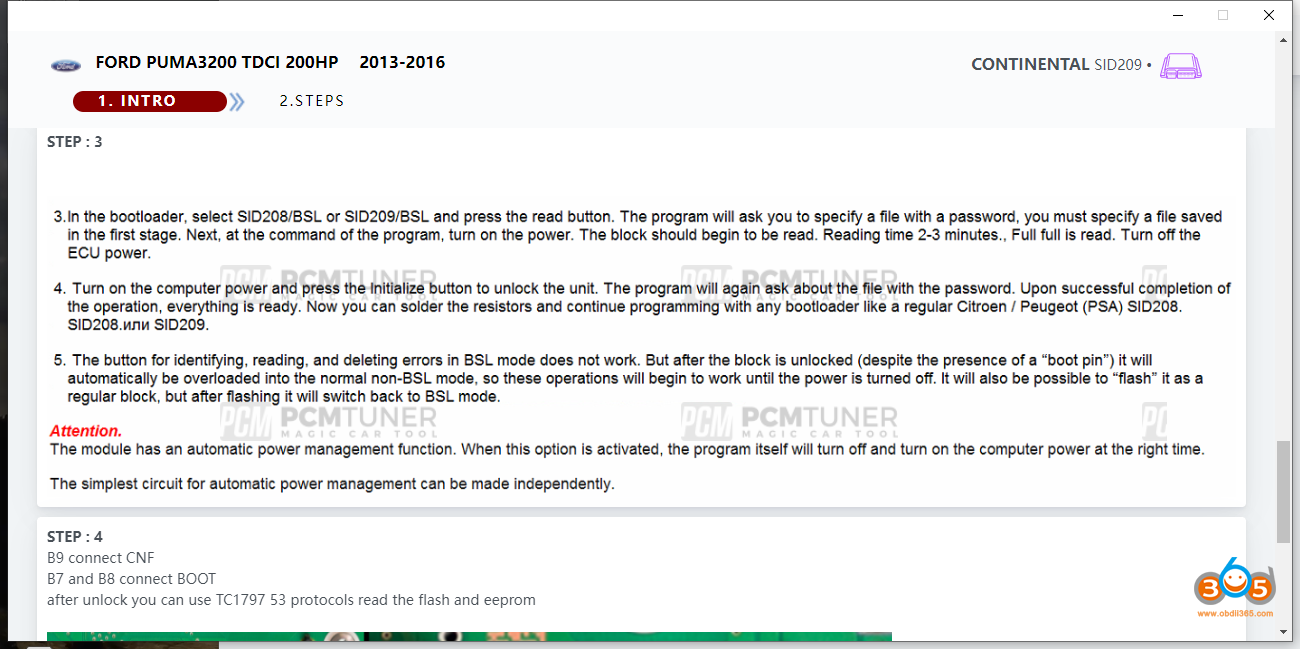
B9 connect CNF
B7 and B8 connect BOOT
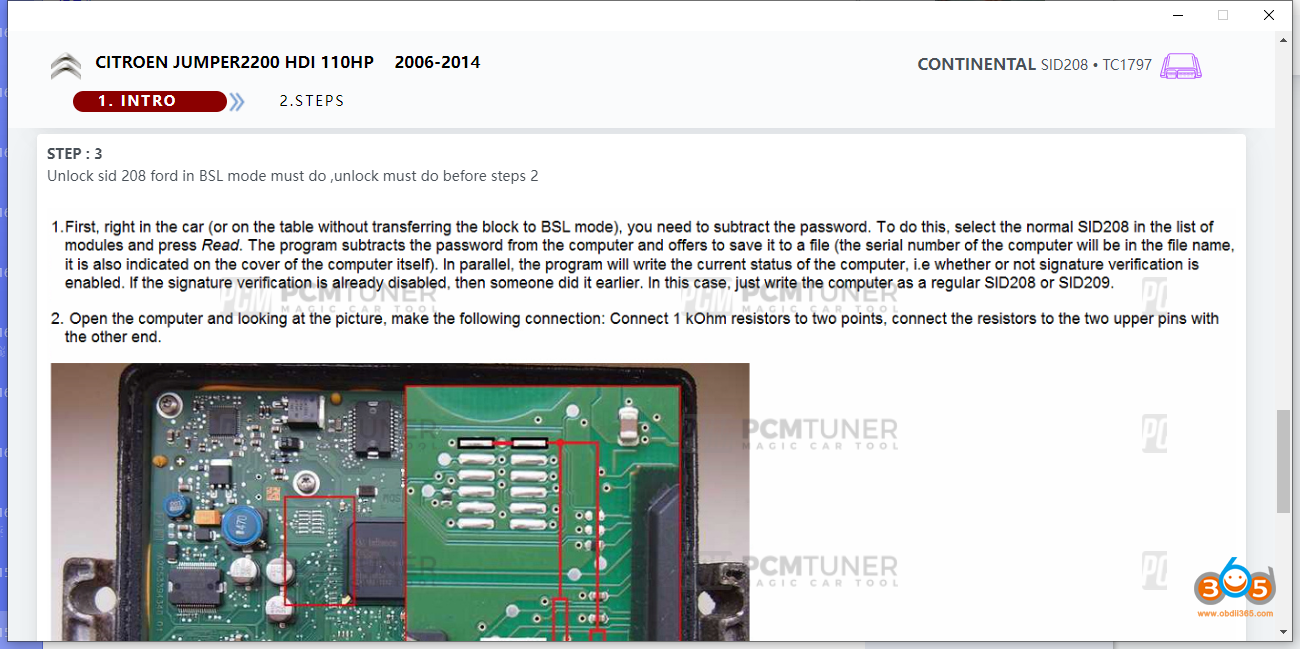
Step 3:
Unlock sid208 Ford in BSL mode must do, unlock most do before step 2
1. First right in the car or on the table without transferring the block to BSL mode. You need to subtract the password.
To do this, select normal SID208 from the list of modules and press Read. The program subtracts the password from
the computer and offers to save it to a file (the serial number of the computer will be in the file name, it is also indicated on the cover of the computer itself).
In parallel, the program will write the current status of the computer, i.e whether or not signature verification is enabled. If the signature verification is already disabled, then someone
did it earlier. In this case, just write the computer as a regular SDI208 or SID209.
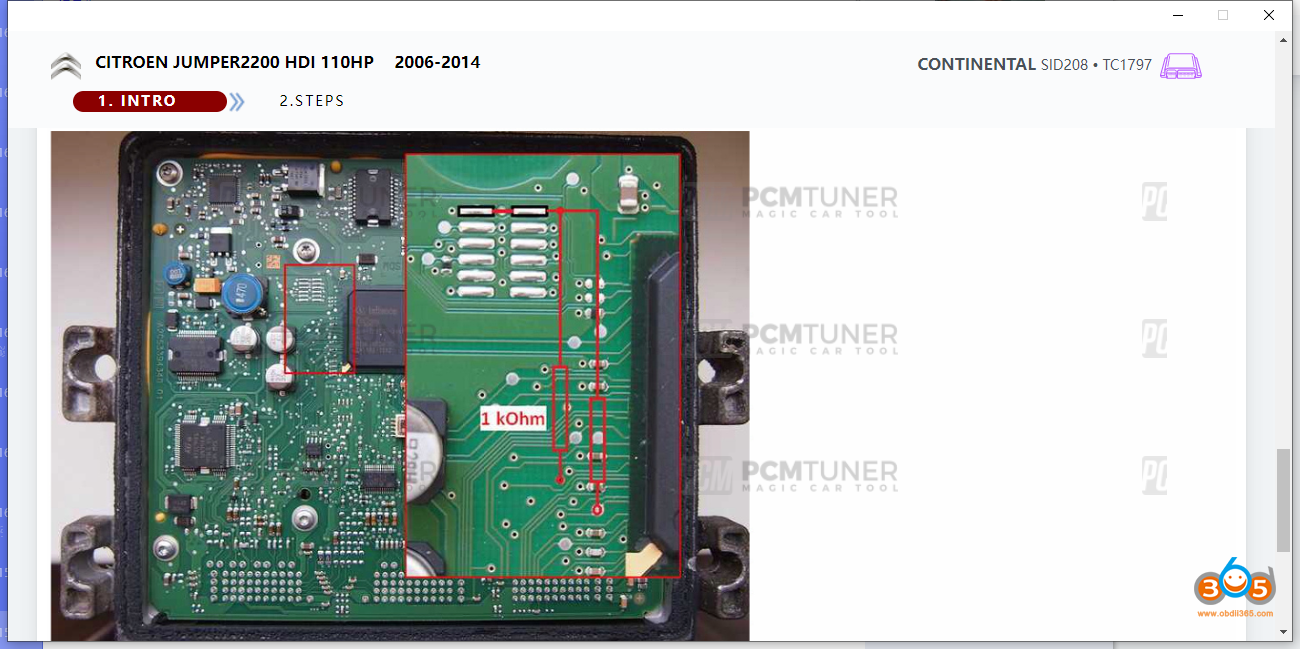
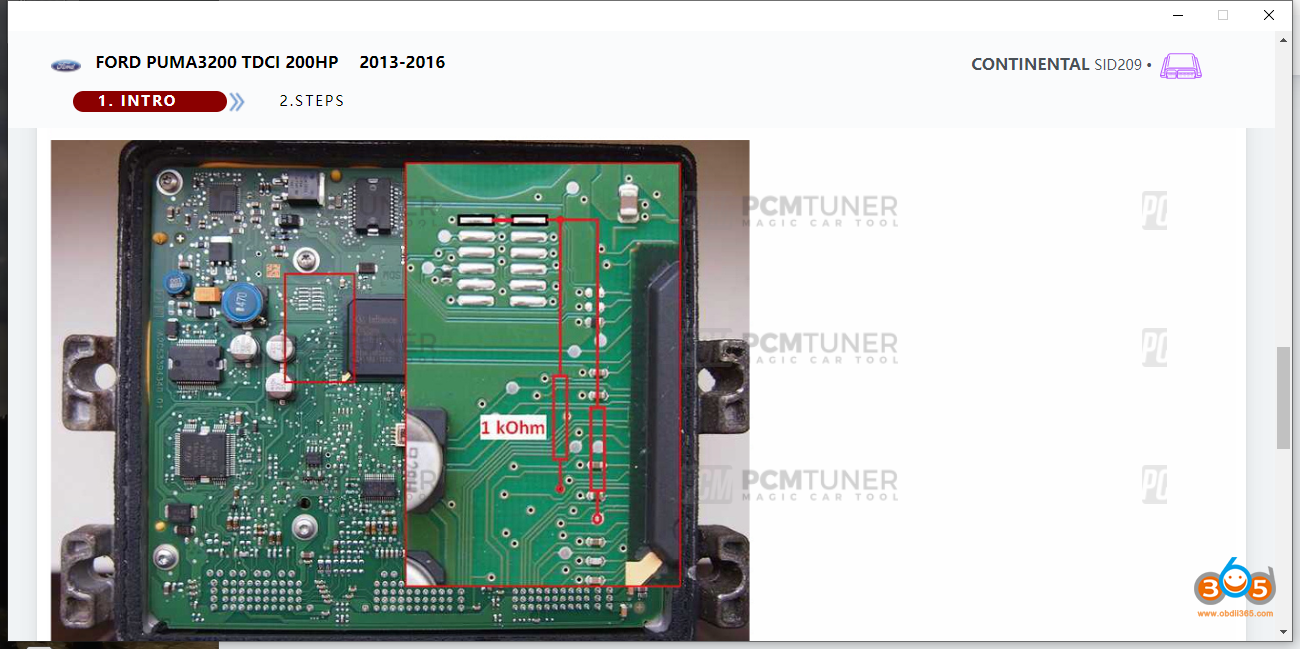
2. Open the computer and looking at the picture, make the following connection: Connect 1kOhm resistors to two points, and connect the resistors to the two upper pins with the other end.
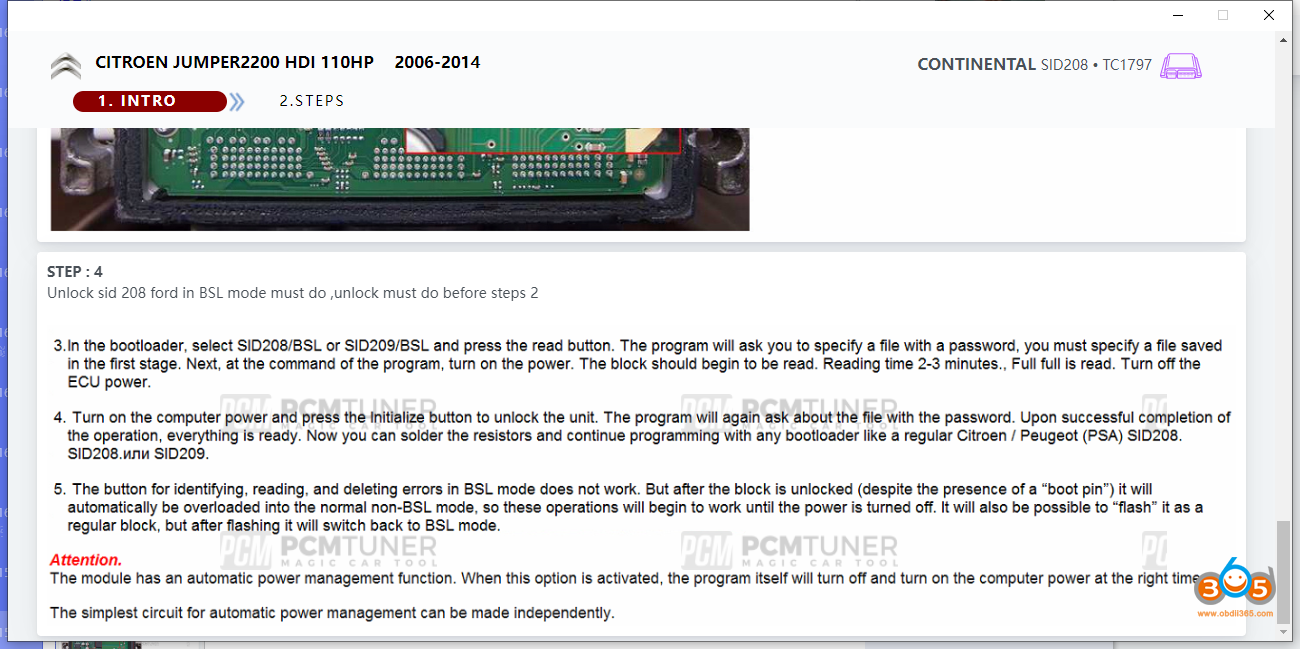
Step 4:
Unlock sid208 FORD in BSL mode must do, unlock must do before step 2.
3. In the bootloader, select SID208/BSL or SID209/BSL and press the Read button. The program will ask you to specify a file with a password, you must specify a file saved in the first stage.
Next, at the command of the program, turn on the power. The block should begin to be read. Reading time 2-3 minutes. Full full is read. Turn off the ECU power.
4. Turn on the computer power and press the initialize button to unlock the unit. The program will again ask about the file with the password. Upon successful completion of the operation, everything is ready. Now you can solder
\the resistors and continue programming with any bootloader like a regular Citroen/Peugeot PSA SID208.
5. The button of identify, read and delete errors in BSL mode does not work. But after the block is unlocked (despite the presence of a boot pin), it will
automatically be overloaded into the normal non-BSL mode. so these operations will begin to work until the power is turned off.
It will also be possible to flash it as a regular block, but after flashing, it will switch back to BSL mode.
Attention:
The module has an automatic power management function. When this option is activated, the program itself will turn off and turn on the computer power at the right times.
The simplest circuit for automatic power management can be made independently.


Ford SID209 BSL Instruction
Instruction is similar to SID208 BSL. Check images below:

SID208/SID209 BSL Step-by-step Guide
Ford SID208 BSL INSTRUCTIONS
This also applies to SID209 just select this ECU during operations
Step 1.
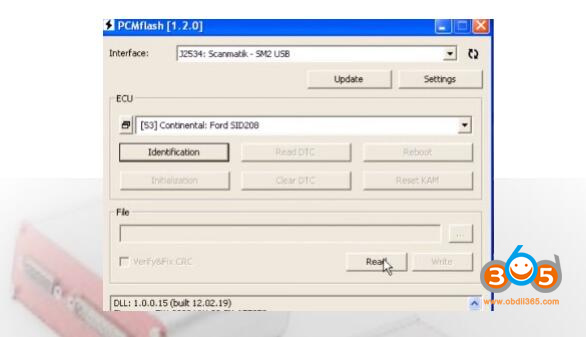
First, with ecu in the car (or on the bench with OBD breakout), we will Identify our ECU
To do this, select 07 SID208 and click Identification
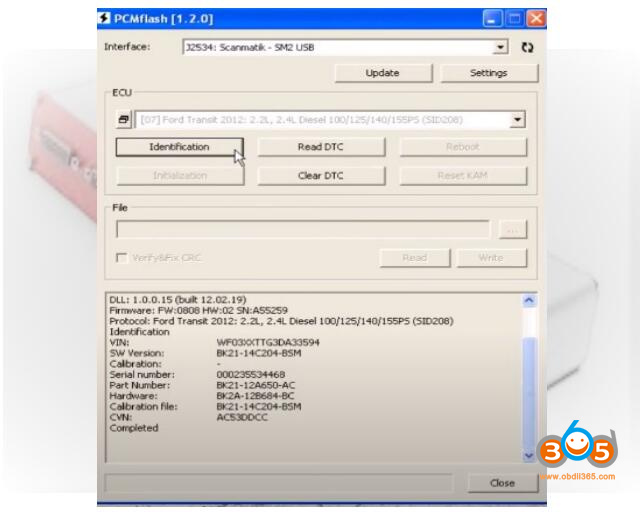
Our ECU details can now be seen, If needed we can make a note of these for any future reference.
Step2.
Now we must get the password from the ECU.
To do this we must use the Password option on module 71, and select SID208
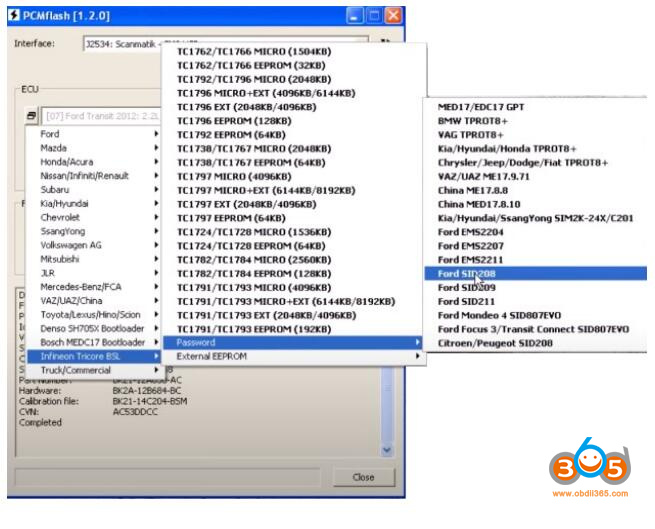
Step 3.
Now we click the Read button
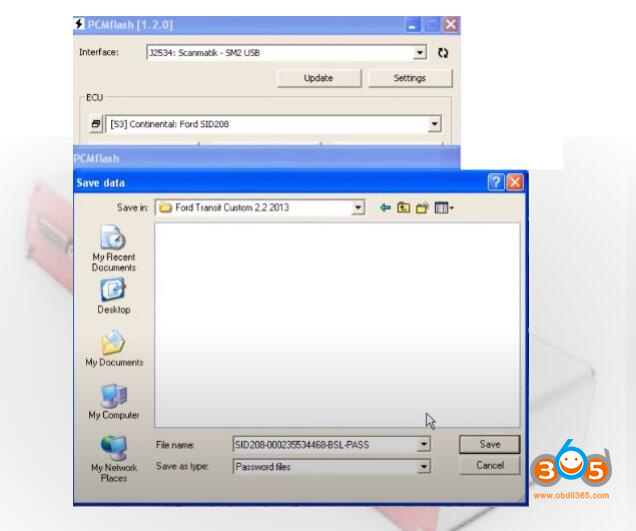
The program extracts the password from the ECU
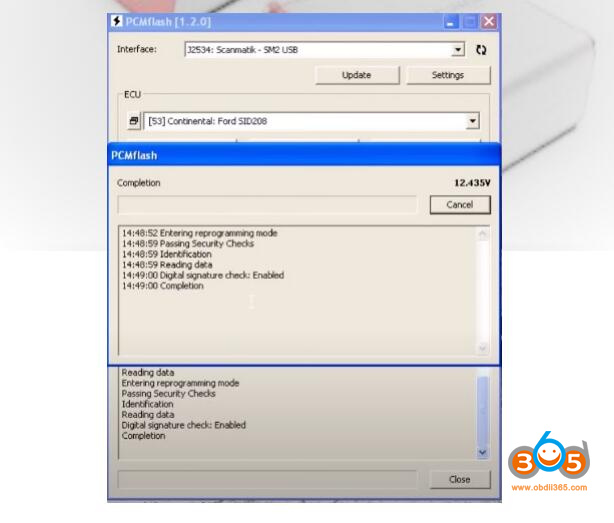
you will now be asked to save it to a file (the serial number of the ECU will be in the file name, it is also indicated on the cover of the ECU itself).
Please remember where you save this file.
At same time the program will display the status of the ECU, i.e. whether signature verification is enabled or not.
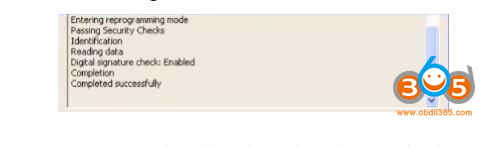
If signature verification is already disabled, then someone has done it before, in this case, just can just write to the ECU as a regular SID208 or SID209.
Step 4.
Open the ECU and, looking at the picture, make the following connection:
Connect 1 kΩ resistors to two via points, connect the end of the resistors to the two upper pads.
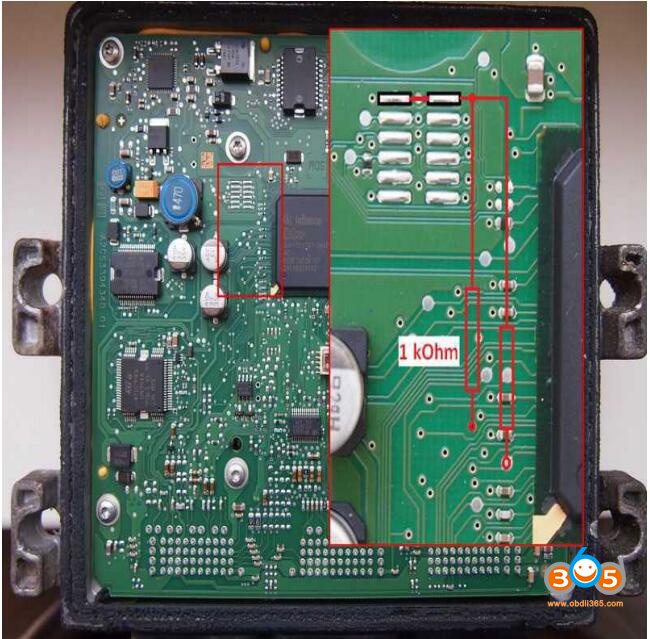
Always be careful when you open ecu and when you are soldering not to damage components
Step 5.
In the PCMflash select 53 TC1797 micro and press the Read button
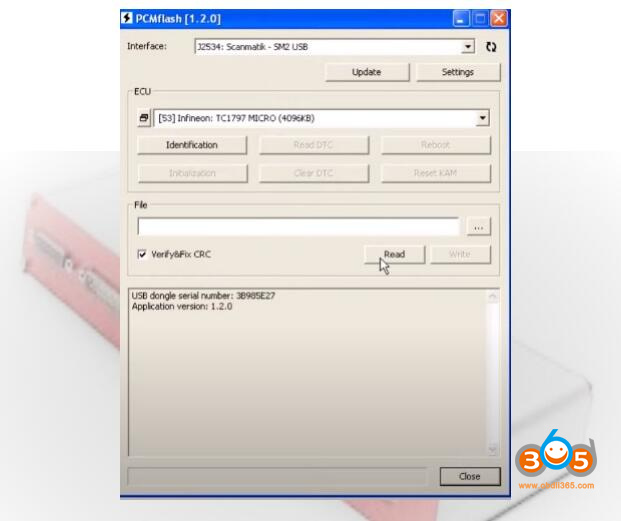
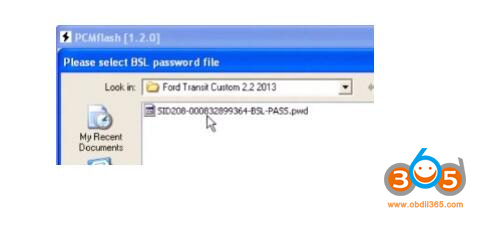
The program will ask you to point to a file with a password, you must change from auto to browse and select the file saved in the first step.
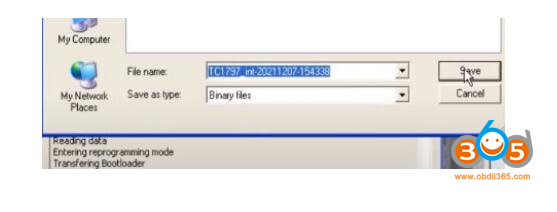
The ECU Micro memory will now start to read
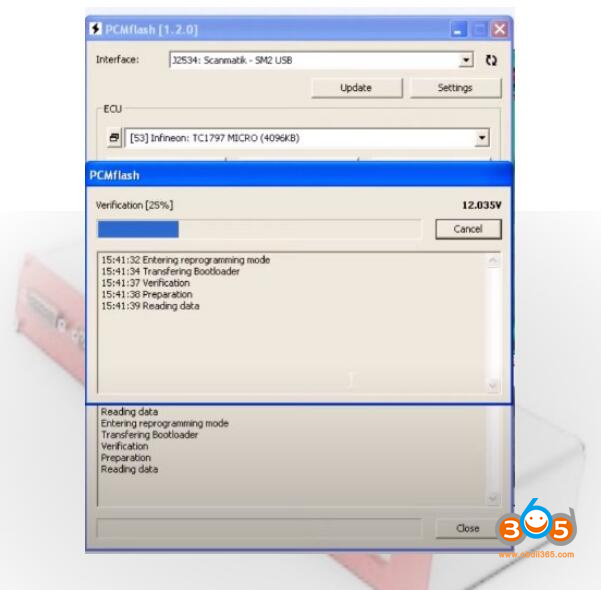
Reading time is around 2-3 miwnutes., The Full Memory is
Read from the ECU. When Prompted please save the file.
Now repeat the above steps for the EEPROM.
Select module 53 TC1997 EEPROM
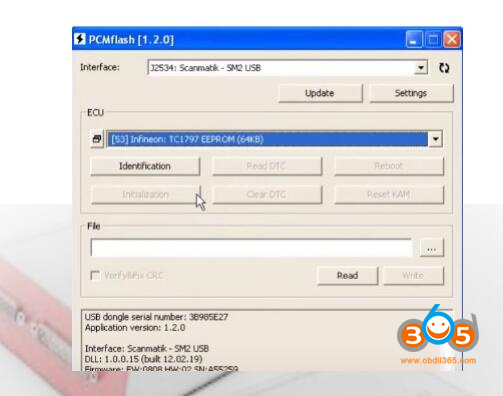
Identification >> read >> select password file >> wait on read >>save EEPROM file
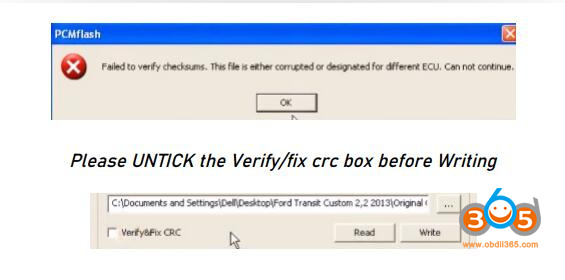
You can Write EEPROM or MICRO back now to ECU, or Remove resistors and Place back in the car and write normally.
When writing file PCMflash
WILL NOT CORRECT CHECKSUM on this ECU –
you must manually do this with winOLS etc
Please UNTICK the Verify/fix crc box before Writing
Read also: another way to read/write SID208 in BSL mode using Godiag ECU adapter
Read JLR Ford SID208 with J2534, PCMFlash & Godiag Boot GPT Adapter


