


If you are working with modern Chrysler or Dodge vehicles (model years 2018–2026), you may eventually need to program or clone a Body Control Module (BCM). These BCMs use the MPC5606B (or its SPC counterpart) processor in a 176-pin package. Cloning such a module can be challenging, especially if the original unit is damaged. Below is a practical guide based on a real-world BCM programming procedure using the CG100X programmer in bench mode.
The Problem:
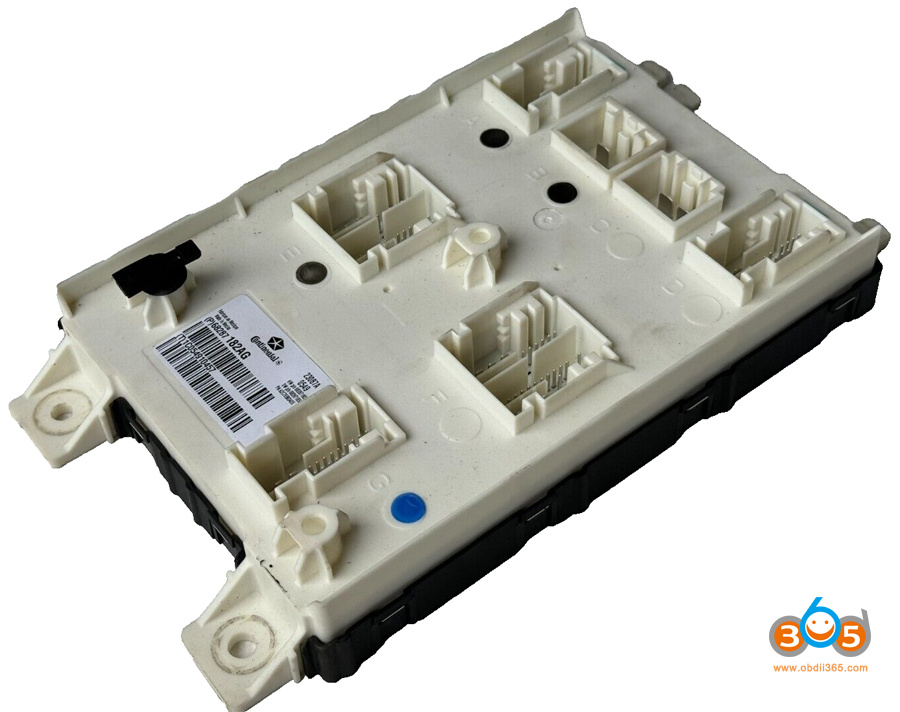
Model example: 2019 Dodge RAM 1500 Mopar BCM Unit Part number: P68287182AG
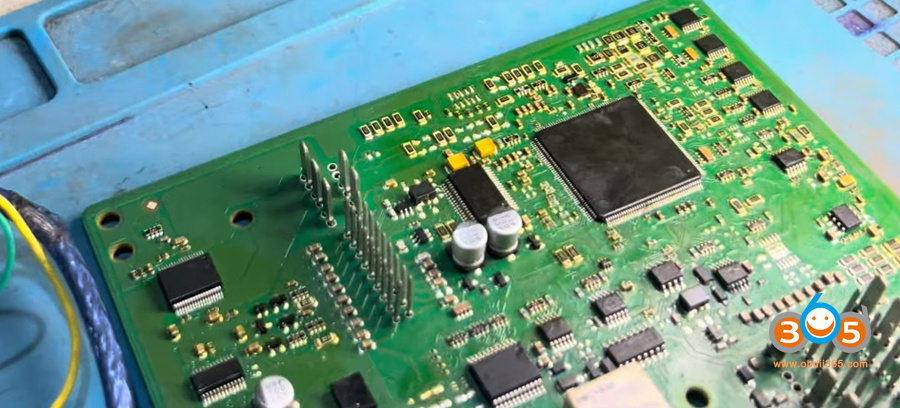
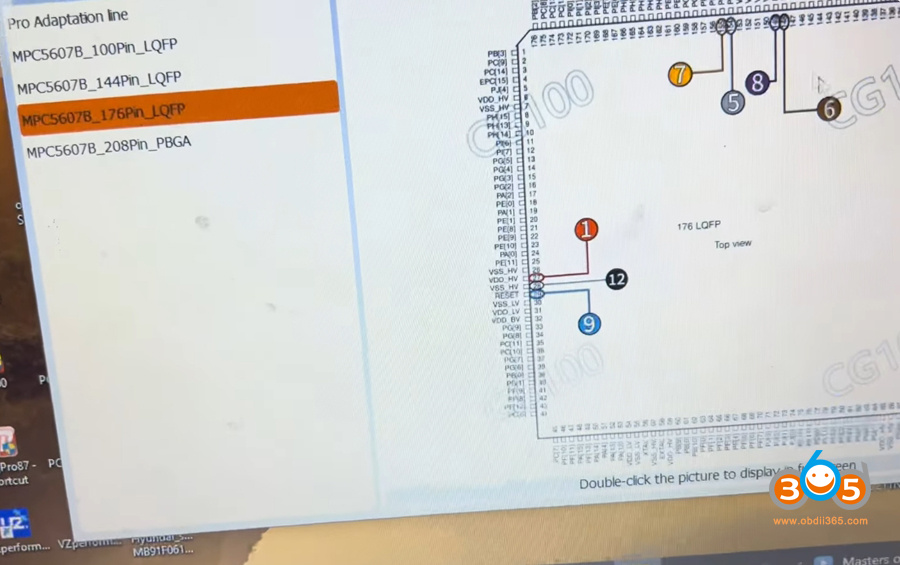
1. Identifying the Chip
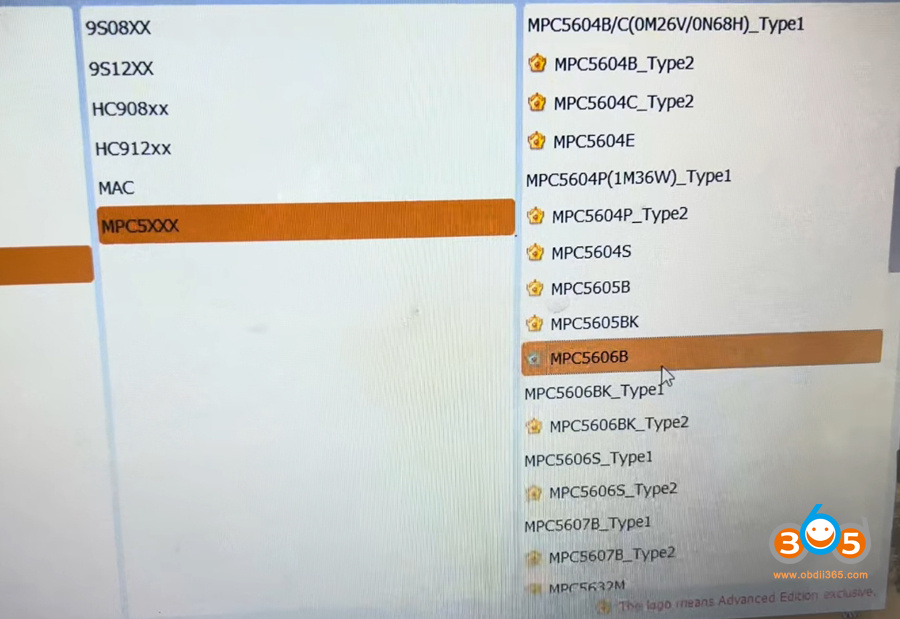
The first step is to identify the processor correctly. Even though the chip is labeled SPC5606B LV, it is electronically identical to the MPC5606B manufactured by Motorola (now NXP). In the CG100 software:
-
Navigate to Programmer → Motorola → MPC5606B.
-
Do not look under ST or SPC, as you may not find the exact match there.
-
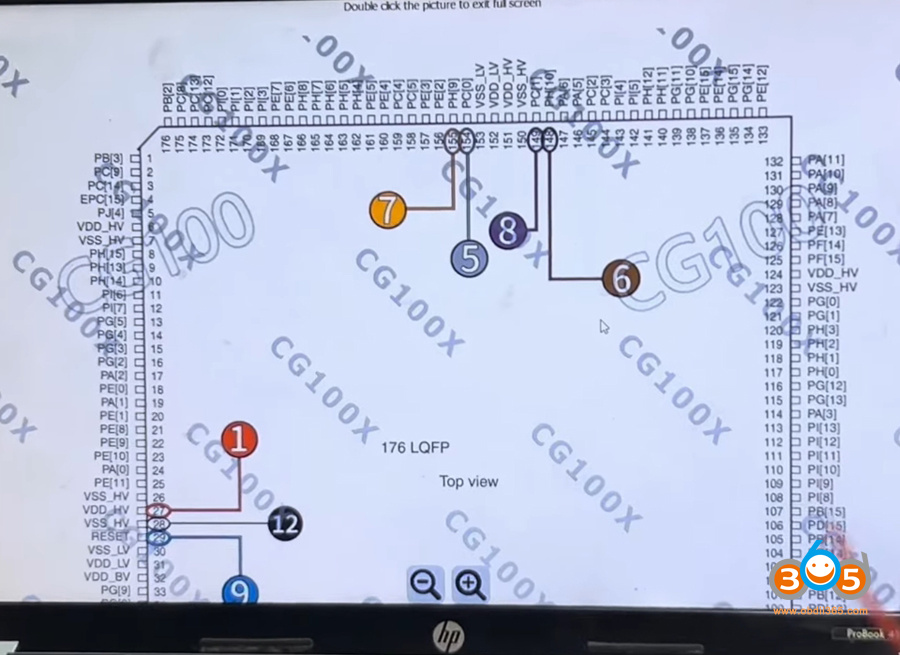
Verify the pin count: This chip has 176 pins. A quick way to confirm is to count the pins on one side (e.g., 44 pins) and multiply by 4.
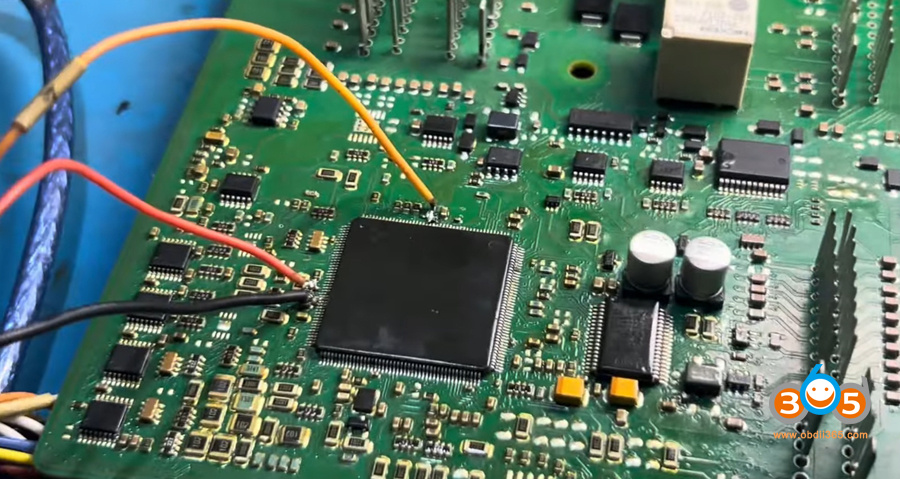
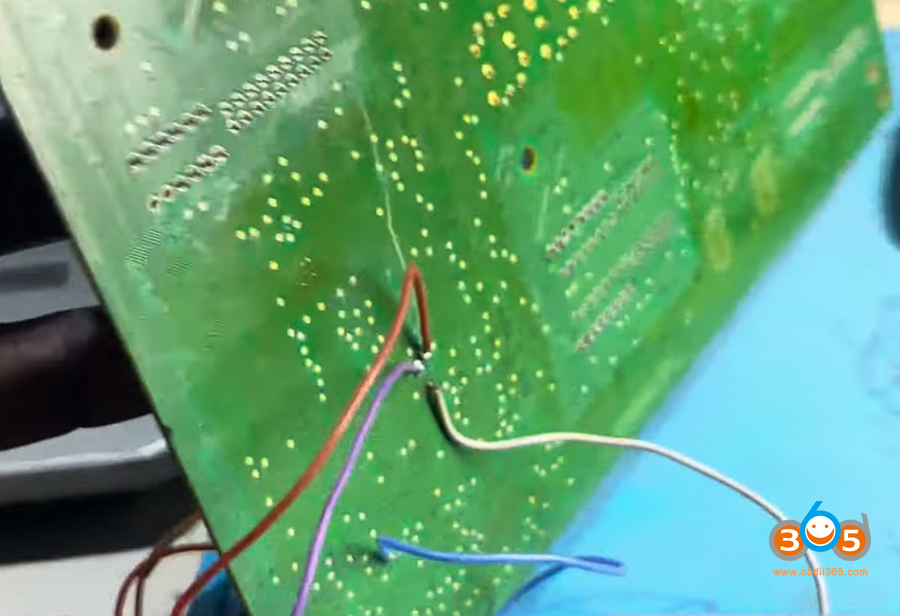
2. Wiring and Connection Points
The processor is very delicate. The programming points (tiny pads or vias) are extremely small. You will need:
-
A magnifying lens or microscope.
-
Fine soldering tools.
-
Patience and a steady hand.
Important steps:
-
Clean the area around the programming points thoroughly. Any residue can prevent solder from sticking.
-
Use the CG100 diagram for the 176-pin package to locate the correct points (JTAG or bench mode connections).
-
Solder fine wires or use a dedicated harness to connect the programmer. Be extra careful – the points are tiny and easily damaged.
Pro tip: If the solder does not stick, clean the surface again until you see a bright, blister-free metal color. Only then apply lead.
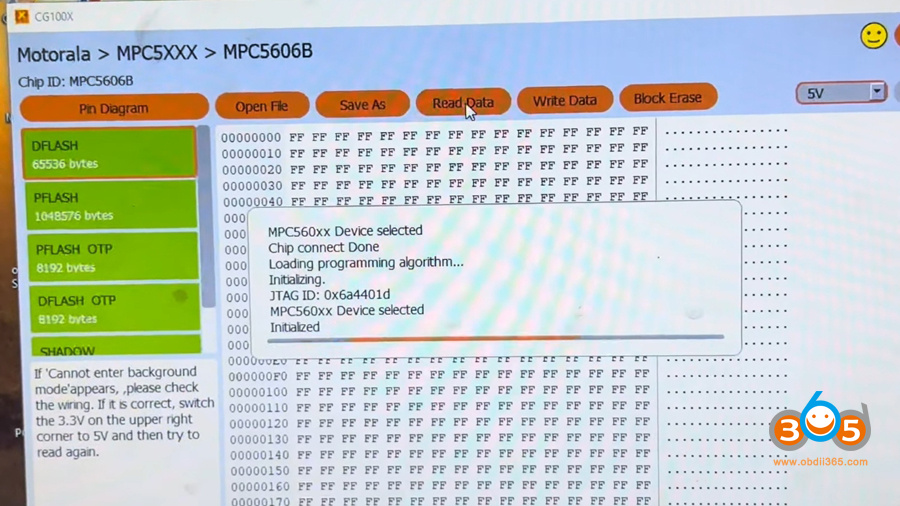
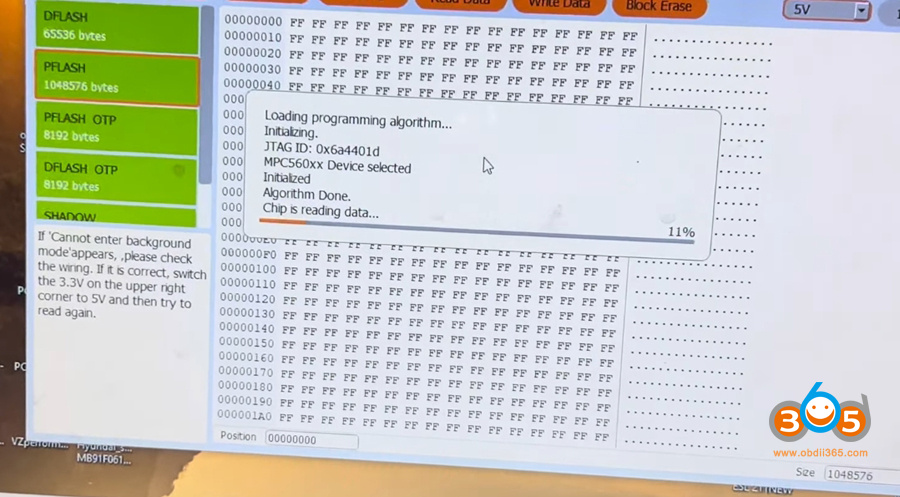
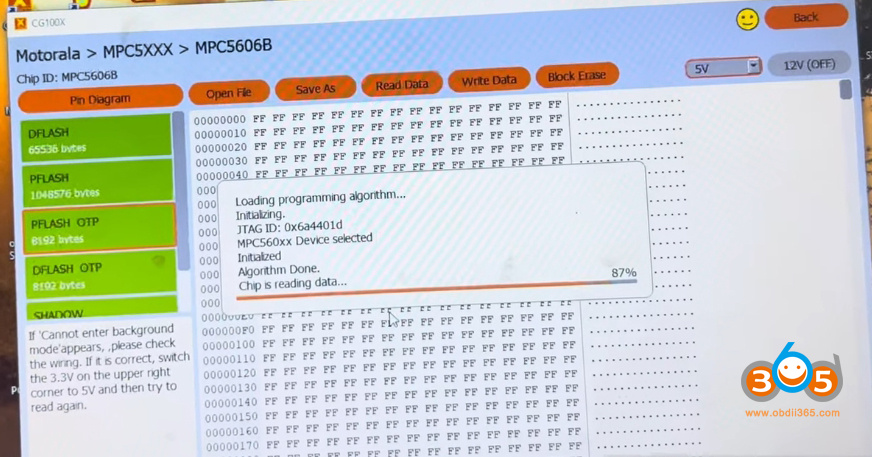
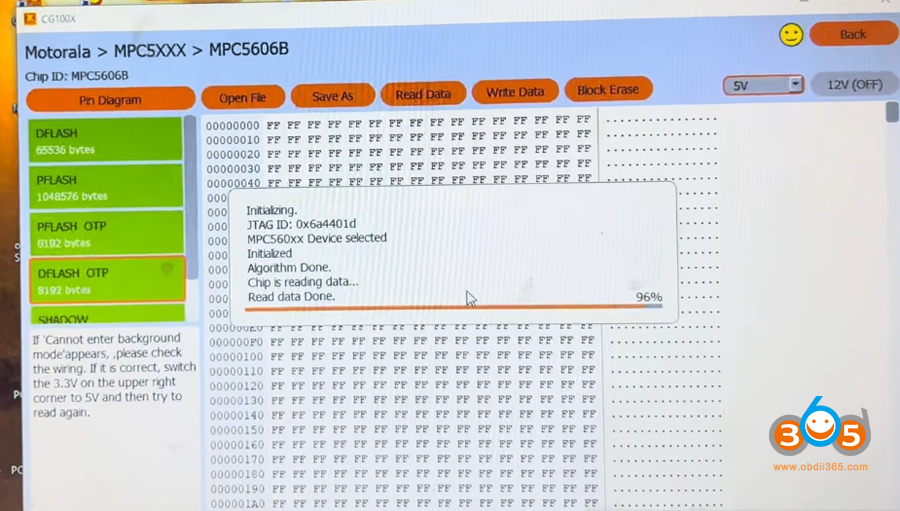
3. Reading the Original (Damaged) BCM
Before attempting to write anything to the new module, always read the original BCM first.
Connect the CG100 to the original BCM.
Click Read Flash.
If the connection is good, you will see a Chip ID and communication will be established.
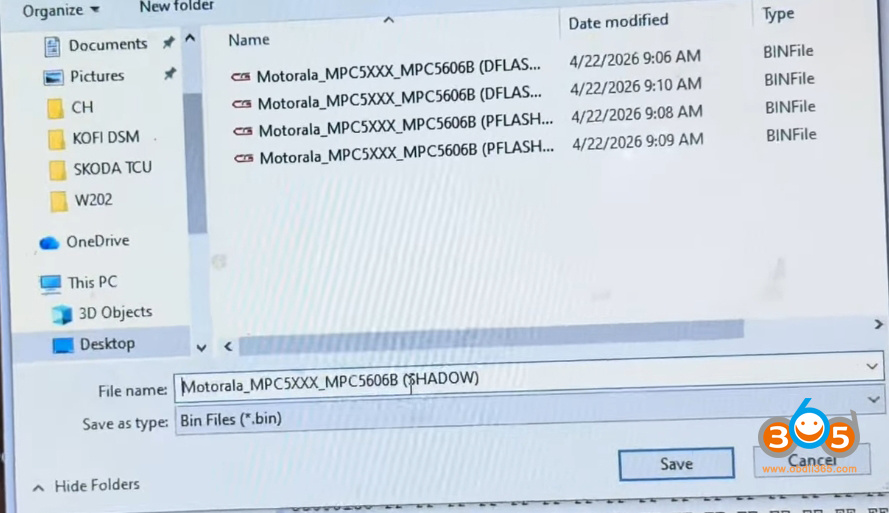
Save the data in a structured way. Create a dedicated folder (e.g., Chrysler_BCM_Backup).
Read and save the following memory regions:
- D-Flash (main program flash)
- P-Flash (boot flash)
- D-Flash + OTP (One-Time Programmable area, often contains key codes)
- P=flash + OTP
- Shadow (may appear empty, but still save it – even a few bytes matter)
Note: The OTP area may or may not contain visible data, but you must save it. It often holds security keys or vehicle-specific codes.

4. Preparing the New (Donor) BCM
The donor module is sometimes referred to a blank or used but functional BCM.
-
Disconnect the original BCM and connect the donor module using the same wiring harness.
-
Read the donor BCM first (optional but recommended) to confirm it is empty or readable.
-
If reading fails with an error like “Operation fail power”, check all connections and power supply. If the problem persists, proceed directly to writing – the error may be due to missing data in the donor, not a hardware fault.
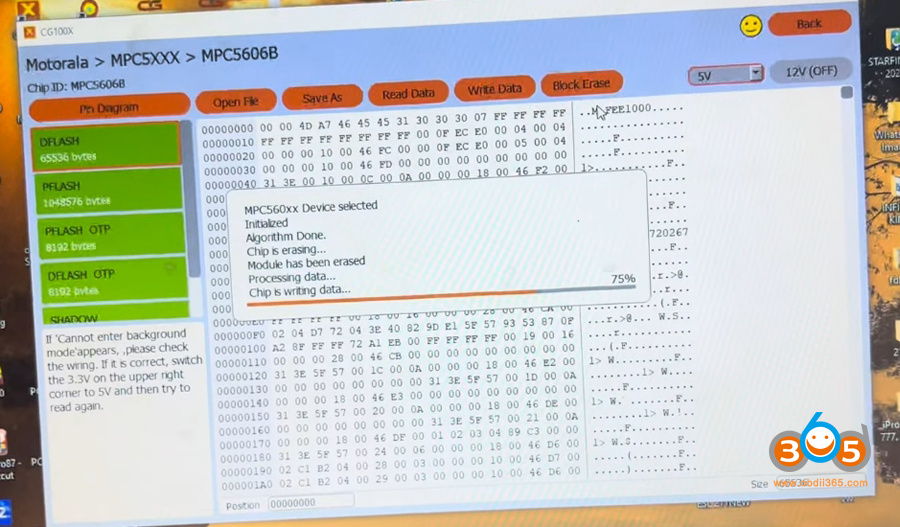
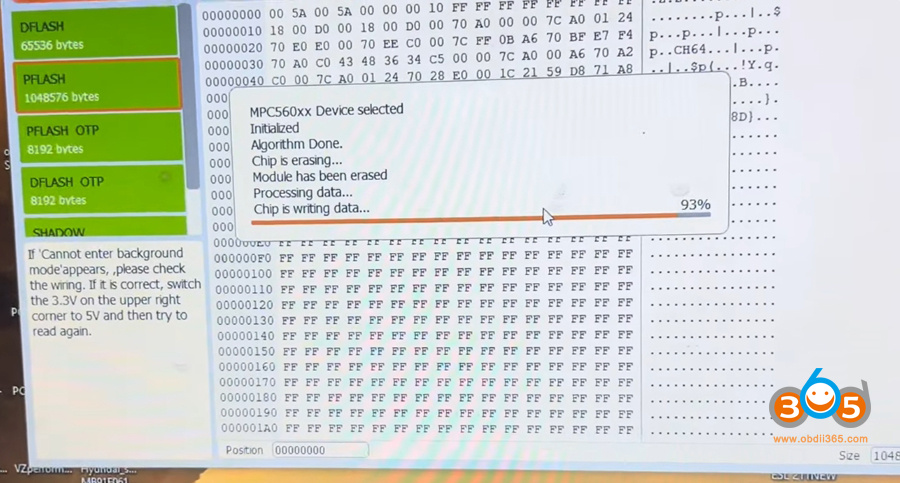
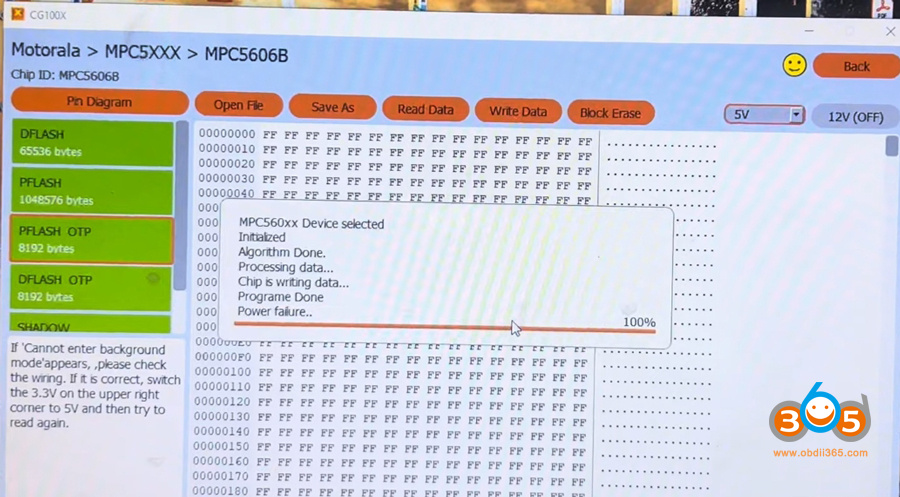
5. Writing the Data to the New BCM
Once you have the original data saved:
-
Open the saved D-Flash file.
-
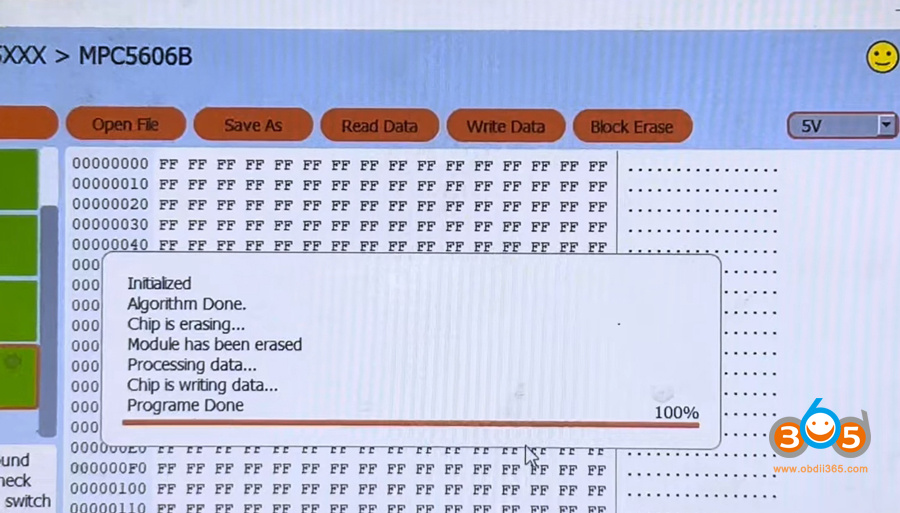
Click Write.
-
If the write fails, erase the block first, then retry.
-
-
Write the remaining regions in this order:
-
D-Flash
-
P-Flash
-
P-Flash+ OTP
-
D-Flash + OTP
-
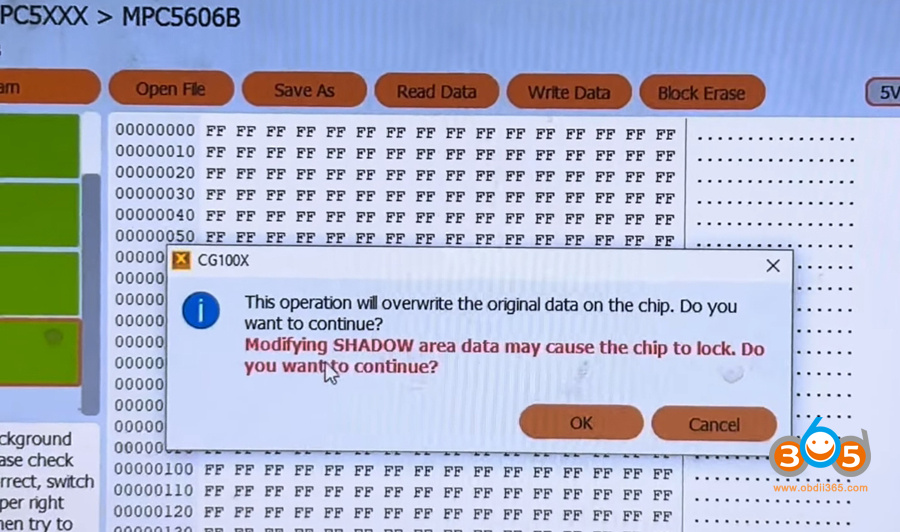
Shadow (confirm the warning about locking the chip – in most cases, it will not lock if you write correct data)
-
Writing the P-Flash will take considerable time. Be patient – monitor the progress percentage.

6. Verification
After writing all regions:
-
Read back the D-Flash from the new BCM.
-
Compare it with the original file (visually or using a checksum tool).
-
If the data matches, the cloning is successful.
7. Final Assembly
Once programming is verified:
-
Power down and disconnect the programmer.
-
Remove the soldered wires carefully.
-
Clean any flux residue.
-
Reassemble the BCM and test it in the vehicle.
Key Takeaways
-
Chip identification is critical – SPC and MPC versions of the 5606B are compatible.
-
Cleanliness and precision are non-negotiable when soldering to tiny points.
-
Always read and save every memory region from the original module, even if some appear empty.
-
Do not panic over write errors – sometimes erasing the block or retrying solves the issue.
-
Donor modules may appear faulty simply because they lack programmed data.
Final Words
Cloning a Chrysler/Dodge BCM with the MPC5606B is not a beginner’s task, but with the right tools (CG100X), the correct software settings, and careful handling, it is absolutely doable. Always work methodically, save your data at every step, and double-check your connections.


