Scania XCOM heavy duty engineering diagnostic software download, installation and user manual are provided here.
Content including:
Free Download Scania XCOM v2.30 & V2.27
How to install Scania XCOM v2.30 software?
How to Clear/Reset Memory Areas with Scania XCOM
How to Retrieve Data from Scania ECU with XCOM
How to Recover Defective ECU with Scania XCOM
How to Reset an ECU by Scania XCOM
How to Program E2 Parameter Configuration Values using Scania XCOM
Free Download Scania XCOM v2.30 & V2.27
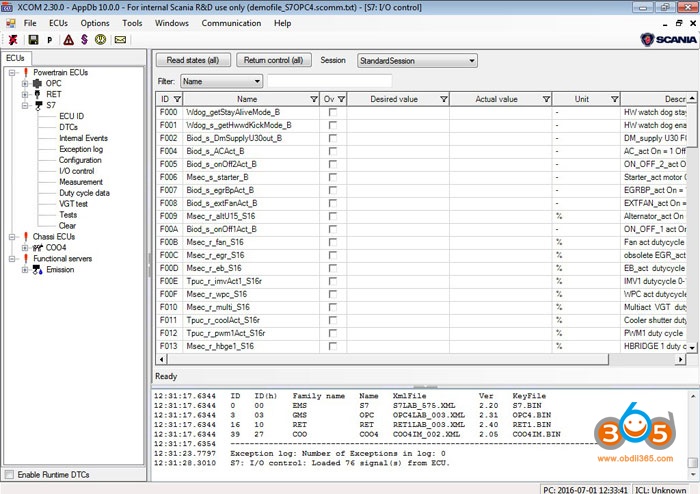
What is Scania XCOM?
Scania XCOM –is a hi-end diagnostic and programming software for maintenance of trucks, other heavy vehicles and heavy duty engines made by Scania to read, save and modify ECU data such as trouble codes, parameters, statistic data etc. Scania VCI3/VCI2 interface is used to connect to ECU via CAN protocol.

Scania XCOM Support System:
EMS – Engine management system.
GMS – Gearbox management system.
RET – Retarder system.
AWD – All wheel drive system.
CLS – Clutch Control.
EEC – Exhaust Emission Control.
COO (COO7) – Coordinator.
BWS (BCI1) – Bodywork system.
Supported resolving trouble codes to text description for the following types:
EMS (S6, S7, S8).
GMS (OPC4, OPC5).
RET (RET1, RET2).
AWD (AWD1).
EEC (SCR1, EEC3).
COO (COO6, COO7).
HMS (HMS1).
Scania XCOM Support Functions:
Read stored fault codes and Freeze Frames.
Clear inactive fault codes.
Read information about stored working cycles.
Measure internal variables such as the engine speed, pressure, temperature and save.
Program certain parameters
AdBlue ON/OFF.
EGR ON/OFF.
Chassis ID/VIN Change.
Immobilizer ON/OFF.
Truck Power INCREASE.
ECU Recovery.
ECU Reset.
ECU Unlock without PIN.
Supported languages: English
Scania XCOM Support Operations Requirements:
– O.S.: Windows XP; Windows Vista; Windows 7; Windows 8
– CPU: Pentium/Athlon 1 GHz or higher
– RAM: 256 MB of system memory
– Hard Drive: 500 MB of available space
– CD-ROM
Scania XCOM 2.27.1.2 Free Download (Paid version)
https://www.obdii365.com/wholesale/xcom-sops-sdp3-bns-ii-software.html
(Tested work 100%)
Scania XCOM 2.27.1.2 + Dongle Emulator (Free version)
http://www.nitroflare.com/view/C353B3EB5C928EF/Scania_XCOM_2.27.1.2.rar
You are at your risk.
Scania XCOM 2.30 crack Download
http://neptunres.dx.am/scania-xcom-230-crack.html
Scania XCOM 2.30 include keygen
How to Install Scania XCOM V2.30 software?
Step-by-step guide on how to install Scania XCOM V2.30 diagnostic software on your pc.
Procedures:
After you download the xcom 2.30, you will get below files.
Double click “Scania xcom stepup_2.30.0.0_fix.exe” to start installing

Click “Next” to install XCOM setup wizard

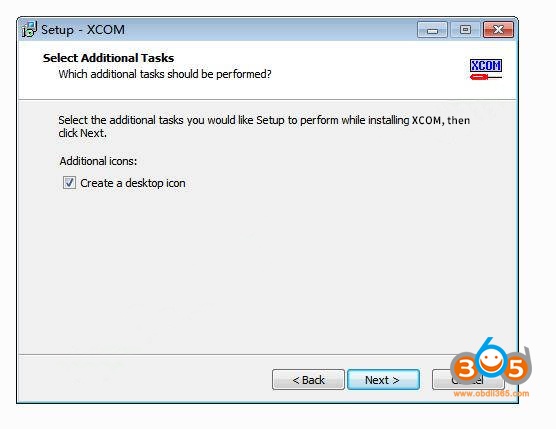
Select “Create a desktop icon”,then click “Next”
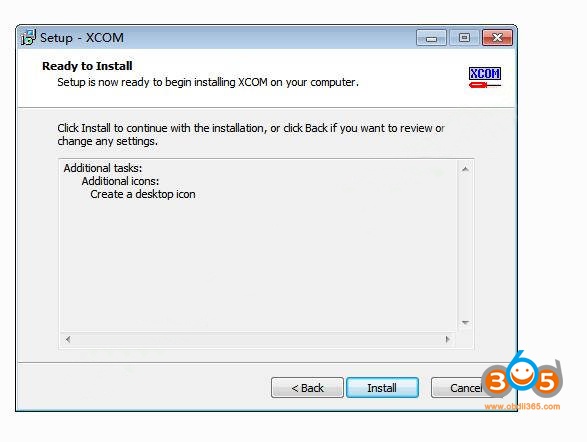
Setup is now ready to begin installing XCOM on your computer,click “Install”
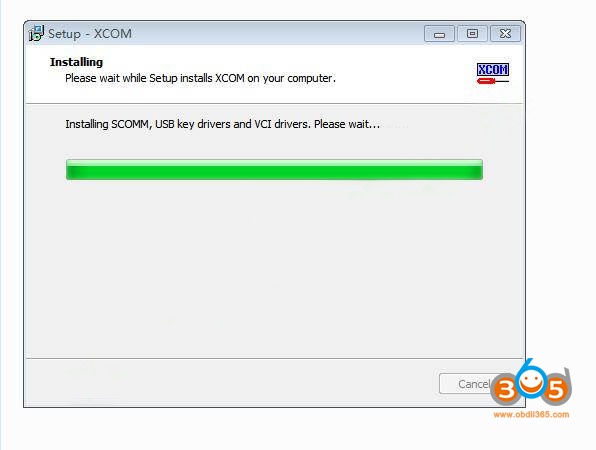
Wait for proceed…

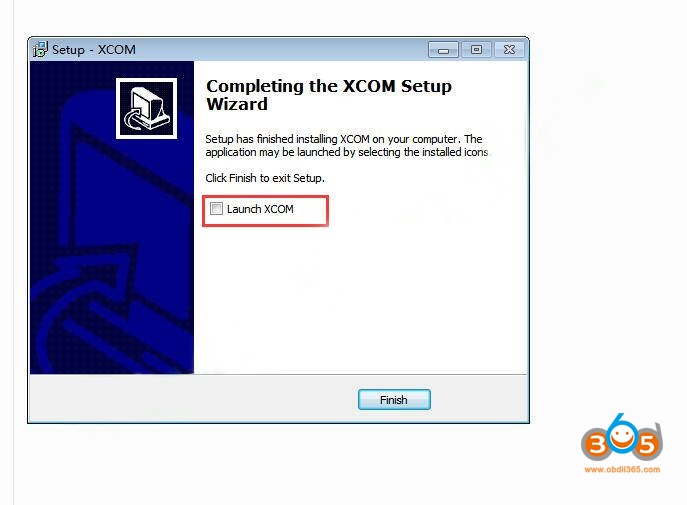
Scania XCOM Setup has finished,unselect “Launch XCOM”,then click “Finish”
Scania XCOM Installation Complete,now we need to activate it.
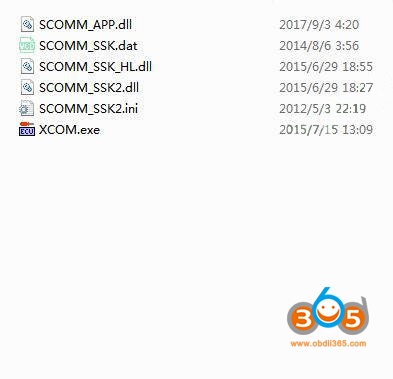
Open “Scania XCOM files” folder,then copy all files.
Open the “Scania XCOM” installation path,here it is “C:\Program Files (x86)\Scania XCOM” on my computer,then paste all files that copied from “Scania XCOM files” folder into it.
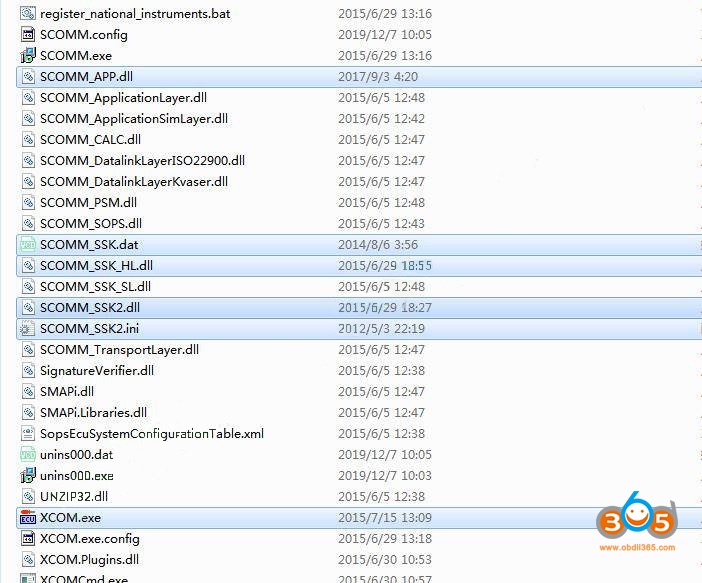
Now you Scania XCOM has been activated,it can run normally.

How to Clear/Reset Memory Areas with Scania XCOM?
This instruction show ou guide on how to use Scania XCOM software to reset/clear memory areas.
Steps:
1) Connect to CAN
2) Open the ”Clear” form for the related ECU. This is done either by expanding the ECU node in explorer tree and double clicking on the ”Clear” function/data node or by selecting the menu choice ECUs->(the EcuName)->Clear. The Configuration form is displayed. Example:
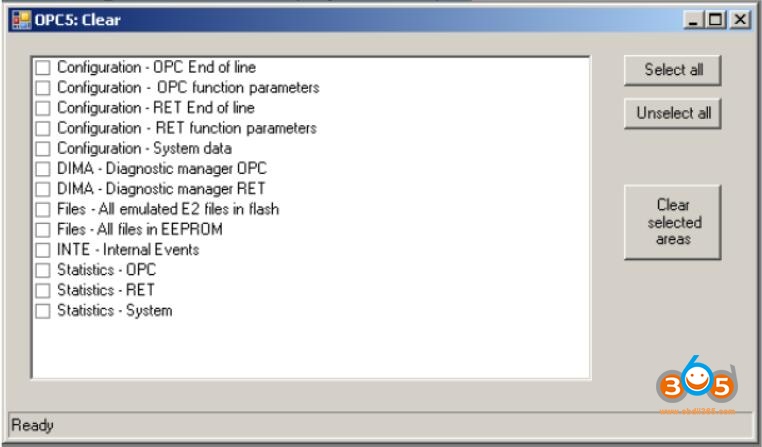
3) Select the area that is to be programmed by making the check mark visible for the name of the area in the list box.
4) Press the ”Clear selected areas” button to reset the data area.
5) When the button is pushed a dialog is displayed to confirm the operation:
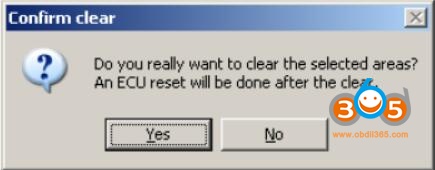
6) Press ”Yes” to start the reset sequence. An ECU reset will be performed when the clear is done.
7) When the sequence is complete a dialog is displayed to report the result:

DCMN memory area
To clear (reset) DCMN data areas, perform the following steps.
1) Connect to CAN if not already connected.
2) Open the ”Duty Cycle Data” form for the related ECU. This is done either by expanding the ECU node in explorer tree and double clicking on the ”Duty Cycle Data” function/data node or by selecting the menu choice ECUs->(the EcuName)->Duty Cycle Data. The ”Duty Cycle Data” form is displayed
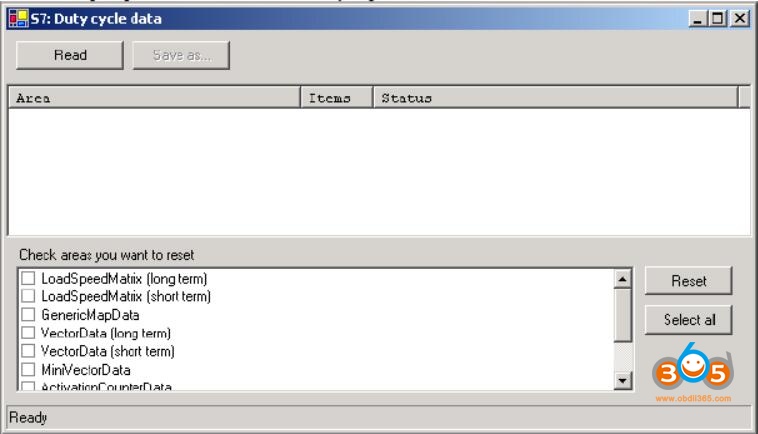
3) Select the areas that are to be cleared by putting the check mark in the boxes of the names in the list box.
4) Clear the areas by pressing the ”Reset” button.
5) The application will erase the areas and display the result in the main form”s status window.
6) The sequence is now complete
OPC4/RET1 statistic tables
To clear the OPC/RET statistics tables, perform the following steps.
1) Connect to CAN (see use case “Connect to CAN”) if not already connected.
2) Open the ”Statistics” form for the a OPC or RET.
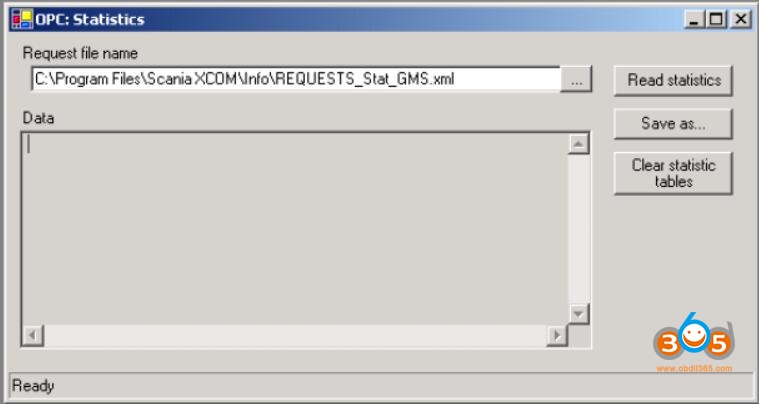
3) Click the “Clear statistics tables” to clear the tables.
4) A query dialog will be displayed to confirm the action.

5) Press ‘Yes’ to proceed and ‘No’ to abort the sequence.
6) The result of the action is displayed in the main form’s status window.
7) The sequence is now complete.
How to Retrieve Data from Scania ECU with Scania XCOM?
To save ECU data to file the user performs the following steps.
1) Connect to CAN
2) Select in the file menu “Save data from ECUs…”
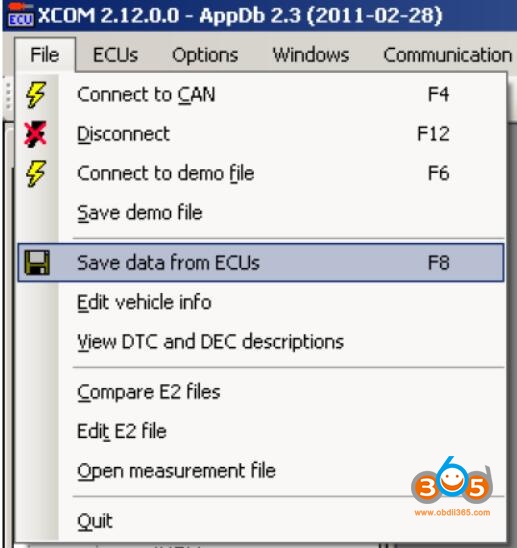
3) A dialog will appear:
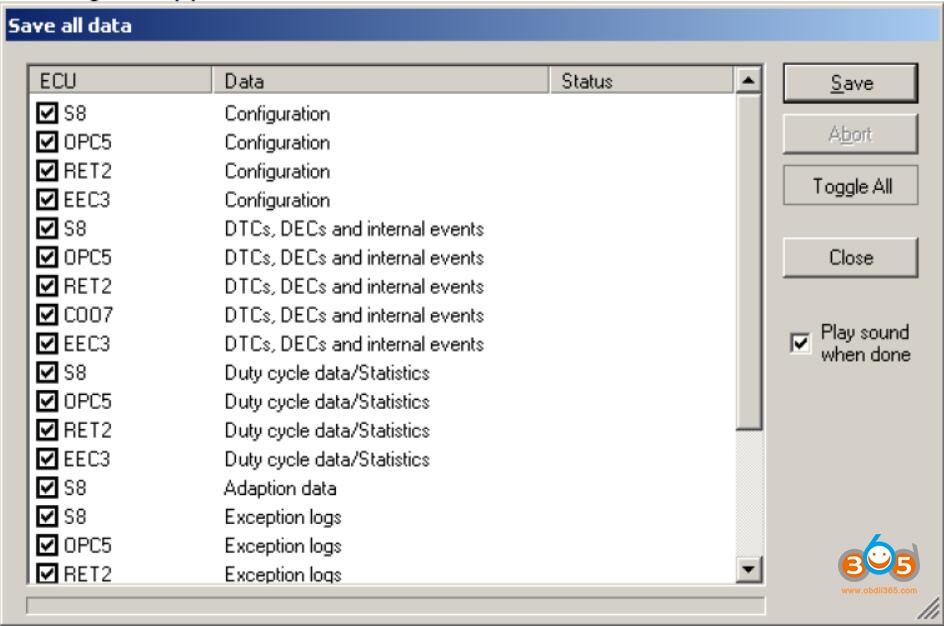
4) Select the data that you want to save data from by checking the boxes in the right field.
5) Press the ”Save” button.
6) A new dialog will appear and prompt the user to choose a file name template.
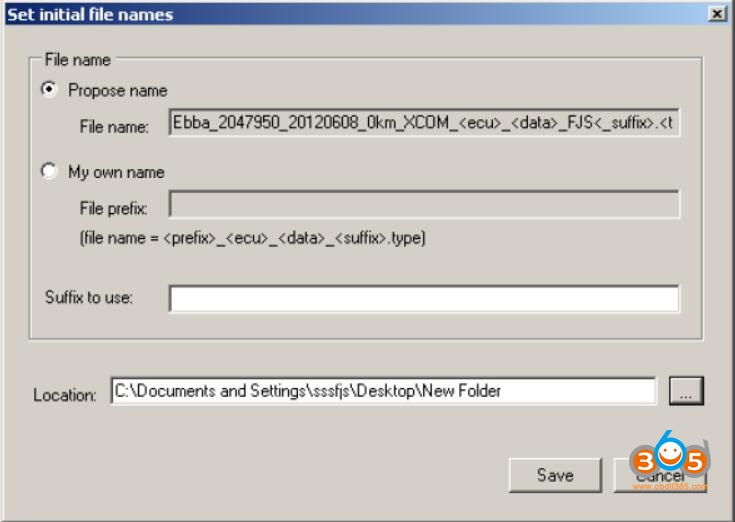
Specify the location of where the application shall store the output files by click on the ”…” button next to the ”Location” text area.
7) Press the ”Save” button to start retrieving and saving of the ECU data. The dialog is closed and the save procedure is started.
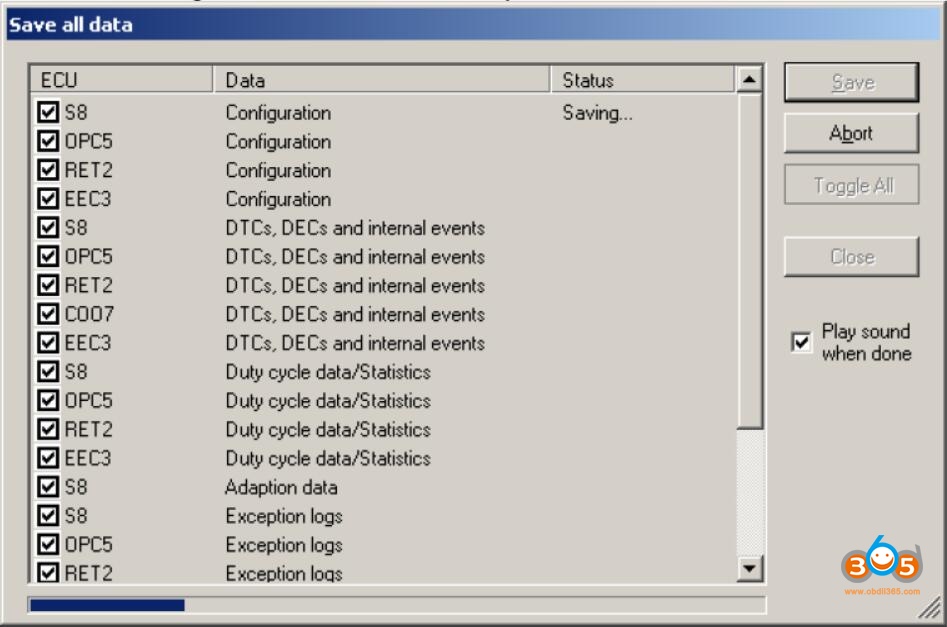
The save procedure will take some minutes.
8) The procedure is complete when window is enabled again.
9) The user verifies that a number of files have been created in the directory previously specified.
10) Press the ”Close” button to close the dialog.
How to Recover Defective ECU by Scania XCOM?
If an ECU has been flashed with a defective software and other ECUs reports that it is missing,you need to recover it.So here car-auto-repair.com show you guide on how to use Scania XCOM diagnostic software to recover defective ECU.
Procedures:
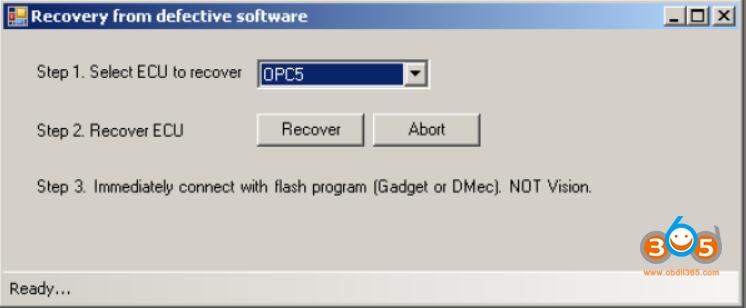
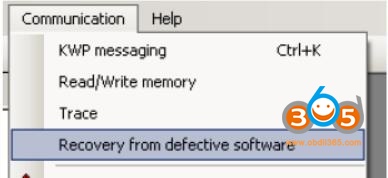
1) Select “recovery from defective software” from the Communication menu.
2) Select the defective ECU.
3) Select to recover it. XCOM will try to connect to the ECU now and should succeed within seconds. In case if XCOM fails try to connect to another CAN bus directly on the ECU.
4) On success a message will be shown:
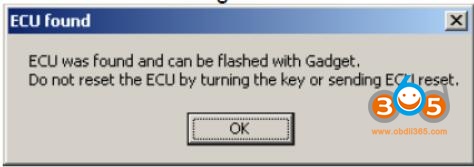
5) Immediately connect with a flash program (Gadget or DMec) and repair the ECU with a no defective software. Do not turn the key or reset the ECU in another way, in that case the whole procedure have to be redone.
How to Reset an ECU using Scania XCOM?
This instruction show you how to use Scania XCOM diagnostic software to reset an ECU.Please perform the follow steps.
Procedures:
1) Connect to CAN if not already connected.
2) Display the ECU pop-up menu either by clicking the ECU node in the ECU explorer tree with the right-side button on the mouse or pressing the ”pop-up” key when the related ECU is selected (which is done with the arrow keys).

3) Pressing ”OK” will reset the ECU, close all open windows and redraw the tree of ECUs. The ECU is reset with “keyOn”.
4) The sequence is now complete.
How to Use Scania XCOM to Program E2 Parameter Configuration Values?
Here is a step by step guide on how to use Scania XCOM to program E2 parameter configuration data into ECU.
Procedures:
1) Connect to CAN
2) Open the Configuration form for the ECU that is to be programmed. This is done either by expanding the ECU node in explorer tree and double clicking on the ”Configuration” function/data node or by selecting the menu choice ECUs->(the EcuName)->Configuration. The Configuration form is displayed.
3) Go to the ”File” tab.
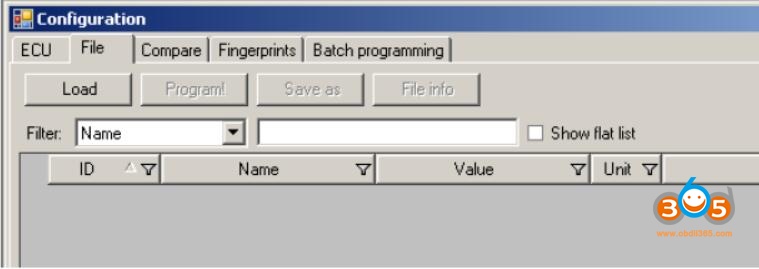
4) Load the XCOM E2 xml file that contains configuration data for the ECU by clicking the ”Load…” button. (This can take some seconds.)
5) Push the ”Program!” button in the ”File” tab to program the ECU. A confirm dialog will appear:
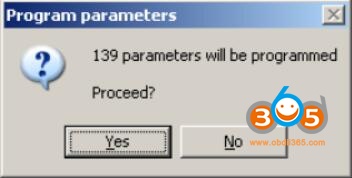
Press ”Yes” to confirm that the ECUs parameters is to be programmed.
6) A new dialog is displayed to query if VIN shall be copied from COO to the ECU that will be programmed.

Press ”Yes” to confirm (you must be connected to a COO in order for it to work) or ”No” to skip this operation.
7) The parameters that were not successfully programmed from file will be marked with red, those that were programmed successfully will be marked green. Parameters that did not exist in the file are marked yellow.
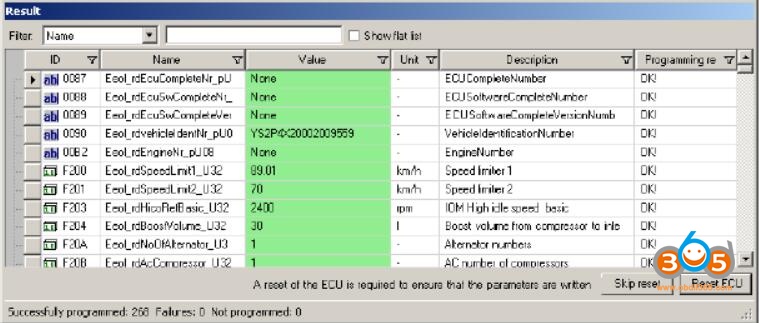
8) To complete programming:
If all parameters are OK, press “reset ECU”to complete the programming.
If there are red or yellow parameters, press “skip reset”and correct those parameters in the ECU tab:
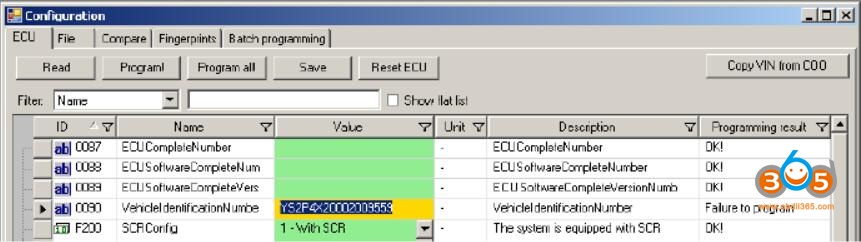
And press “program!”.
9) The sequence is now complete.