


Tutorial: pick & decode HU66 VAG lock with Lishi HU66 2-in-1 locksmith tool
The HU66 lock is a straight forward lock to pick , far easier with the Lishi HU66 2in1 pick and decoderthan with the standard picks, but either tool with practice makes short work of this lock.
Use Sequence picking For Best Results
The HU66 lock has proven to be susceptible to sequence picking
The 1st generation lock was used in general up to around 2002
The 2nd generation lock was produced in 2002
The 3rd generation lock was introduced after 2006
The 4th generation has been introduced in the end of 2008
Follow below sequences for best results.
This Lock can often pick open easier in an anti clockwise direction , but should in most cases pick open following sequence picking in either direction.
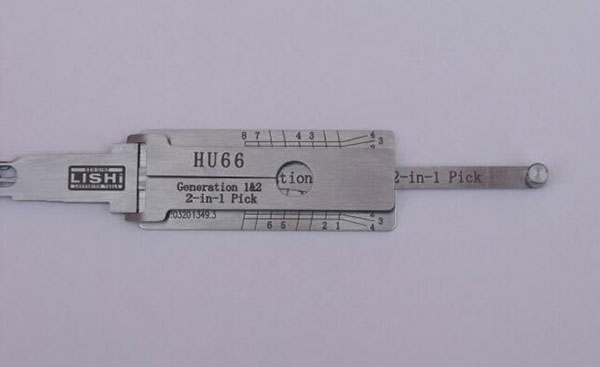
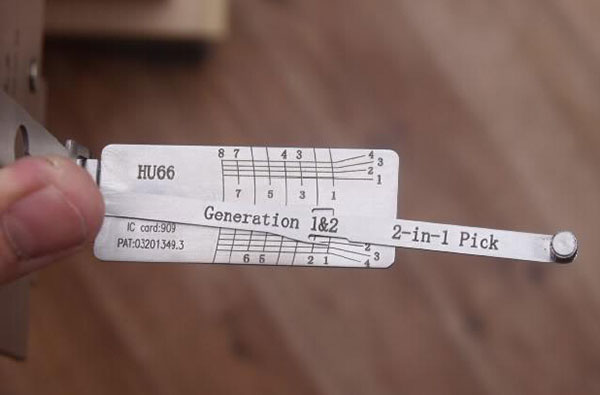
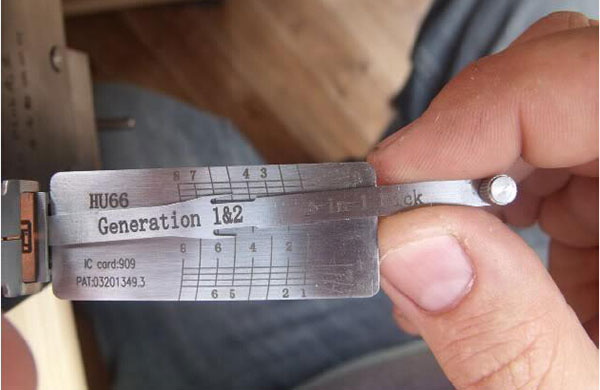
Looking at the photo , generation 1 locks are a straight 4 wafers on top and bottom of lock, commonly referred to as 1 up 1 down , ie , wafer 1 is up so wafer 2 is down , wafer 3 is up and so on . for this we follow the inside numbers on the grid.
Generation 1 lock follows a simple sequence of pick the odd numbers first , then pick the even numbers, so generation 1 locks ;
Pick positions 1 , 3 , 5 , 7 first then pick positions 2 , 4 , 6 and 8 last .
The generation 2 locks onwards used 2 close wafers ,space, and 2 close together on each row, commonly referred to as 2 up and 2 down, ie , wafers 1 and 2 down then wafers 3 and 4 are up then wafers 5 and 6 are down and wafers 7 and 8 up . these have proven susceptible to sequence picking as follows;
First pick positions 1 , 5 , 8 and then 4 in the binding order, once set you will feel plug turn a fraction, then increase tension a fraction and pick positions 3 , 7 , 6 and then position 2 in the binding order , if the lock doesn’t open , run back through positions 3 , 7 , 6 and then 2 a few times and the lock will open.
Picking a generation 2 lock With the Lishi HU66 2in1 Pick/Decoder
The picking process with the 2in1 compared with standard picks is simplified by a far greater feel and the advantage of sequence picking, unlike the standard picks and any other picks, the lishi 2in1 pick/decoder, picks and decodes all 4 generations of the HU66 lock .
Introduction
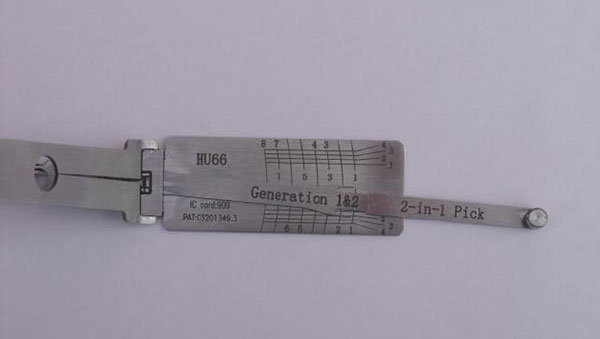
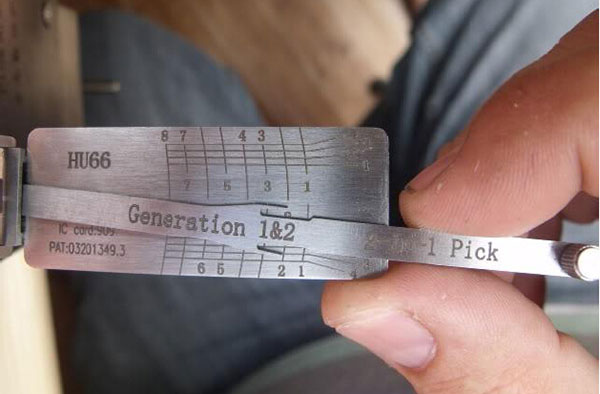
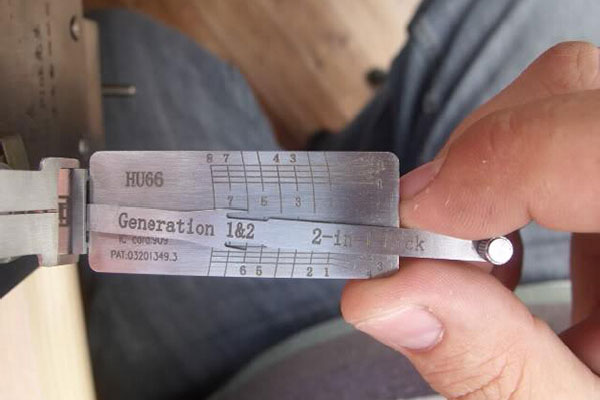
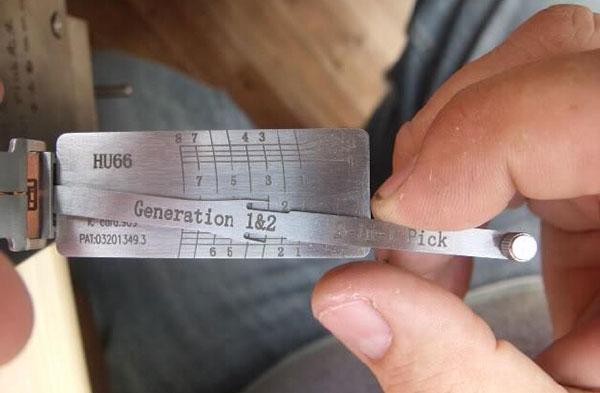
The Lishi Vag 2in1 pick decoder is a simple to use tool , looking at the photo you will see the wafer positions numbered 1 to 8 from left to right , with lines running up and down , to the right running up and down you will notice the key cut height numbers, with lines running left across the grid. This simple grid allows you to find the perfect position every time, assists to limit the height of your lift in increments simplifying the picking process, the key cut heights allow you to accurately decode the lock first time every time in most cases. The single lifter allows picks and decodes both top and bottom rows of wafers.
The Picking Process
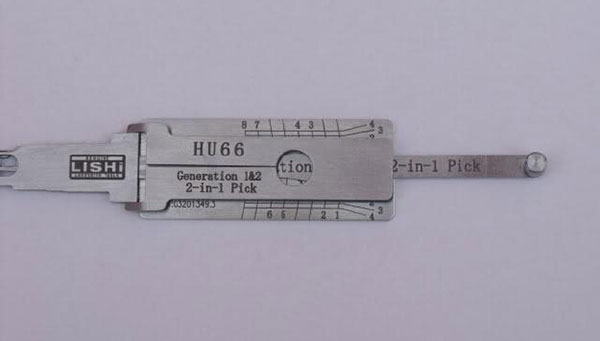
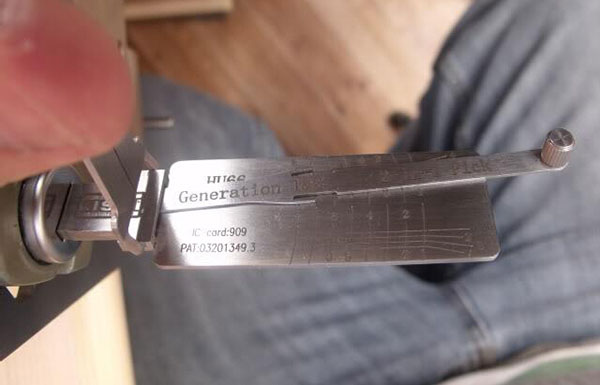
Begin by fully inserting the tool into the lock, in this example we are using a generation 2 lock, so position the lifter on the position 1 line, and with no tension on , pull gently down both the number 1 position line and the number 2 position line , ensure a wafer can be felt in each position , if so we are ready to begin to pick this lock. As a generation 2 lock, we will follow the picking sequence of picking and setting positions 1 , 5 , 8 and 4 , once set the plug should turn a fraction.
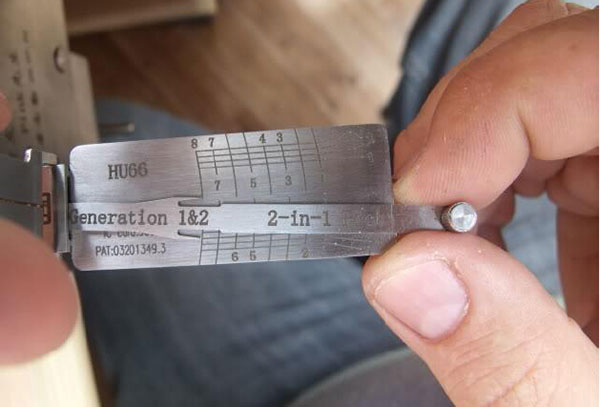
Position the lifter on the number 1 line , if binding as this did , pick it by moving the lifter along the line towards the outer number 1 on grid, lift 1mm at a time , if still binding then lift another 1mm until the wafer moves again slightly and returns on spring in a tight slapping motion. Once picked moved to positions 5 , 8 and 4 picking each binding wafer in turn until a slight rotation movement is felt on the plug, at which point these are set.
Position 5 was binding so picked
position 8 was binding so picked
Position 4 was binding so was picked , at which point the plug rotated 1mm which confirms that positions 1,5,8 and 4 were all set, so at this point i increased tension a little to help bind the final 4 positions.
We are now ready to pick the final 4 wafers, positions 2 , 6 , 7 and 3 .
Position 2 was binding so is picked
position 6 was binding so was picked

Position 7 was next to bind so was picked
at which point the plug turned and the lock opens. Position 3 was not picked, which is significant as confirms position 3 to be the lowest No 4 cut which doesn’t require picking.
Decoding the generation 2 vag lock with the Lishi auto pick/decoder
The HU66 lock offers a very reliable decode that rarely throws up a curve ball, and is a simple process . You must decode this lock in the open position for the generation 2 , 3 and 4 locks, however read the direct decode notes below . so once picked , keep the tension on and hold the lock in the open position , and follow the following procedure.
We read the decode on this lock , by moving the pick arrow along the numbered line in the OPPOSITE direction to the direction we picked the lock. As we move the pick arrow along the numbered line , it will stop on one of the height lines numbered 1 to 4 , which ever line it stops on will be the cut for the key in that position.
The procedure is as follows;
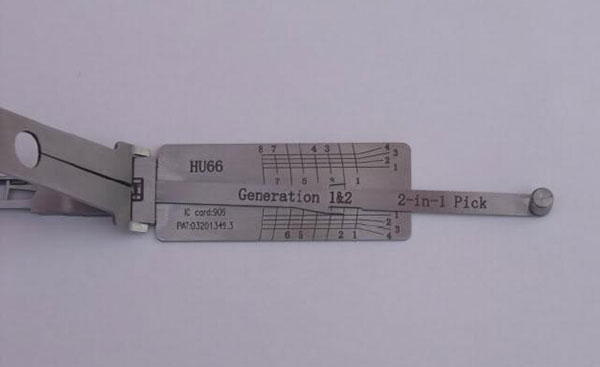
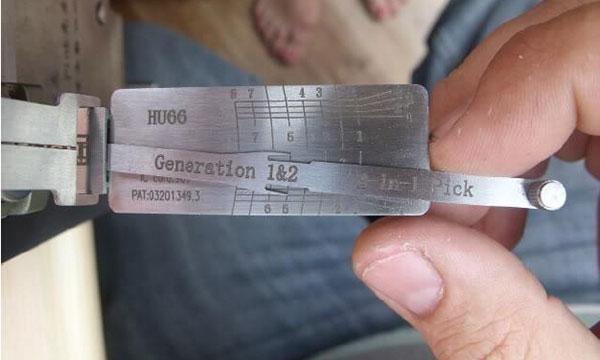
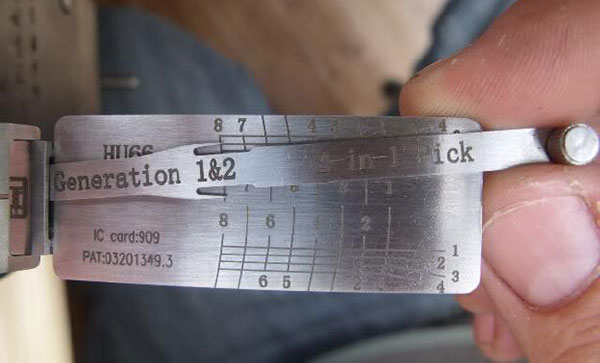
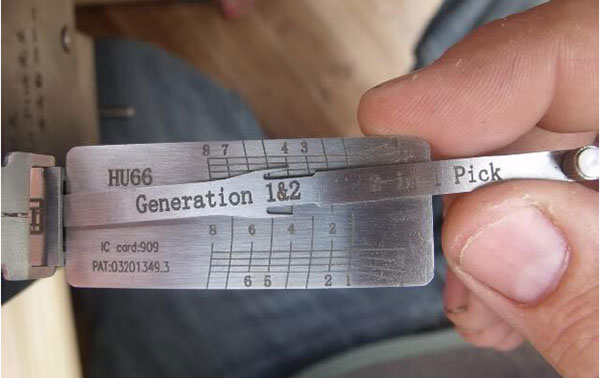
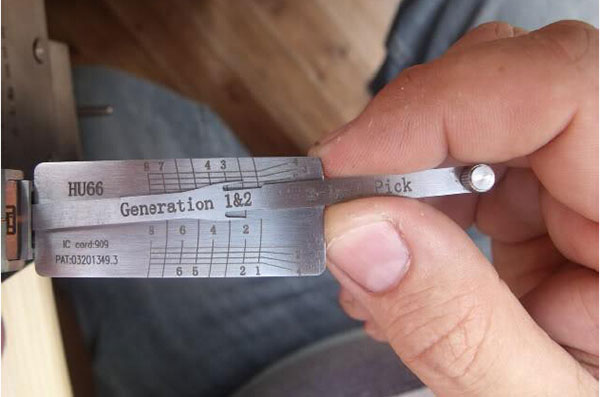
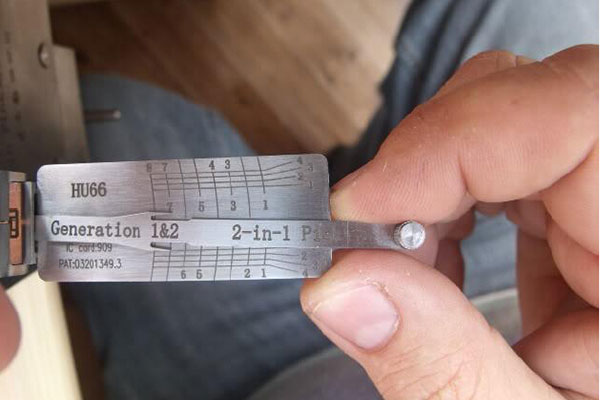
Maintain a light tension holding the lock in the fully open position via the tension handle , move the reader to position 1 line and move the reader lever along the number 1 line away from the outer numbers , thus in the opposite direction to that in which we picked the No 1 position as in the photograph.

Position 1 shows its a No 1 cut
Position 2 shows its a No 2 cut
Position 3 is a cut No 4 (confirmed )

Position No 4 is a No 3 cut
Position 5 is a No 3 cut

Position 6 is a No 2 cut
Position 7 is a No 1 cut
Position 8 is a cut No 2
So with each position now decoded we have the cuts of the key, remembering that the cuts run from the bow end at position 1 to the tip end at position 8 . so our key from the above pick and decode is as follows ;
From bow end the key is , 1, 2 , 4 , 3 , 3 , 2 , 1 and 2 at the tip . we can now enter this into a code machine and cut the key, cut with depth and space keys or order the cut key from your suppliers.
With a little practice , the vag can be picked and decoded in between 2 and 5 mins out on the job , simplifying the job for the auto locksmith greatly.
The only difference with the generation 1 lock is the sequence the locked is picked in, for the generation 1 lock, you would pick the odd numbered wafers first and set these prior to picking the even numbered wafers.
The decode remains the same except you decode following the internal numbers and not the outer numbers, and you decode again in the opposite direction to that in which you picked the lock in when reading.
The generation 1 lock can also be decoded directly without the need to pick it first , though a much more accurate decode is obtained if the lock is picked open first and held in the open position via the tension handle whilst decoding the lock.
http://www.obdii365.com/wholesale/brand-lishi/


