After reading all the coding below, wait a while before coding! Please back up and restore your data , and proceed with the coding while you are backed up !!!
Summary
If you are ready to install all the coding programs and the coding cables, we will start coding in earnest. The coding is roughly done in the following order. It would be easier to understand the following outline after drawing the overall outline first.
- Connect your car and laptop to each other with a cable.
- Run the coding program to connect to the car (this is the process of connecting the coding program to recognize the car)
- Download coded data from my car to my laptop (eg download the data set to ‘Beep if the seat belt is released!’).
- Change the settings on my laptop and save them to my computer (eg change the setting to ‘Do not beep if your seatbelt is released!’)
- Upload the coding data you saved to my computer to the car.
Connect your car and laptop to each other with cables
First connect your vehicle and computer with the BMW ENET cable .
And turn ignition switch to on position. If the vehicle is powered off during the coding and the communication is lost, we recommend that you turn on the ignition before coding (It is recommended that you do not code DME / DDE modules).
Run a coding program to connect with cars
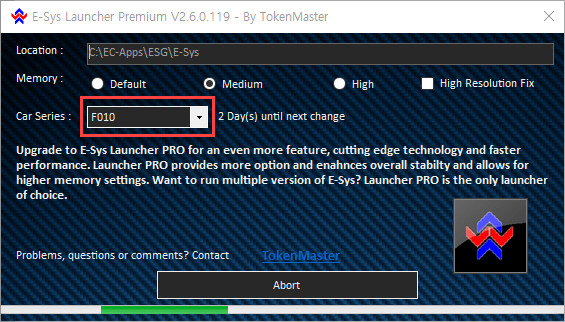
If you have connected the vehicle to the cable and started up as above , run the E-Sys Launcher .
Choose the code for your car from the Car Series . The code you choose here is a generic code name for your car. In other words, select F010 for a 5-Series sedan and F030 for an F30.
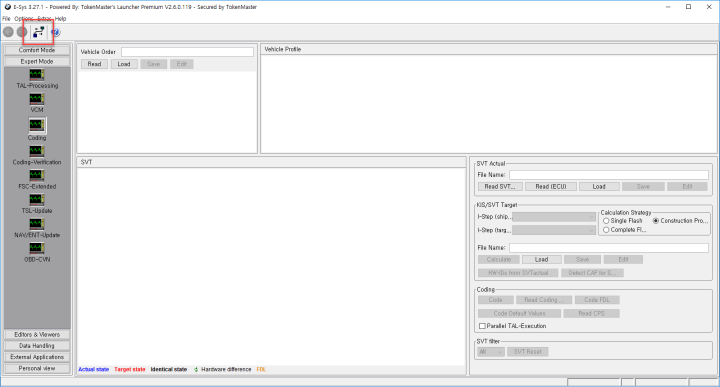
Tendeyo it is displayed if the program is executed, the following screen, press the connect button to connect to the vehicle .
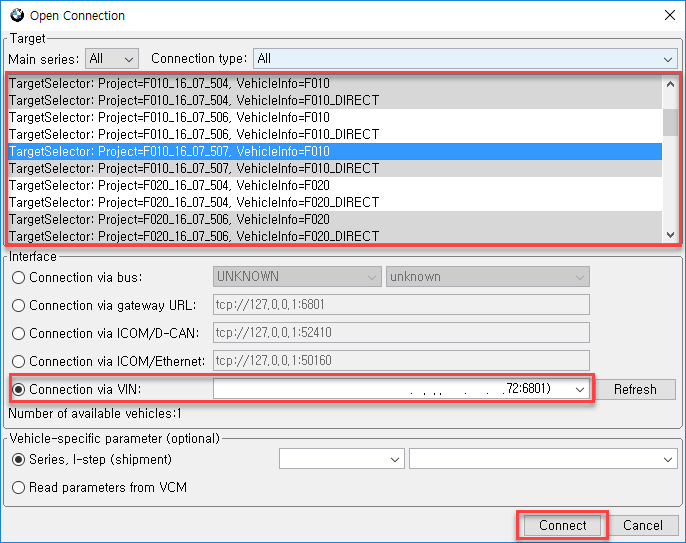
Press the connect button to display the connection setting screen. You must select Target and Interface here . Code Name and E-Sys Target when usually call the model number of the vehicle may vary.
Please check the E-Sys access code I have uploaded and select the correct Target. If there are several F010s as below, you can choose the one with the latest version of Direct. Usually the latest version is at the bottom of the list.
In the Interface, select Connect via VIN .
Select Target and Interface and press Connect button.
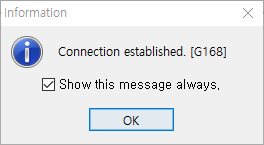
If the vehicle is normally connected, the following message will be displayed. Click OK to close the window.
Download car-coded data to my laptop
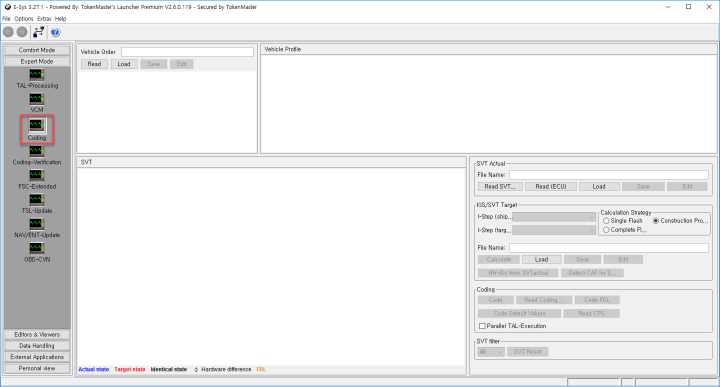
On the left side of the program screen, if Expert Mode is not selected, select Expert Mode and select Coding .
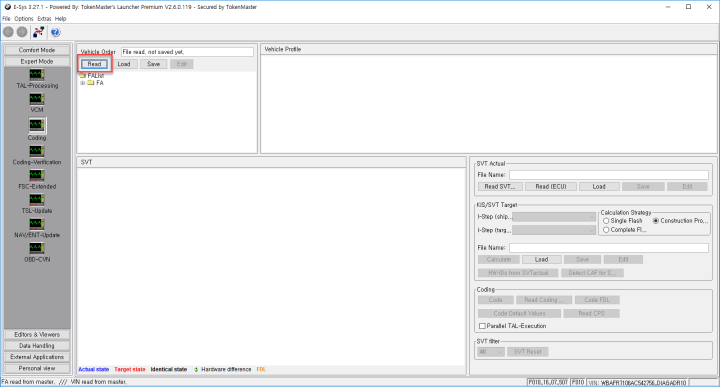
Click the Read button in Vehicle Order.
Right-click on the FA folder and select Activate FA .
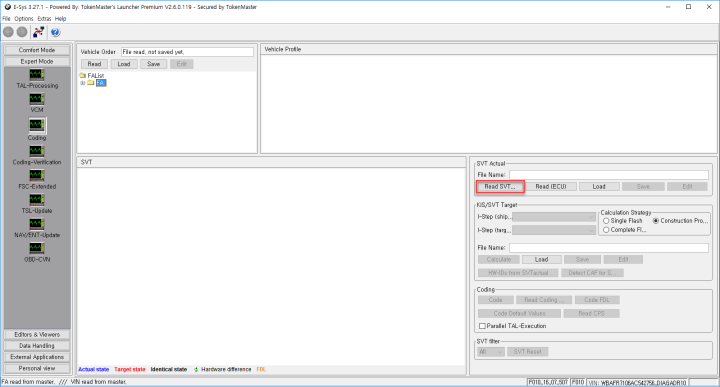
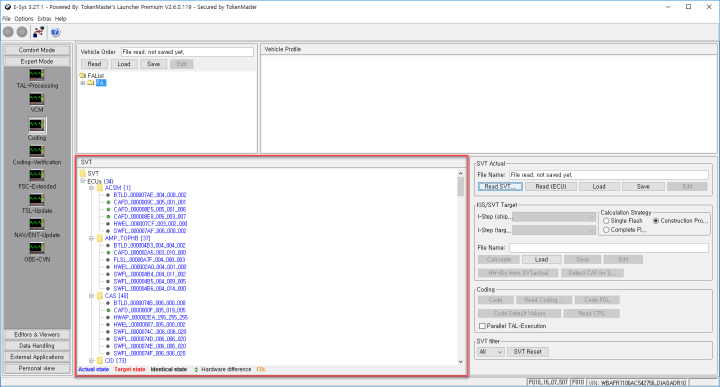
Press the Read SVT button on the right side of the screen .
The modules of the car are displayed in the SVT area.
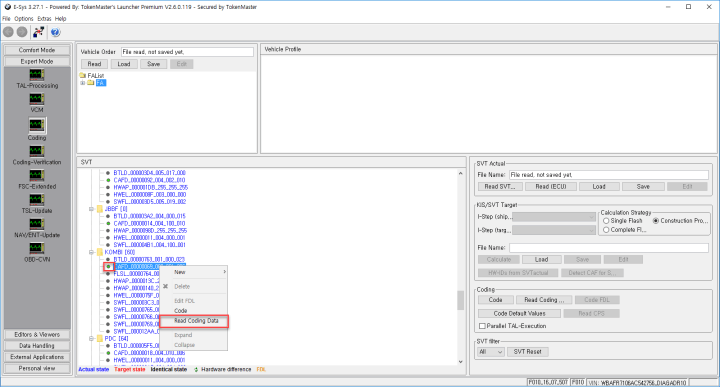
As an example, let’s show you how to modify one coordinate. I want to change the coordinates of KOMBI the coordinates to the HUD_SPRACHEINGABE_ENABLEvalue of aktiv.
First locate the KOMBI module in the SVT area, select the CAFD with the green V icon on the left side of the KOMBI submenu, click the right mouse button and select Read Coding Data.
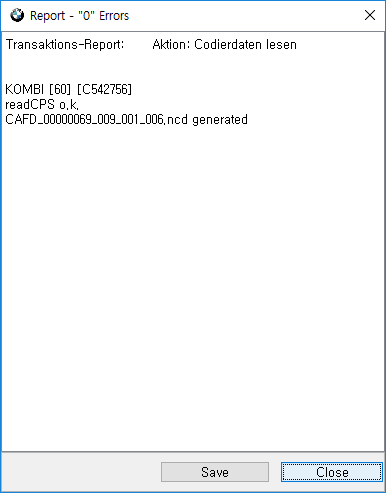
When you read the coded data on the vehicle, the following message will be displayed. Close button to close.
Change settings on my laptop and save it to my computer
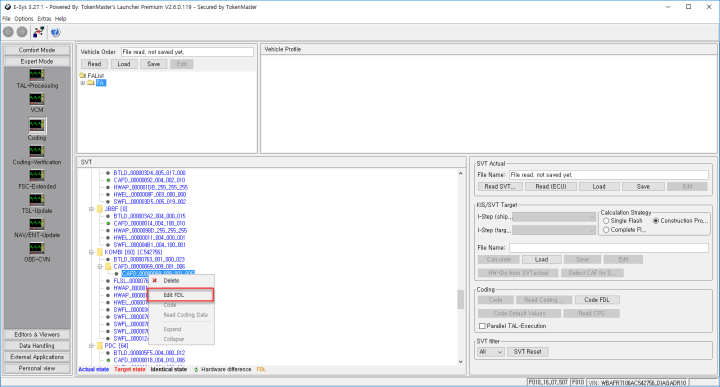
CAFD will be changed to a folder, and another CAFD list will be created under it. Select the list, right-click, Edit FDLand select.
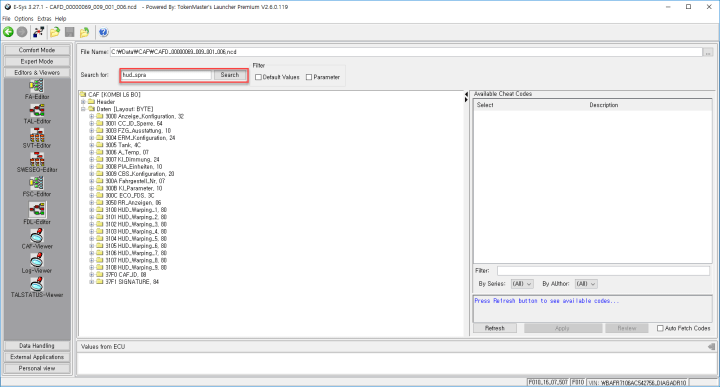
The FDL Editor screen will open . Enter coordinates in the search bar to find the desired coordinates . You can find some of the keywords by typing them without having to type in all the coordinates.
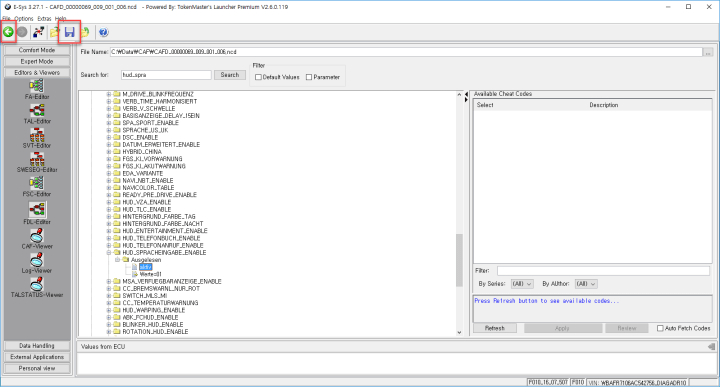
I found exactly the coordinate I wanted.
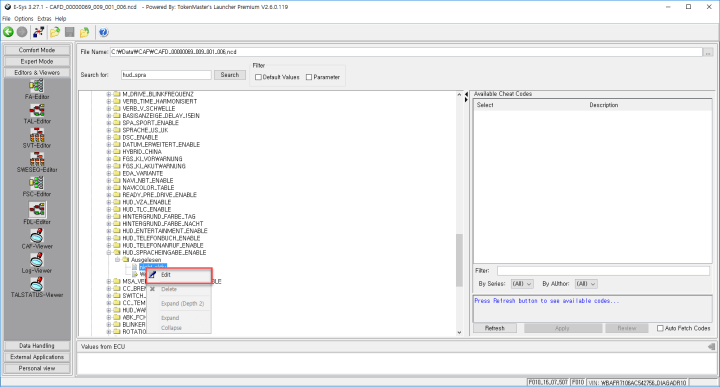
Let’s expand the folder of coordinates and change the value that this function now works. Expanding the Ausgelesen folder has nicht_aktiva value of. This value is the setting value of the existing function aktiv. To change this value to , press the right mouse button and press the Editbutton.
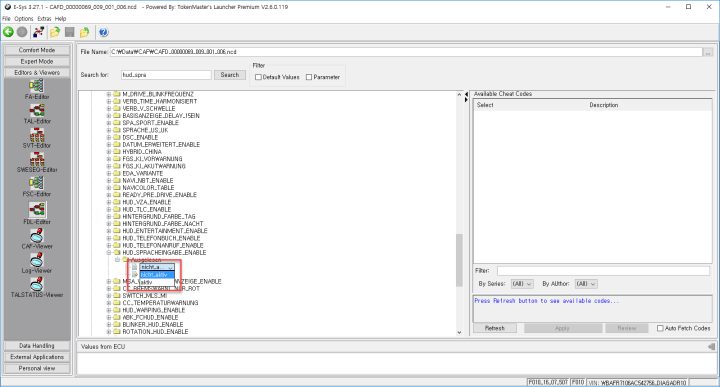
This will bring up the select box so you can select a value, then aktivselect it.
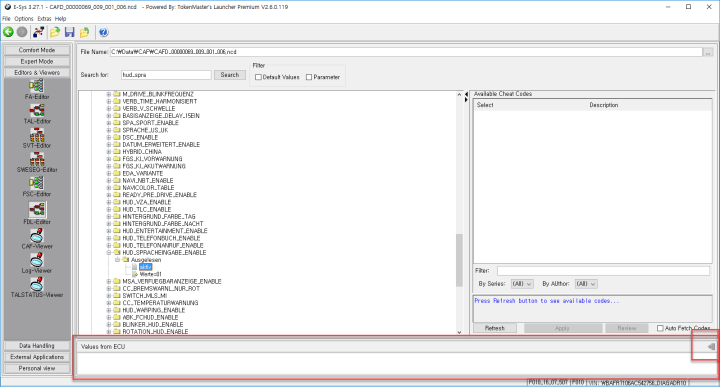
For some coordinates, you may need to enter a value directly instead of selecting it as above. After selecting Edit, Values from ECUenter the value in the lower area of the screen and then click the Exit button on the right of the screen.
If you modified the value well, the save button at the top of the screen will be activated. This is not the step of storing the value in the vehicle, but the step of temporarily saving the value to the current computer. After saving, press the Back button to exit the FDL Editor screen.
Upload coded data from your computer to your car
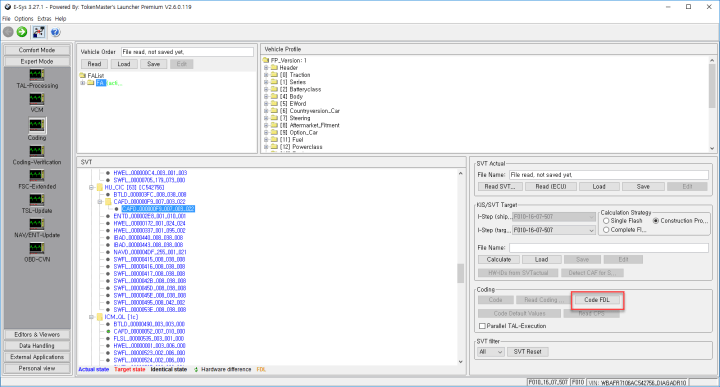
Now it’s time to transfer the coding values you temporarily saved to your computer to the vehicle. Code FDLButton.
Note:
CodeThis is a button, not aCode FDLbutton.CodeButton is a button that initializes the coding.
I am transferring modified coding data from my computer to my car.
A message will be displayed indicating that the vehicle has successfully transferred the changed values and completed without errors. Report 0 errorAnd if there is an error, there is a problem during coding, it is recommended to return the modified value to the original value.
Quitting coding
The coding is finished. Please make sure that the value you just edited is correct. There is no procedure to terminate the coding separately. Normally, the connection button that is clicked before will be changed to the disconnect button. Pressing the button or disconnecting the BMW ENET cable is not a big problem.
Note: The guide was translated from Korean. Credit to Mr.JIHUNX.


