


Launch X431 tutorial: How to Enter/Enable Service Mode for Tesla Model 3/Model Y/Model S/Model X.
The benefit of Tesla Secret Service Mode:
Though Service Mode is tailored for technicians or Tesla owners with a deep understanding of their vehicle, it offers a new level of engagement, providing detailed insights that can help troubleshoot, reset, calibrate, and even configure new parts.
Device required:
Launch X431 diagnostic tool PAD VII, PAD V, Pro5, Pros3+ etc
Tesla software V10.15 and above
X431 App version V7.03.037 and above
*Note:
Tesla software and diagnostic cables need to be purchased separately.
Procedure:
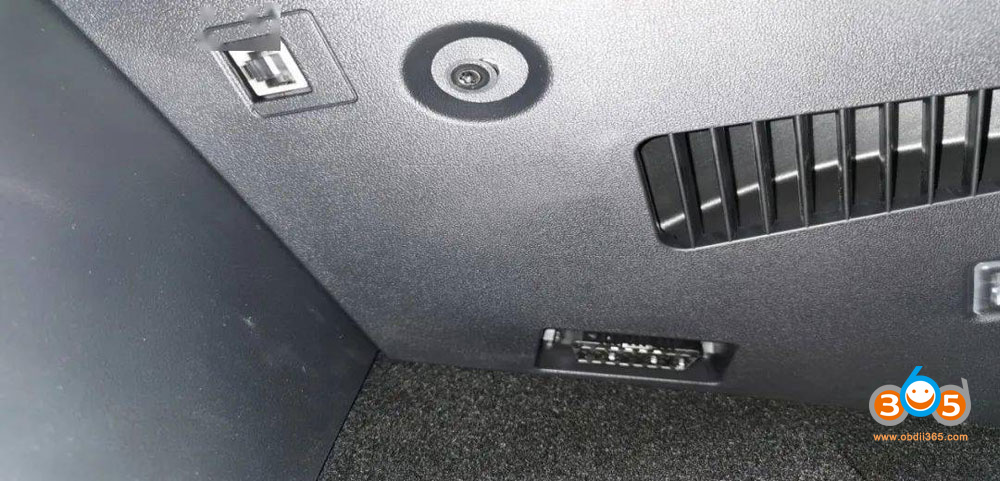
1.Find the vehicle’s LAN port and connect it with the dedicated LAN adapter cable. Generally, the LAN port of Model 3/Y models is on the lower left of the steering wheel; the LAN port of Model S/X models after 2019 is on the lower right front of the co-pilot, as shown below:
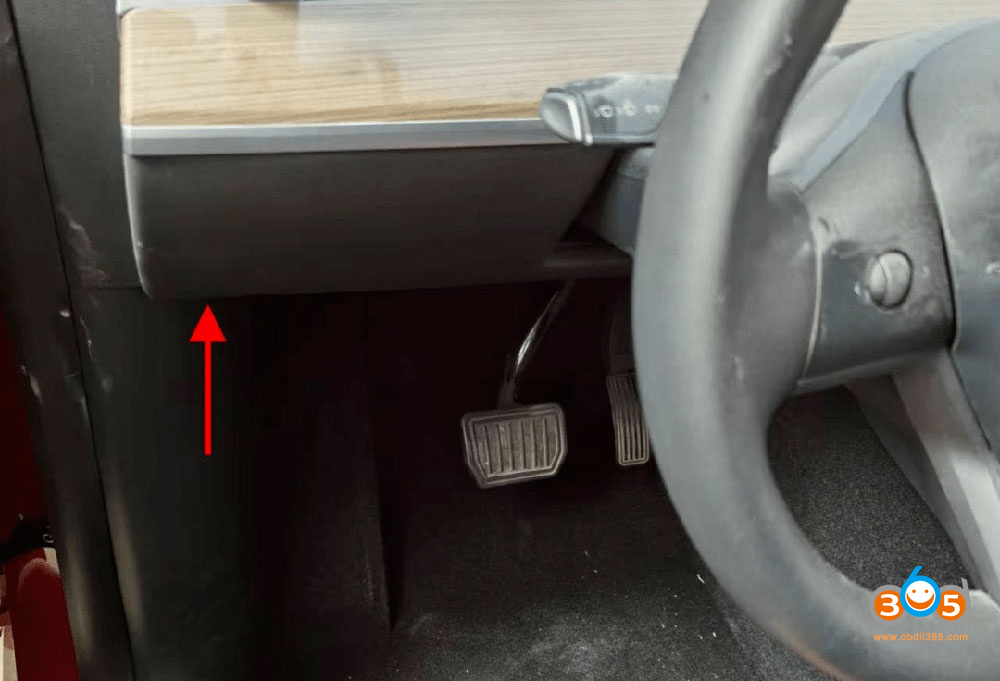
▲ Model 3/Y LAN port location
▲ LAN port 5PIN of Model 3/Y before 2022 (need 5 PIN Converter)
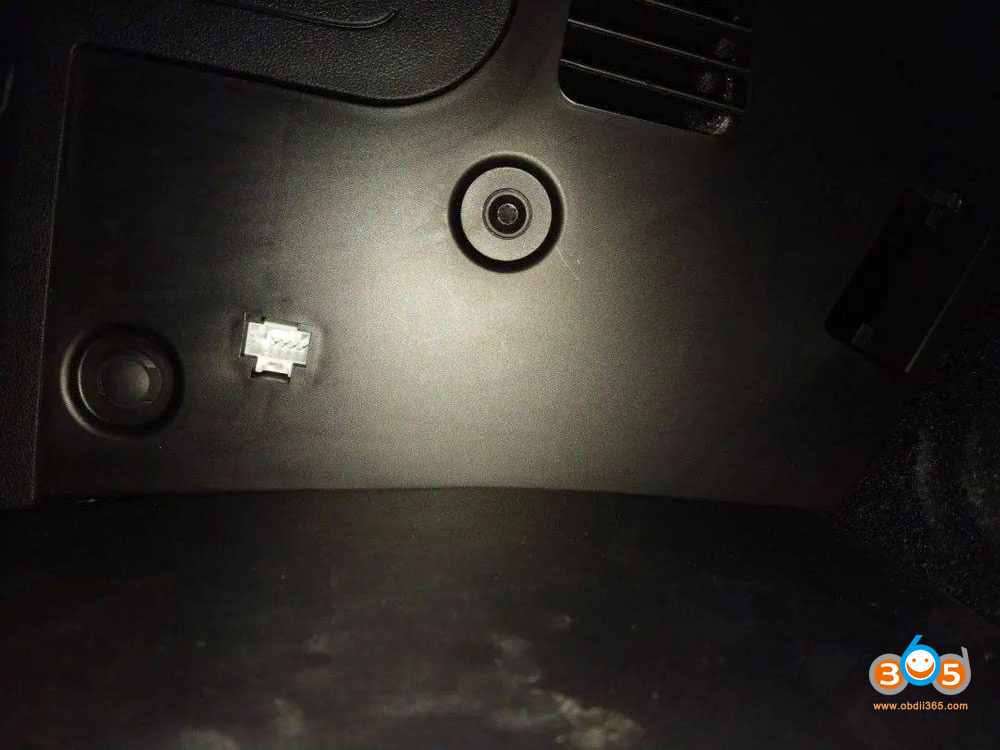
Note: Some models may need to remove the baffle to ensure the normal insertion of the adapter cable, as shown in the figure below:
▲LAN port RJ45 of Model 3/Y after year 2022 (Need RJ45 converter)

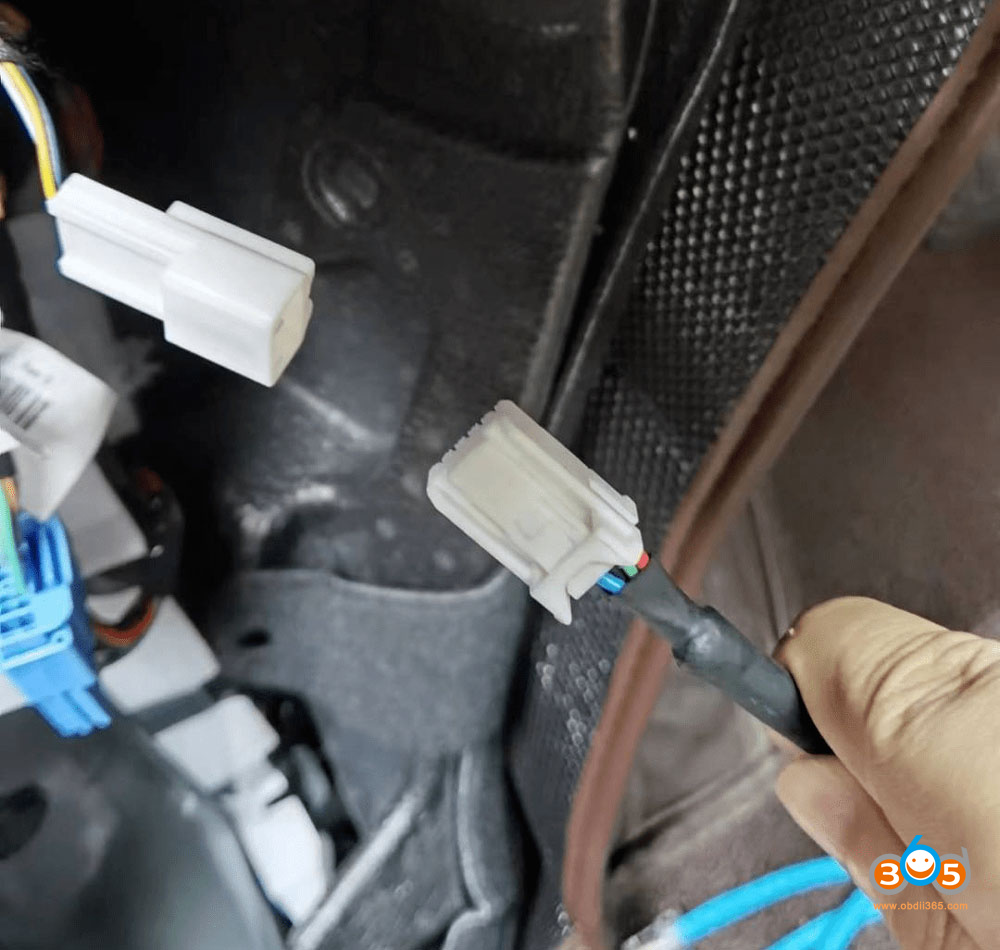
▲ LAN port 4 PIN of Model S/X after March 2018 (Need 4 PIN Converter)
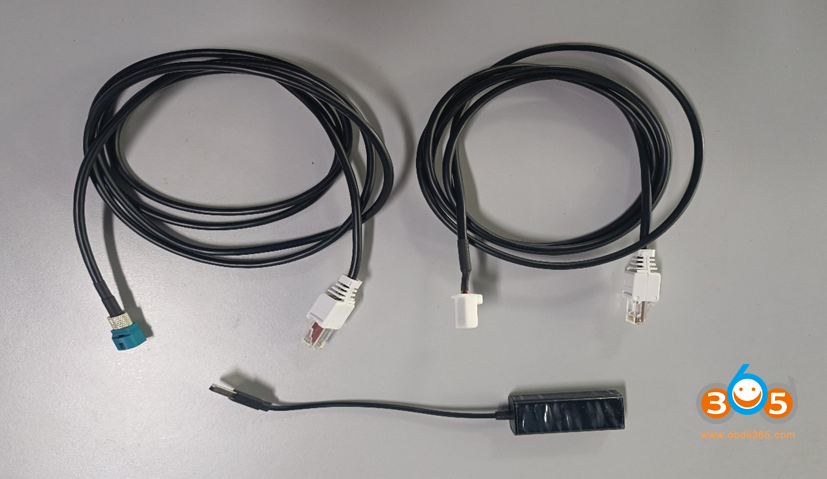
2. Connect one end of LAN cables to vehicle, the other end needs to be connected to the RJ45 port to the RJ45 port to the USB converter, and the USB end of the converter is connected to the device, as shown in the figure below:
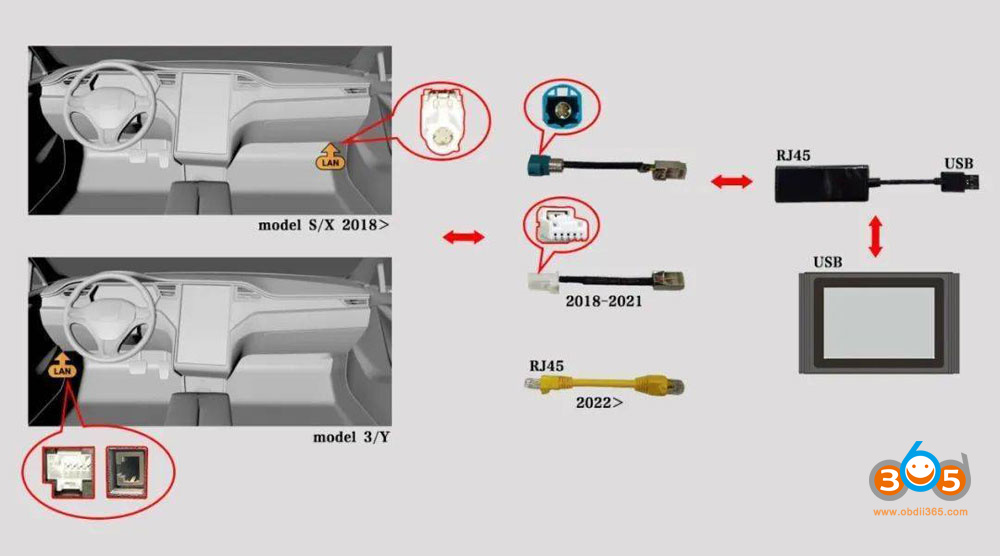
(Note: Some Launch X431 scanners have RJ45 ports, and the adapter cable can be directly connected to the device).
For other models, check pinouts in Part 4 here
http://blog.obdii365.com/2023/08/31/launch-x431-tesla-adapters-pinouts/
3. Make sure your X431 scanner communication mode is set to Bluetooth mode.
Step 1: Click “Personal Center”-> VCI

Step 2: Click “VCI” more than 8 times, and you will see a hidden menu “Diagnostic Connector Connection Management” will appear.
Step 3: Click “Use Bluetooth communication mode” to set to Bluetooth mode.
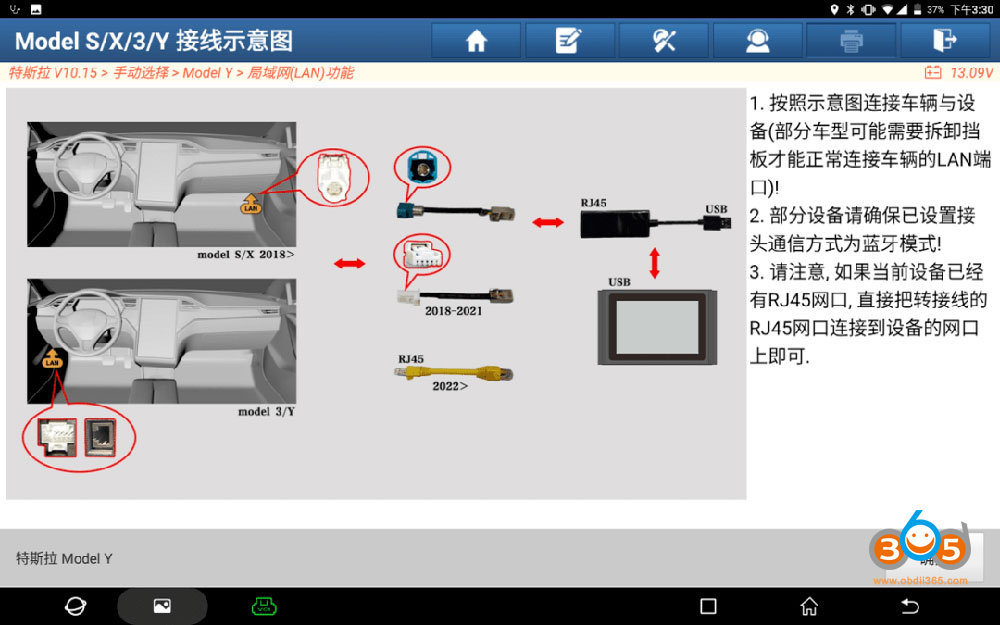
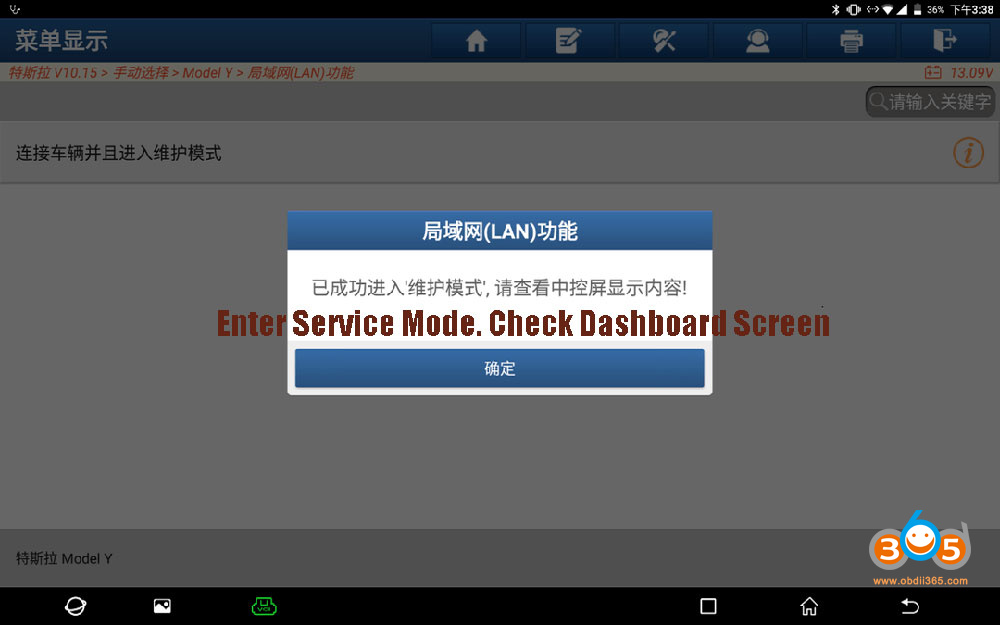
4. Connect X431 scanner with vehicle (insert diagnostic connector of the device into OBD port), turn on ignition switch, select Tesla software-> Manual Selection, select the corresponding model, For example Model Y is selected here, then select LAN function
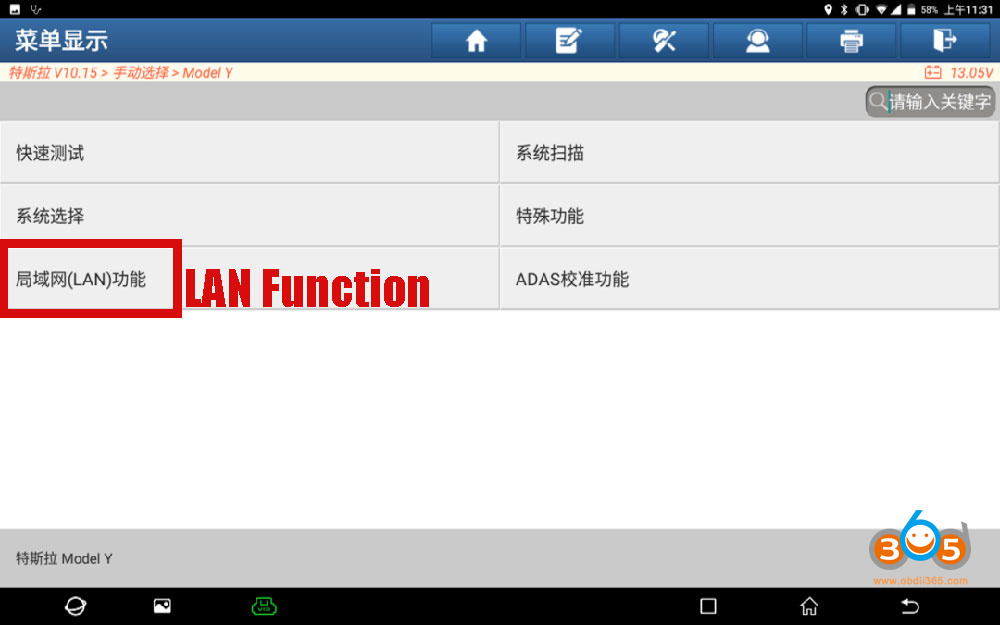
Make sure network is connected, device is set to Bluetooh mode and cable is well connected, press OK to proceed.
Enter Service Mode, check content on your vehicle dashboard screen

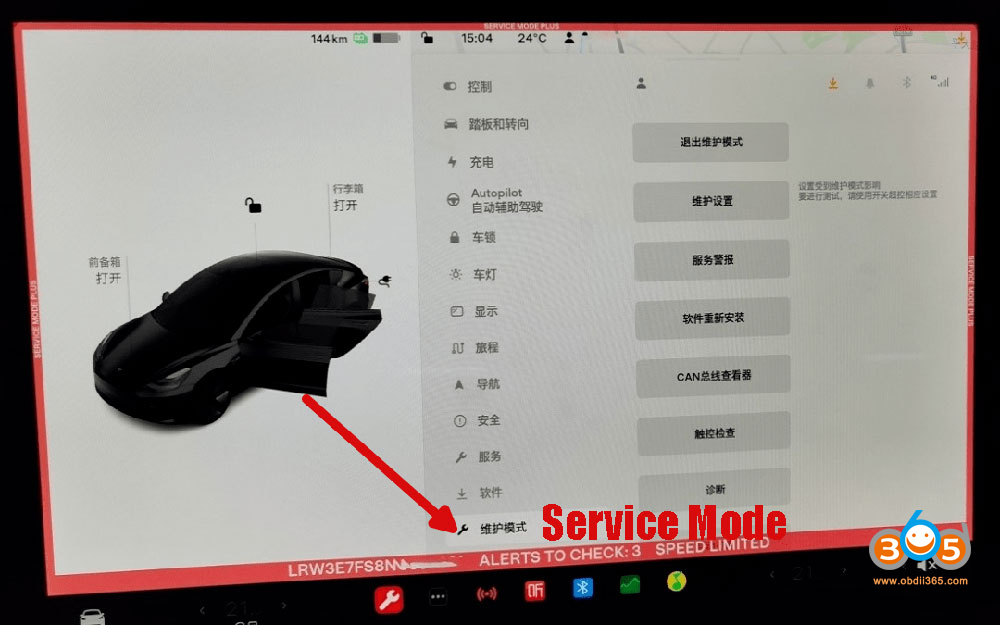
5. After successfully enabling the “Service Mode”, you can see the “Service Mode” on the vehicle’s central control screen, indicating that the vehicle has successfully entered the “Service Mode”, as shown in the figure below:
6.
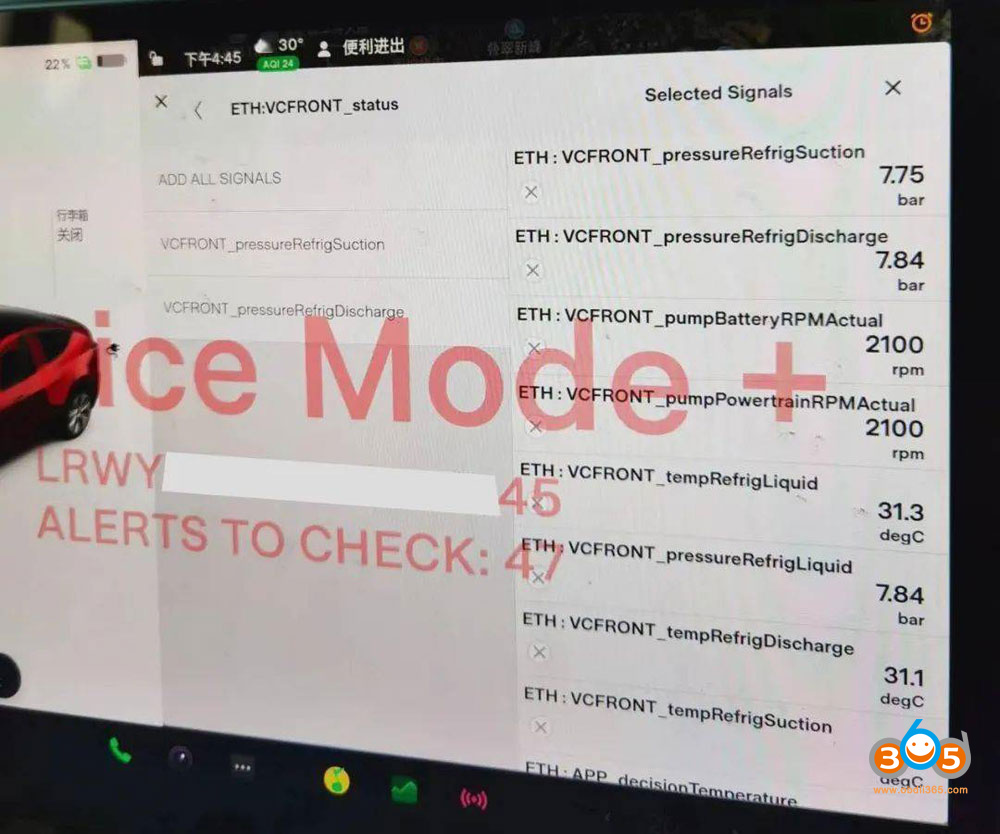
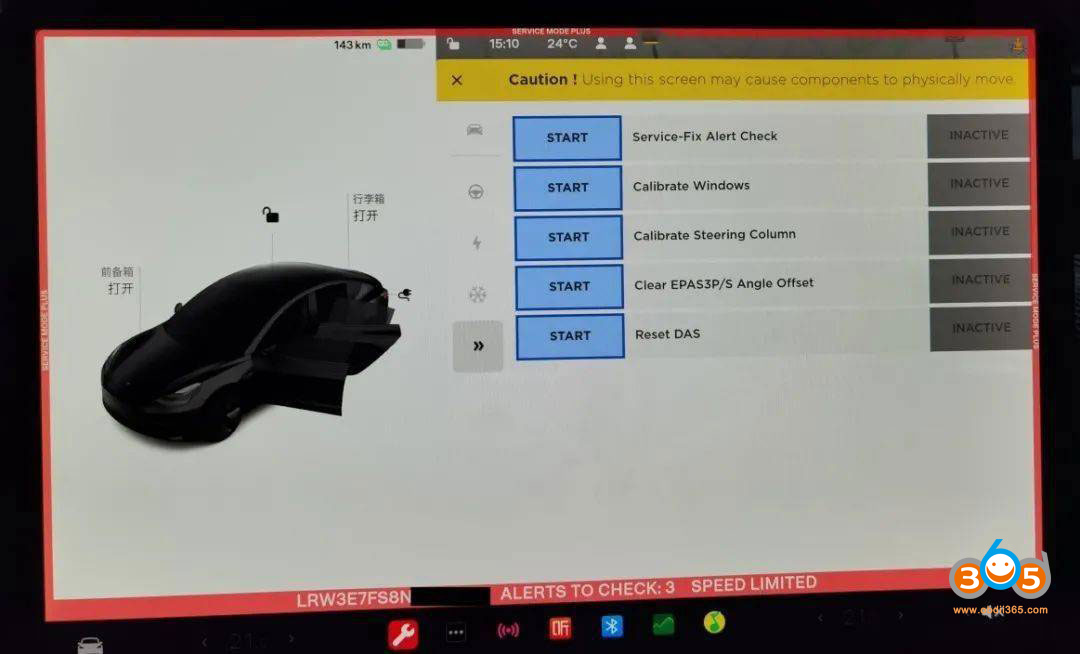
Click the [Service Mode] menu on the vehicle’s dash screen to view vehicle alarm information and some bus data streams, and perform some commonly used special functions, as shown in the figure below:
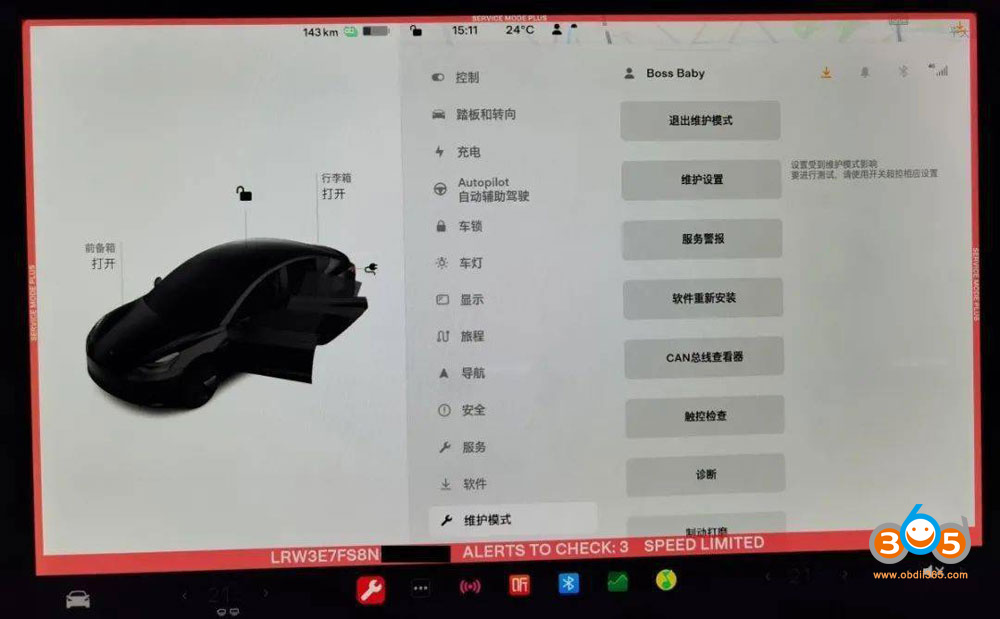
For example: coolant replacement, steering angle calibration, etc. (For specific special function menus, please check [Service Mode] -> [Diagnostics] on the vehicle screen).

Service Alerts
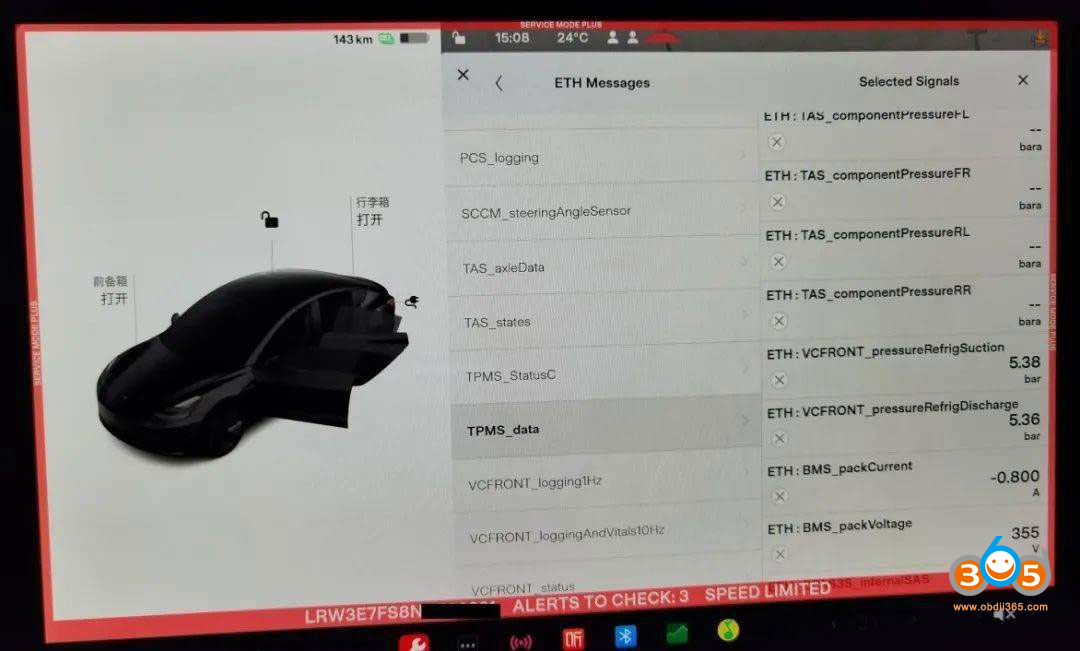
CAN Bus viewer
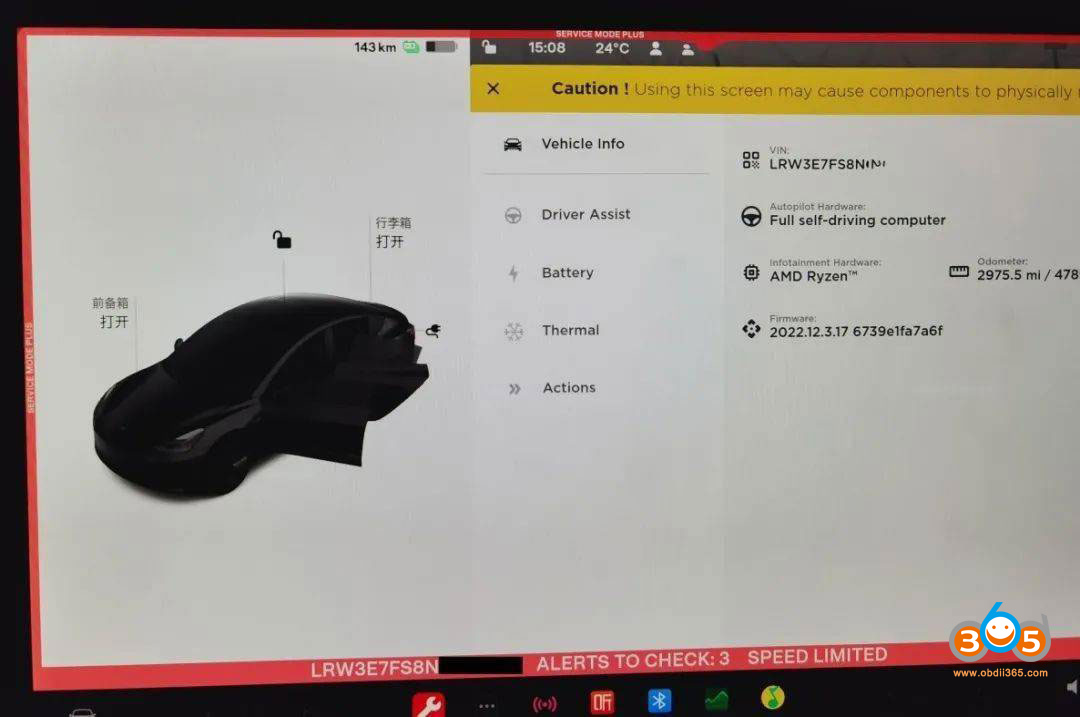
Vehicle Information
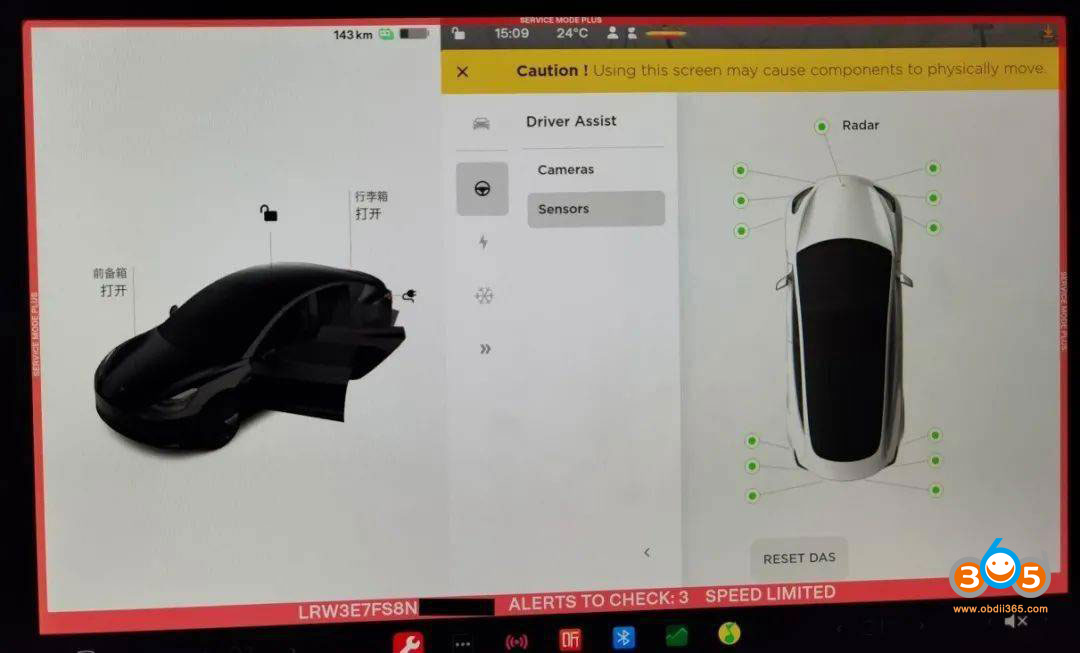
Driver Assist
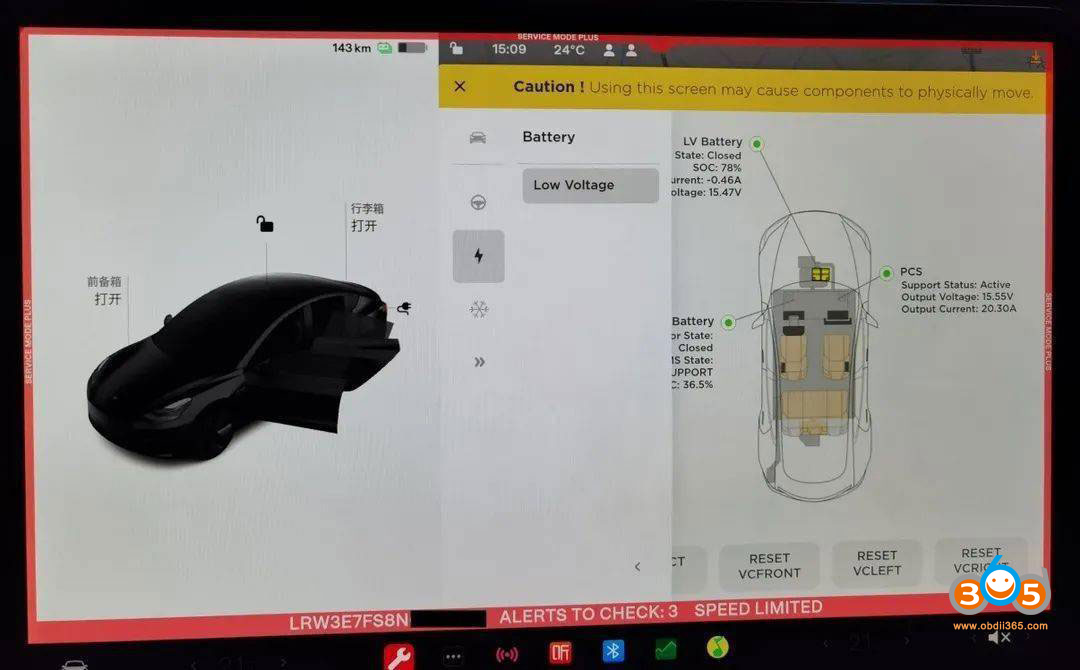
Battery menu
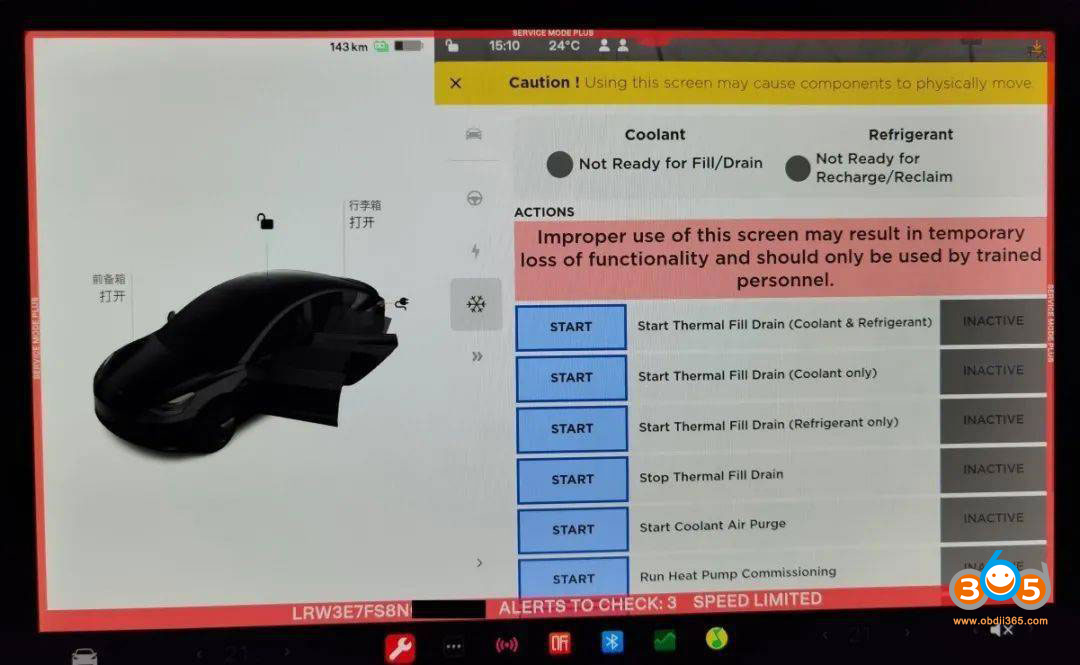
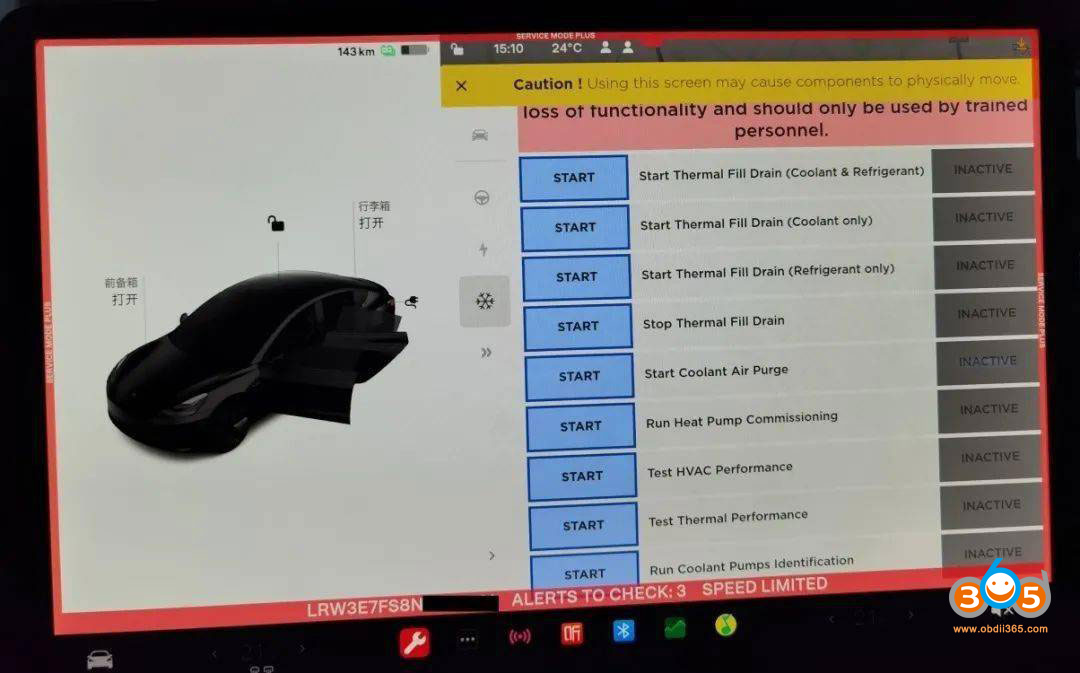
Heat control menu
etc


