


Step-by-step tutorial: GM DCT Hydraulic Flush Procedure using GM Scanner GDS2 software and Techline Connect SPS2 subscription.
What’s needed:
A GM MDI hardware (MDI2 clone, VNCI MDI2, VXDIAG VCX NANO GM etc)
Techline Connect SPS2 subscription
Bosch MDI2 hardware is not cheap, if you buy it from ACDelco $850-$1100.
Additionally, the GM GDS2 (Techline Connect) needed to run the hydraulic flush is subscription-based. A three-day subscription was $64. Once you purchase the subscription, you’ll receive the link for the software.
Completing the fluid flush and subsequent filter change is an easy change that requires some patience.
NOTE:
– The DCT holds ~11.7 quarts of fluid when dry. The DCT is NEVER dry—the flush forces all the fluid through the filter. Once drained, about 1.5 quarts are remaining in the DCT. So, the fill will accommodate about 10 quarts.
– Once you complete the initial fill, it’s crucial to start the car and cycle between reverse, drive, and neutral for 30-45 seconds multiple times. Turn the car off, and add more fluid (about .5-.75 quarts) until you have a slow drip coming from the fill line.
Procedure:
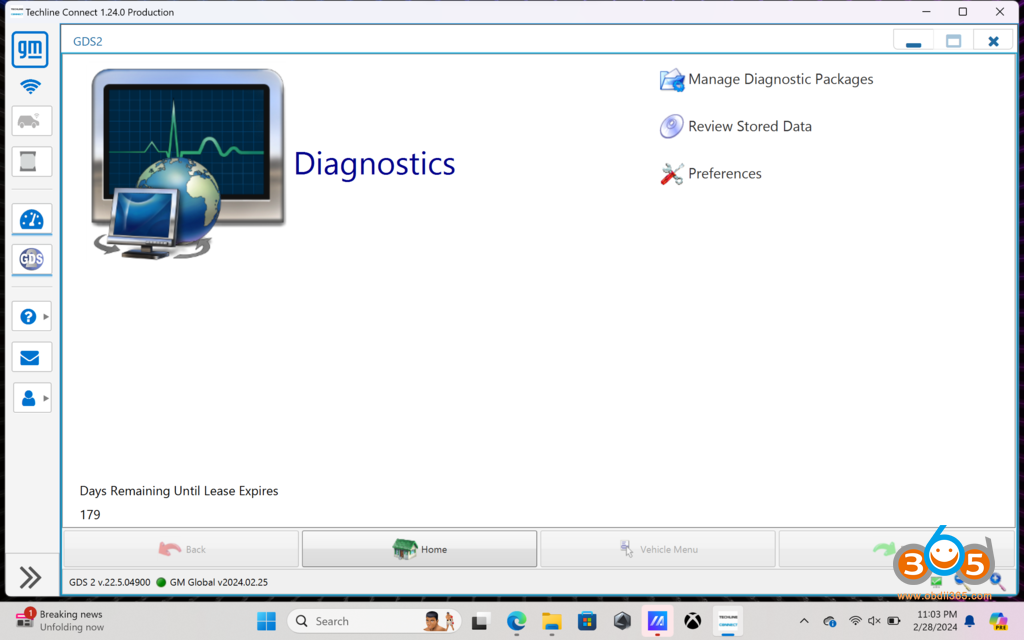
Let’s get into GDS2 (Techline Connect)
We’ll start by plugging in our MDI2 and getting GDS2 fired up.
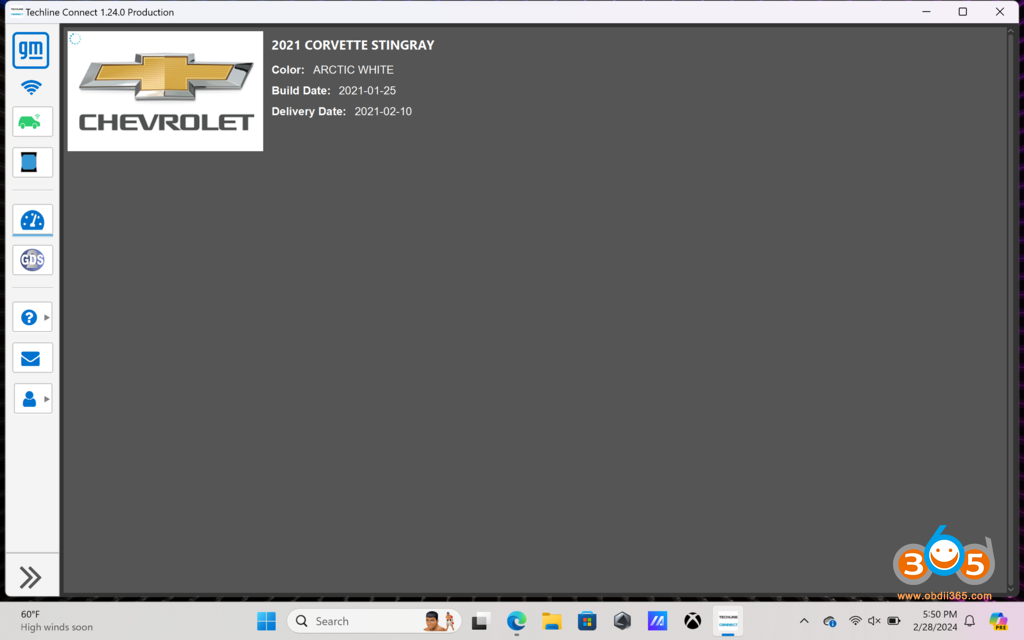
Next, we’ll get logged in and connected to the car using the MDI2.
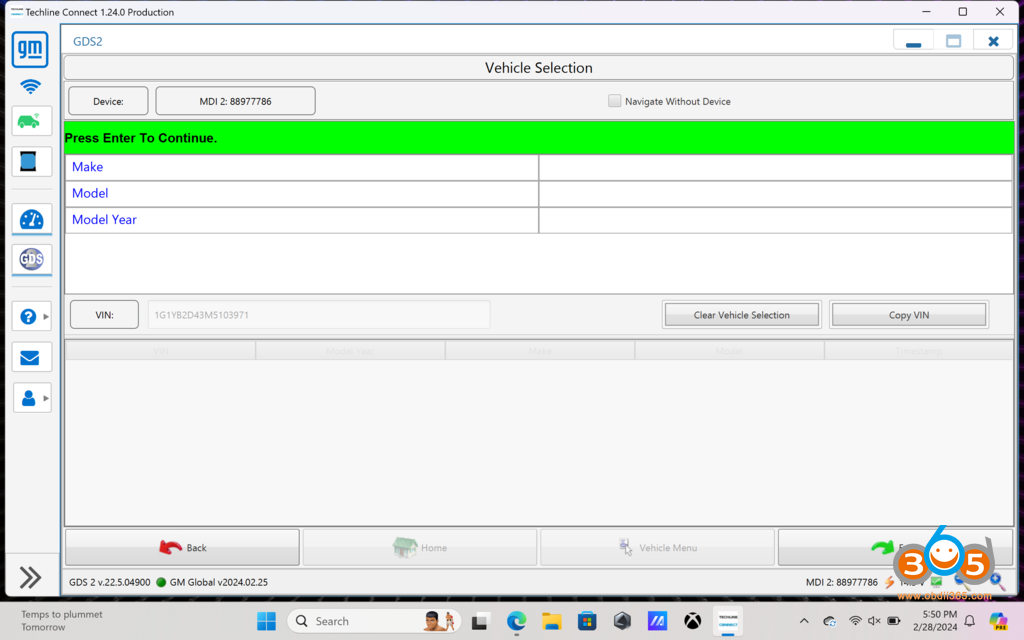
We’ll get the car read in and ready to browse for the transmission control module.

Now that we’re read in let’s navigate to the transmission control module.
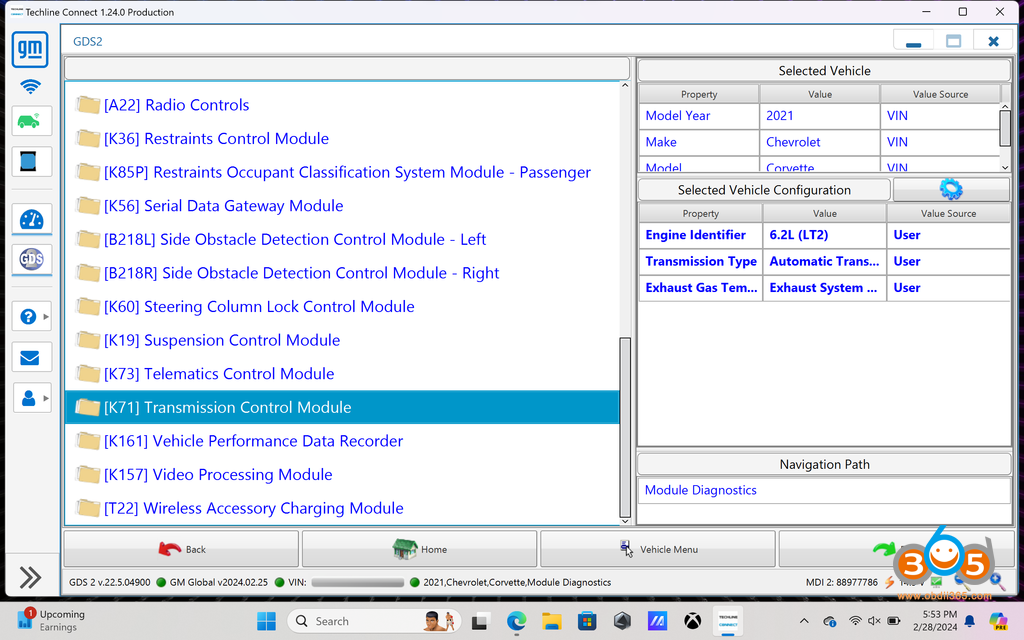
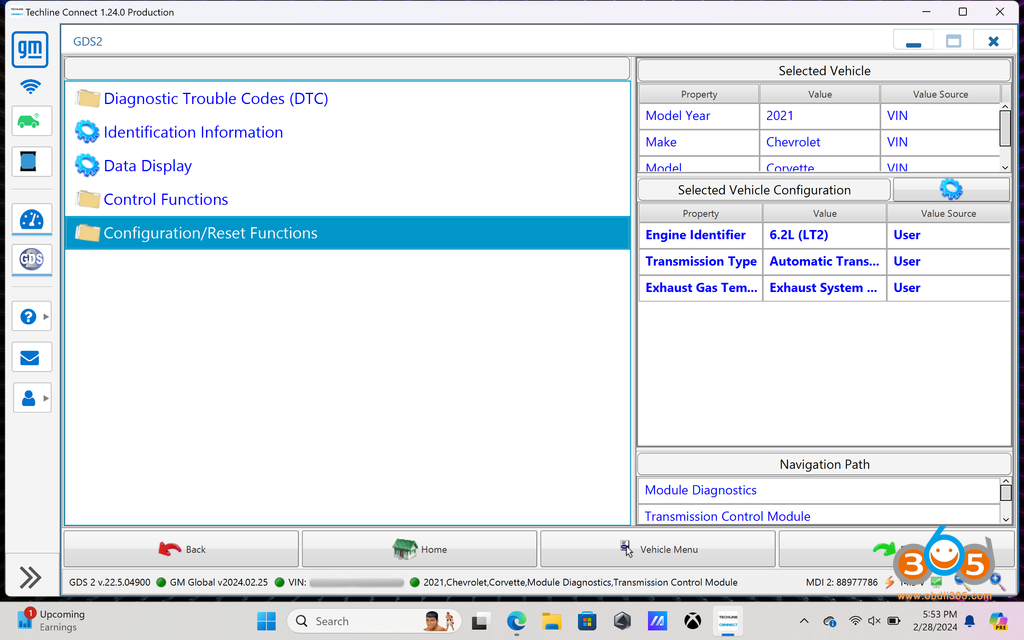
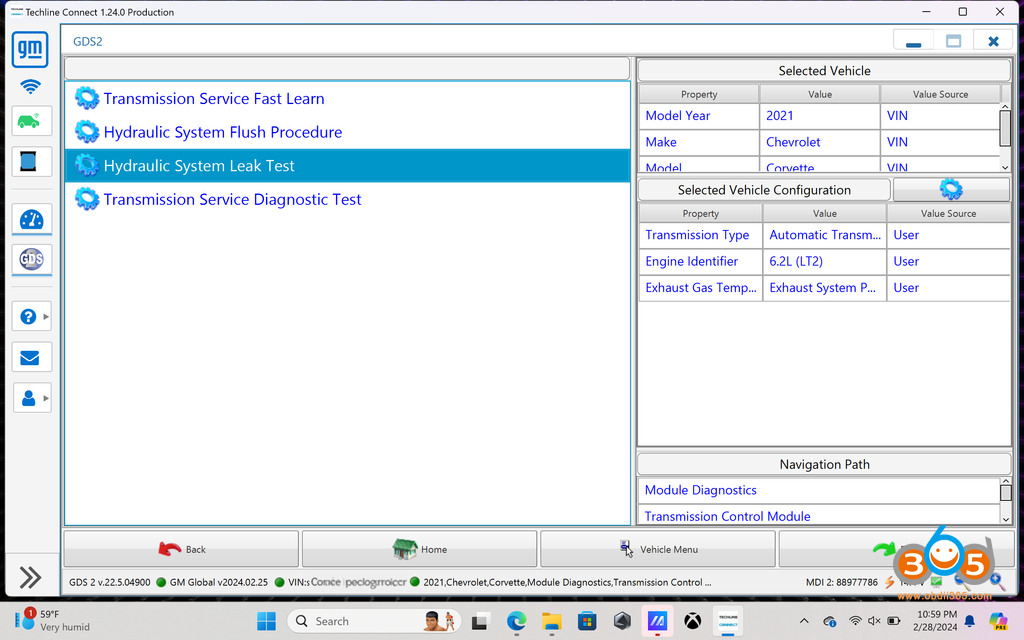
Select ‘Module Diagnostics’
Go down to K71, which is the Transmission Control Module
Select Control/Reset Functions
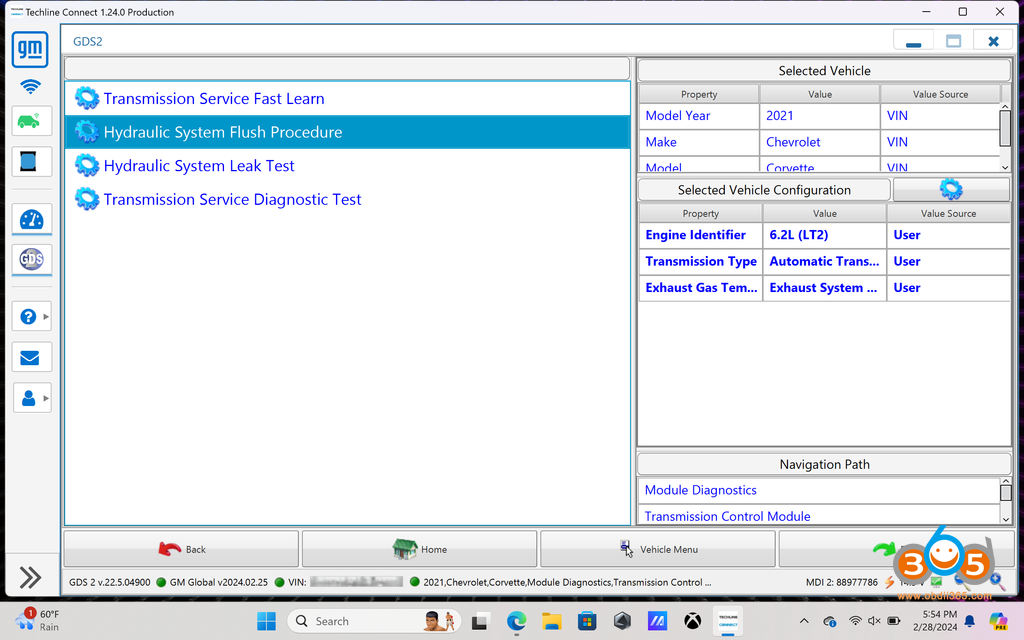
Select Hydraulic System Flush Procedure
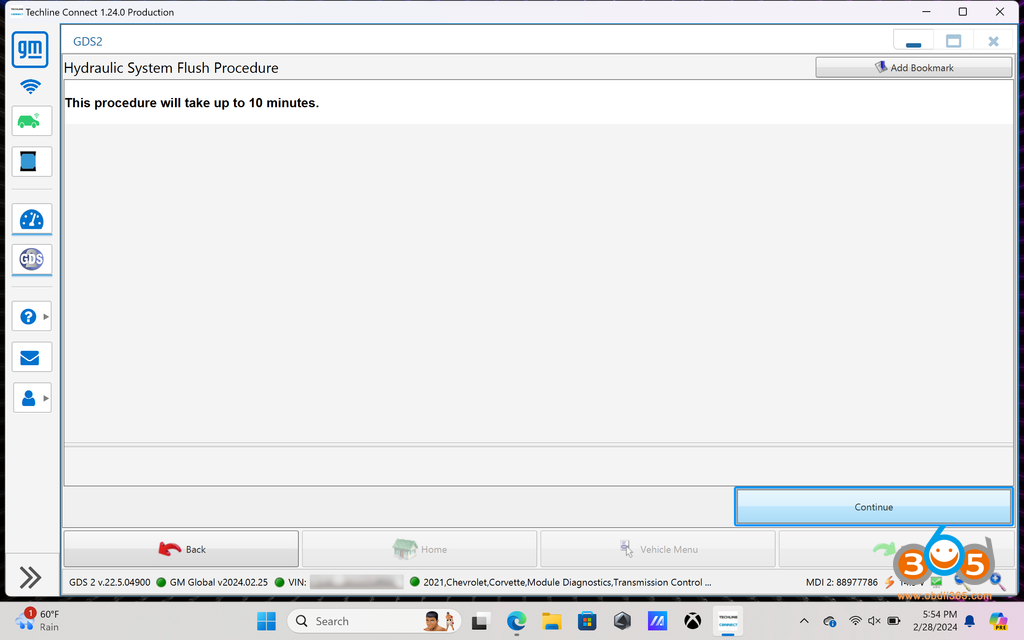
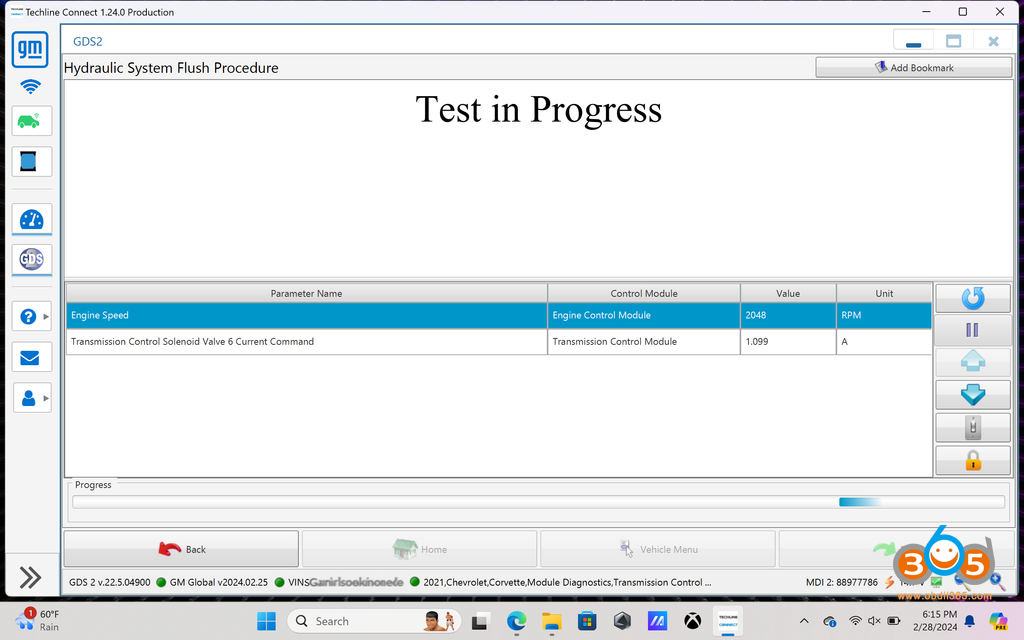
Get ready to start the procedure. It is not exaggerating. It will take up to 10 minutes to complete the flush procedure. You won’t begin the procedure yet, this is just an alert that it can take up to long.
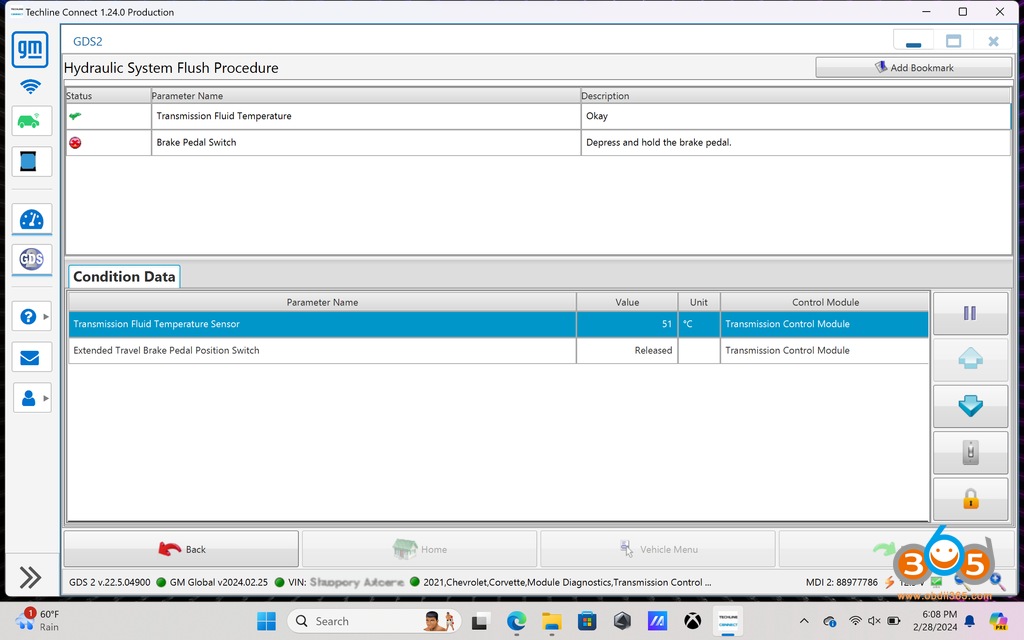
There are conditions that must be met to begin the flush procedure.
1) The transmission fluid must be at least 50c (122f)
2) The car must be running (while it is not stated in the screenshot, the engine’s RPMs will fluctuate between 500-2100 RPM during the cycle, which obviously can’t happen with the vehicle off). 2022+ updates the procedure to state that the engine must be running.
3) Don’t skip leg day, you’ll need to depress the brake for the entire duration to prevent the car from rolling.
Once the conditions have been met (50c and brake pressed), you’ll be directed to shift into neutral

Once shifted into neutral, click continue to begin the hydraulic flush procedure. You’ll hear the engine RPM fluctuate between 500-2100 RPM. Throughout the procedure, you will hear several clicks from the solenoids and modules inside the transmission as the fluid is system is pressurized and fluid passes through the filter. Hang tight, it will take nearly 10 minutes.
Once done, you’ll receive a completed message.
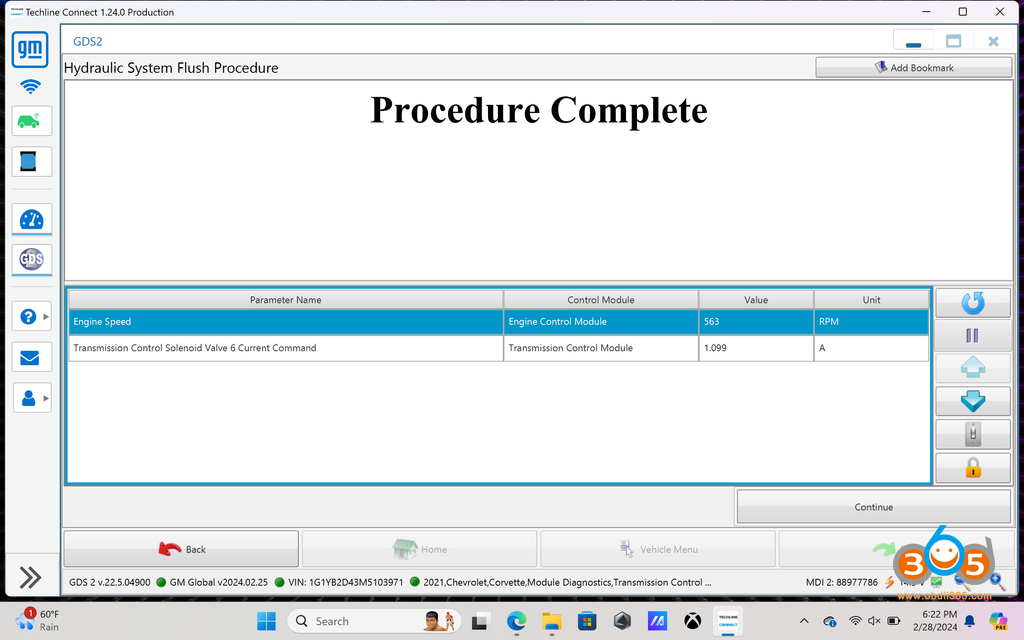
Click Continue to exit the procedure.
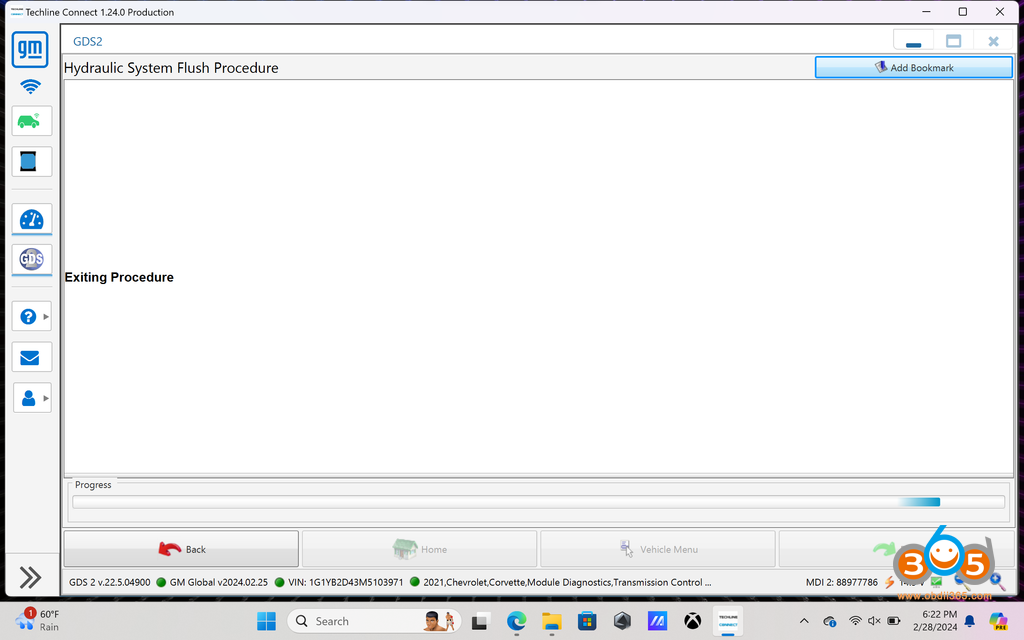
Close out of GDS2 and disconnect the VNCI MDI2 from the OBDII and laptop. You don’t need them until you’re done with draining and refilling.
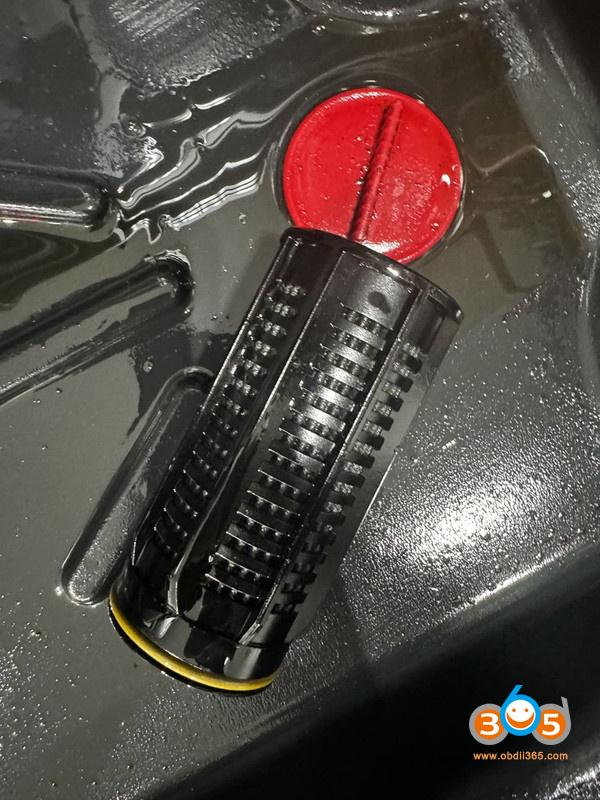
Lift your car. Remove the rear shear shield. Remove the FILL PLUG FIRST! You can use a ratcheting wrench, which worked flawlessly. Make sure you have at least a 11 quart drain pan. Give it some time to allow the fluid to cool, after all you did just warm it to 122+ degrees. The DCT fluid is low viscosity, meaning it will drain quickly. Remove the drain plug to drain. Remove and replace the DCT external canister filter (careful, it will be messy).
Insert the new canister filter. The filter comes with o-rings for the seat of the external aluminum housing and fill plug (set aside the old fill plug o-ring you’ll use it later if you read below). Reinstall the drain plug. Take your time to replace the o-rings and get everything sealed up.
I’d suggest picking up a:
Metric M20 M20X1.5 Male to Barb Hose ID 1/2” Brass Fitting
Brass Pipe Fitting Metric M20 x 1.5 Male To 1/2″ NPT Female Adapter
1/2 Inch ID (5/8 Inch OD) PVC Clear Vinyl Tubing (4-5’ is sufficient)
Small/Medium Funnel
Plumbers/Teflon tape
Put it all together and it’ll look something like this:
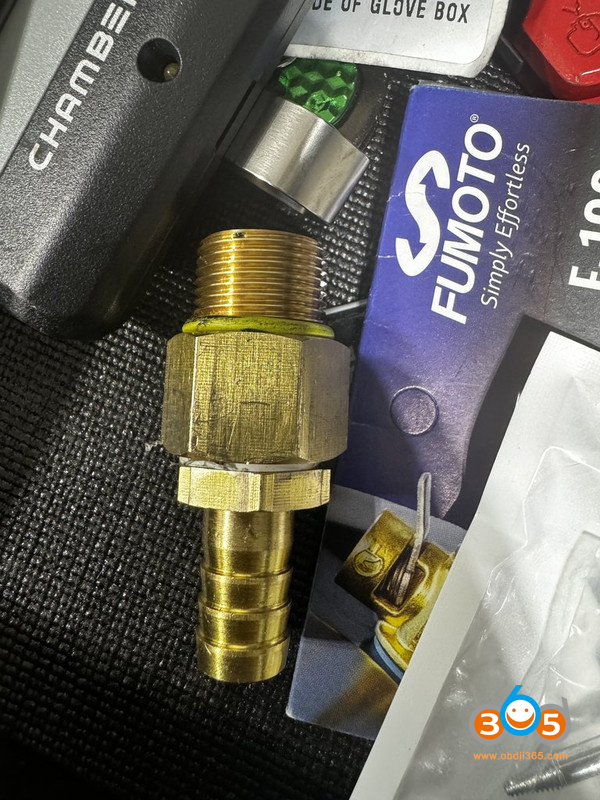
Install the fitting using the old o-ring from the fill plug. Now pass the vinyl tube through one of the top spokes on the wheel and press it onto the fitting.
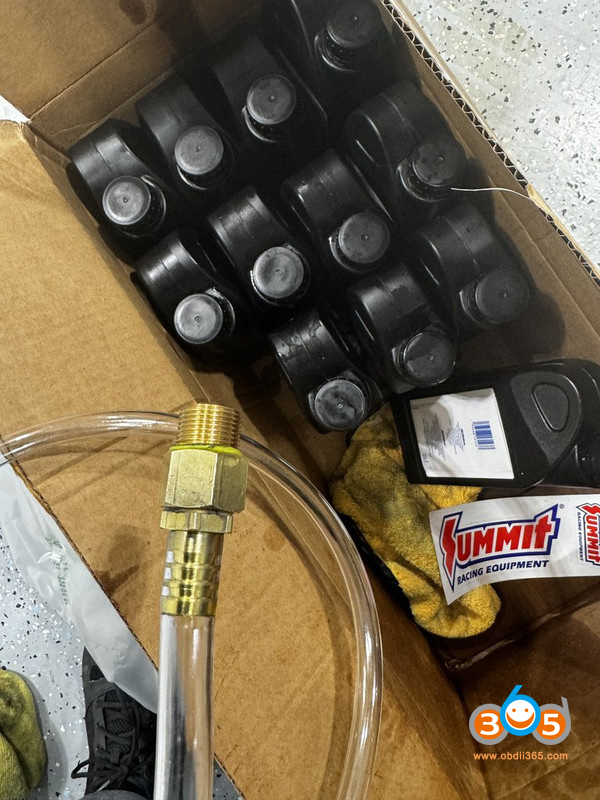
Now fill the transmission. You’ll easily fill 9 quarts with no issue. Stop periodically to ensure the hose is still attached to the fitting, which is would be if you tug too hard on it. Once you’ve finished 9 quarts, you’ll need to slow down because the transmission will fill before you see it backing up in the tube. Pour slowly and check the tube to see if it’s backing up. If you don’t hear gurgling from the tube, you’re reaching the full point and your tube is likely backing up — get ready to clean the mess.
Once you have it filled, remove the fitting and vinyl tube, install the fill plug, and start the car. Cycle through drive, reverse, and neutral waiting 30-45 seconds each. Stop the car, remove the fill plug and top off (using your DCT fill contraption). Once you have a very slow leak from the fill plug, you’re done. Replace the fill plug and remove the tubing.
Start the car so the fluid can warm and check for leaks.
Put away the tools that you don’t need again, e.g., your fluid contraption, empty bottles, fluid containers, ratcheting wrenches, etc.
Get into the car and load back into GDS2 (Techline Connect). Follow the aforementioned steps to get back into the K71 Transmission Control Module menu and select Control/Reset Functions.
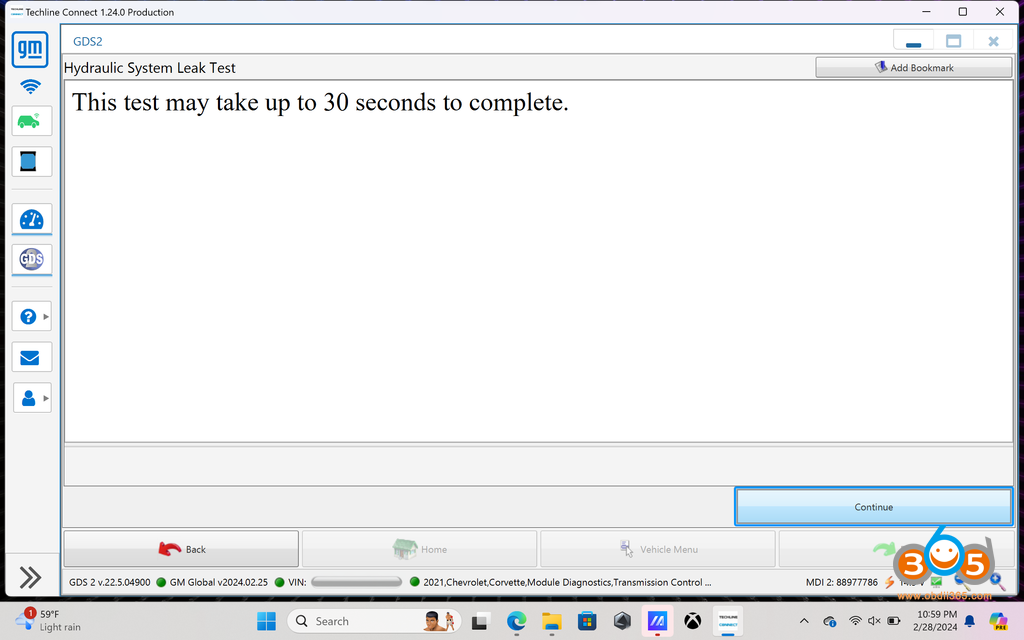
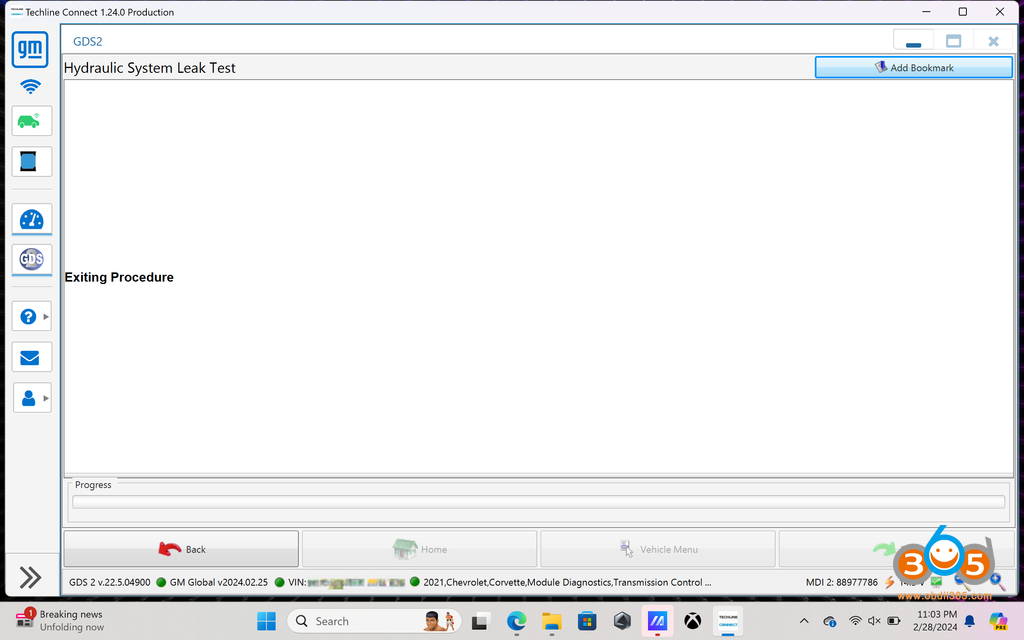
This time we went to select Hydraulic System Leak Test
This will take you 30 seconds and we’ll click continue
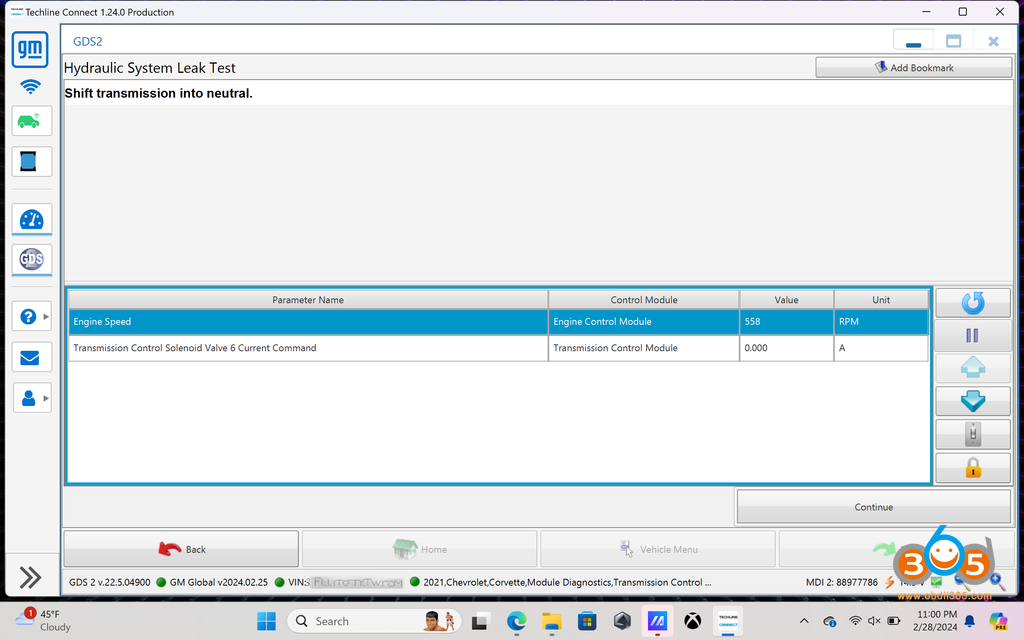
You need to be at least 50c (122f) and depress the brake, then hit continue

You’ll be prompted to shift into neutral and hit continue
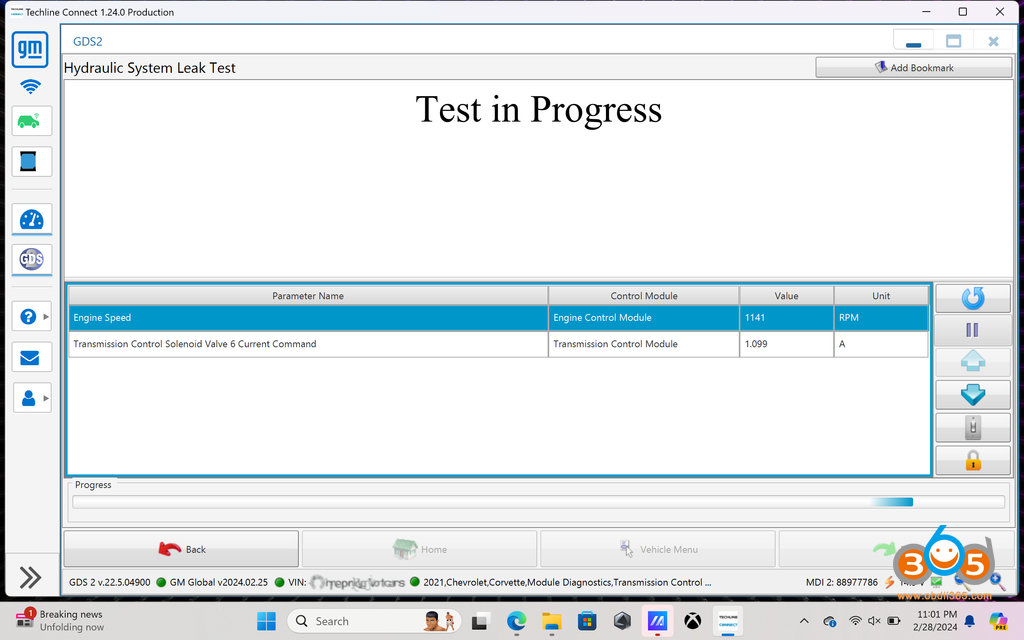
Allow the procedure to run
You’ll receive a prompt when finished
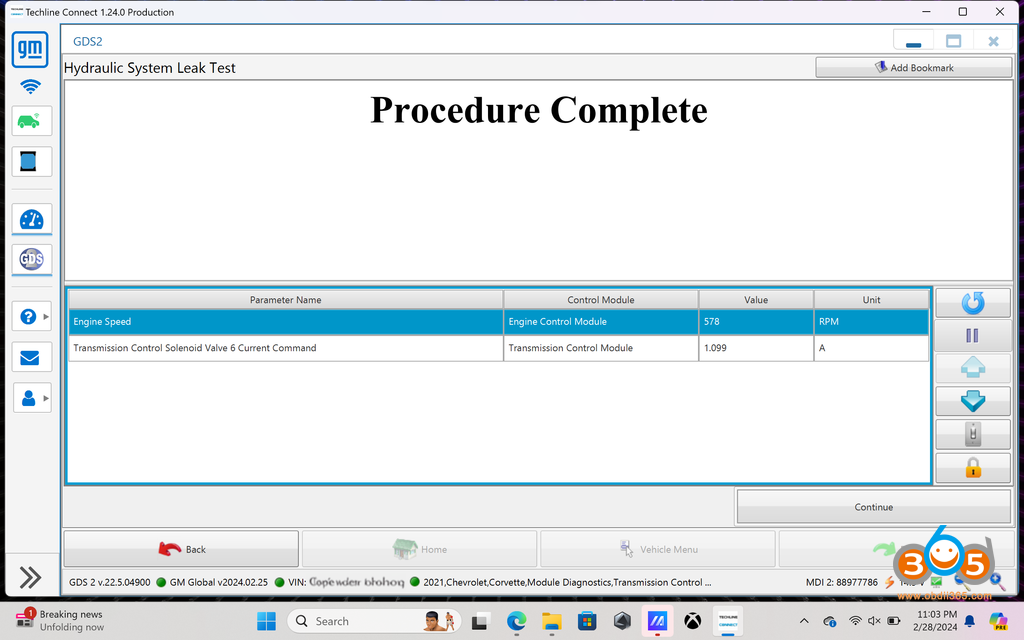
Click continue to exit the procedure
If you have a 2023+, use GDS2 (Techline Connect) to navigate to the menu option to reset the DCT external canister and fluid service interval. For 2020-2022, you can reset the DCT fluid service reminder from inside the car.
Close out of GDS2 (Techline Connect) and disconnect the MDI2 from the OBDII and laptop. You’re done.

You can also run the hydraulic flush procedure using a Bi-directional diagnostic scanner.
Here is an example:
Launch X431 Chevrolet Hydraulic System Flash Procedure


