


In stock! Autel OTOFIX IM1 Automotive Key Programming & Diagnostic Tool. OTOFIX IM1 is an advanced and smart key programming tool that combines powerful immobilizer (IMMO) and programming functions with OE-level diagnostics and advanced service functions in one Android-based 7-inch touch screen tablet.
With the included key programmer OTOFIX XP1 and VCI OTOFIX V1, the OTOFIX IM1 is an easy-to-use key programming tool that covers most vehicles.

Image 1: The first batch of OTOFIX is in stock.
Part 1. Autel OTOFIX IM1 smart key programmer Unboxing
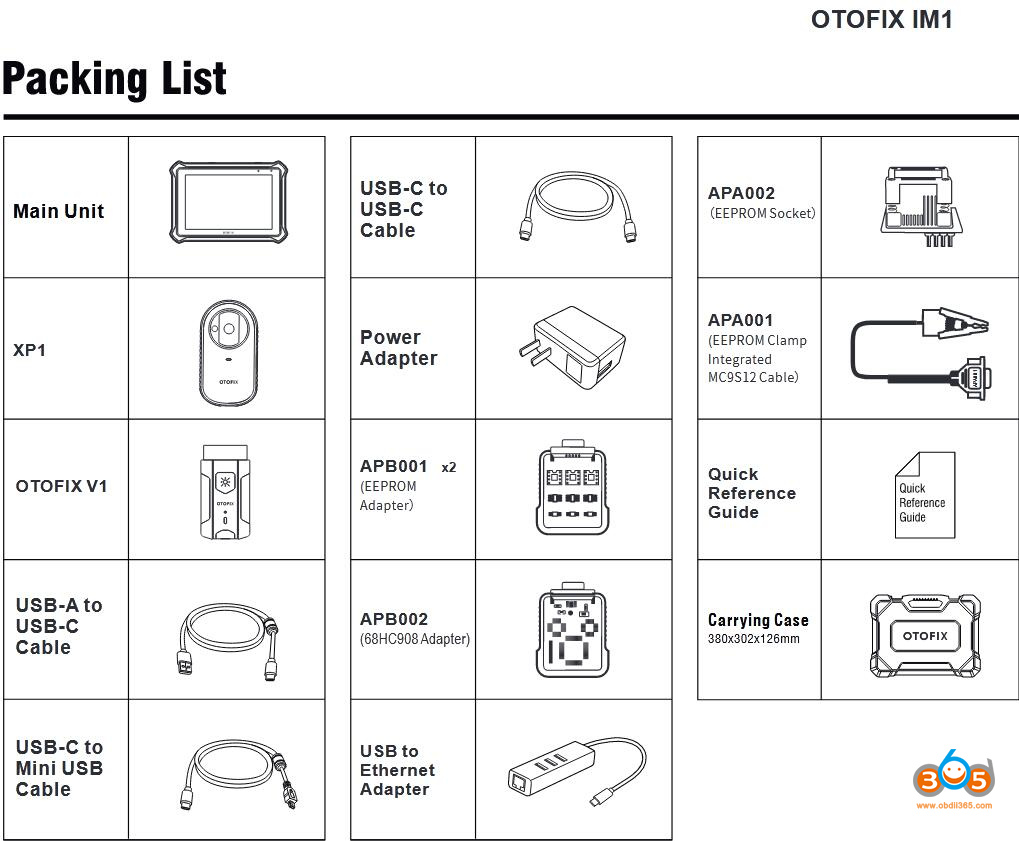
Open the box and we have: OTOFIX IM1 Main Unit, OTOFIX V1, XP1,USB-C to USB-C Cable, APA002, Power Adapter, APA001, APB001 (2pcs), USB-A to USB-C Cable, APB002 , USB-C to Mini USB Cable, Carrying Case and quick Reference Guide
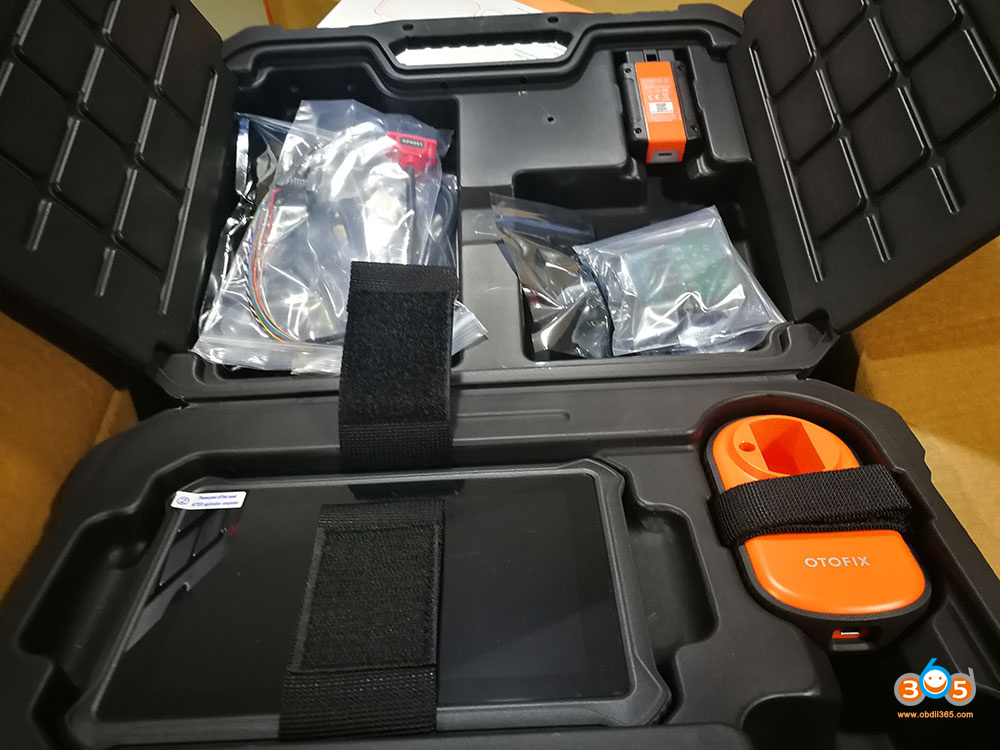
In details…
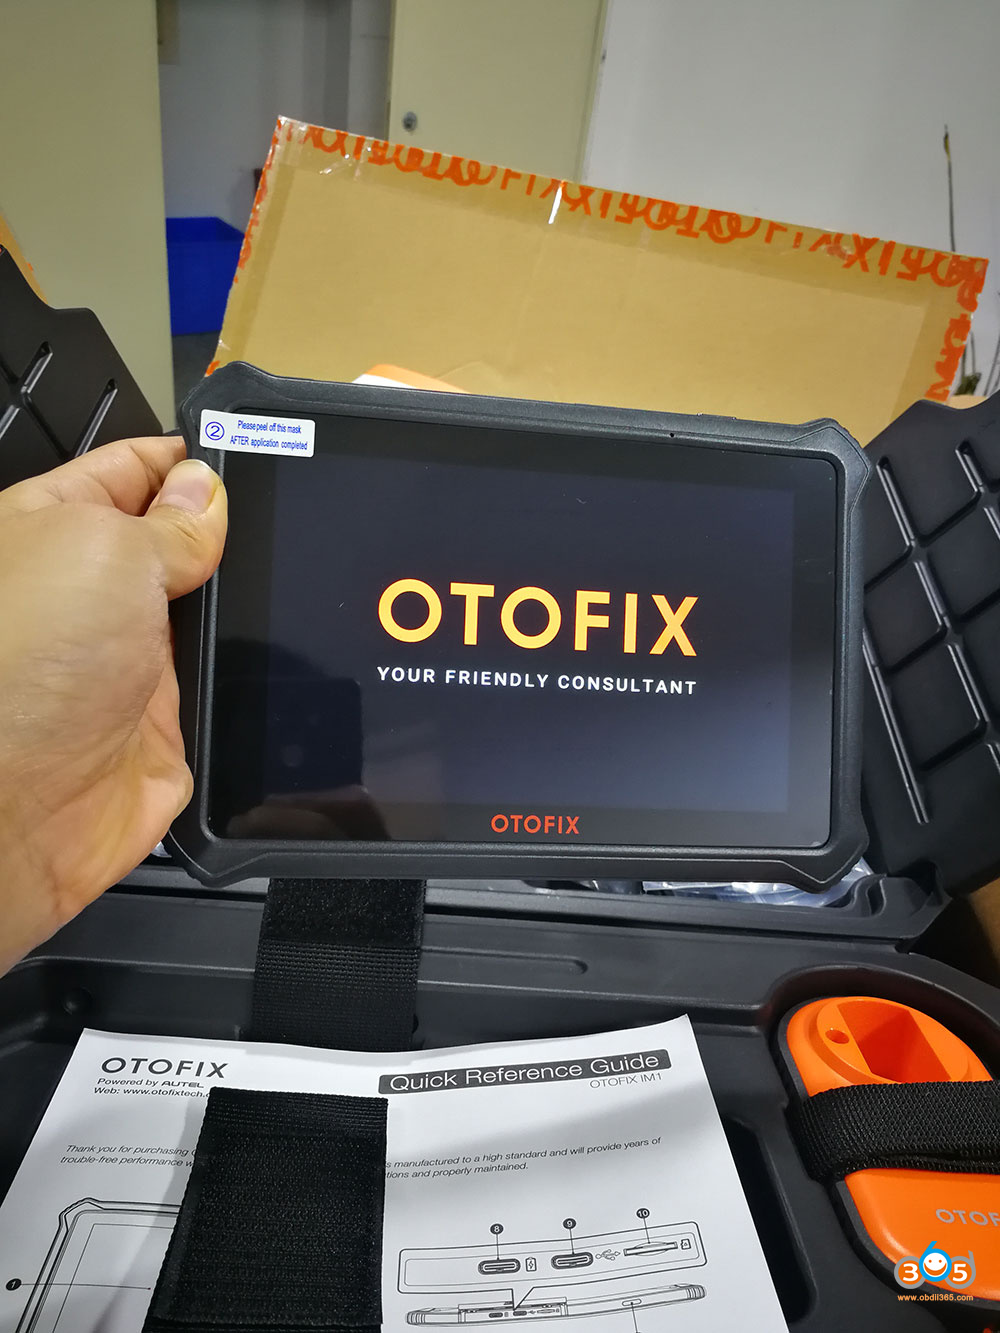
Come to the front of OTOFIX tablet: we have one 7-inch LCD Capacitive Touch screen, Microphone, power LED (Flashes green when the tablet is charging; flashes red when the tablet encounters a problem) and one Ambient Light Sensor.
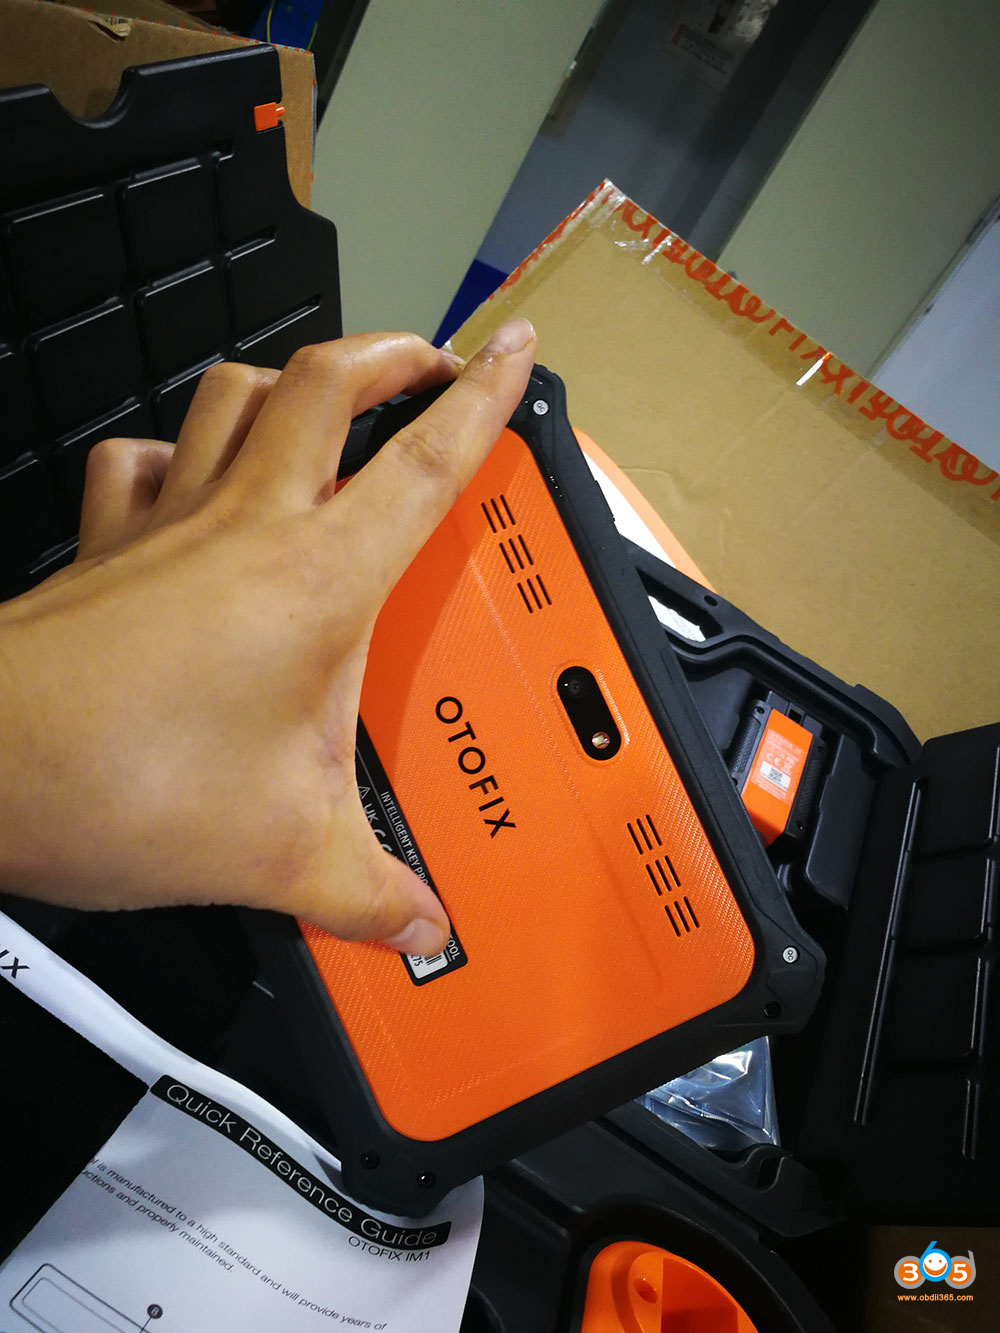
Come to the back of OTOFIX tablet: we have loudspeaker, camera, camera flash and the serial number.
Come to the side of OTOFIX tablet:
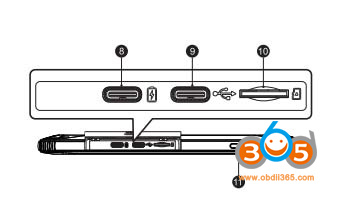
- USB OTG/Charging Port
- USB Port
- Micro SD Card Slot
- Power/Lock Button —long press to turn the device on/off, or short press to lock the screen. OTOFIX tablet can receive power from internal battery pack or external power supply).
Next is OTOFIX VI
OTOFIX V1 is a small vehicle communication interface (VCI) used to connect to a vehicle’s data link connector (DLC) and connect with the tablet via Bluetooth or USB cable for vehicle data transmission.

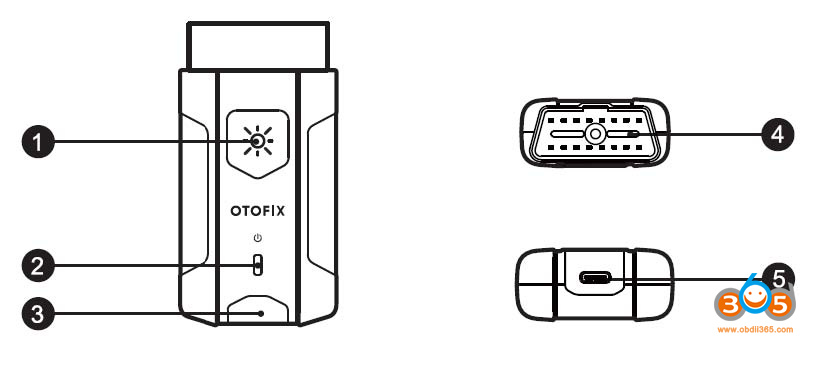
- Flashlight Button
- Power LED
- Vehicle/Connection LED
- Vehicle Data Connector (16-pin)
- USB Port
The OTOFIX V1 can receive power from vehicle power, AC/DC power supply.
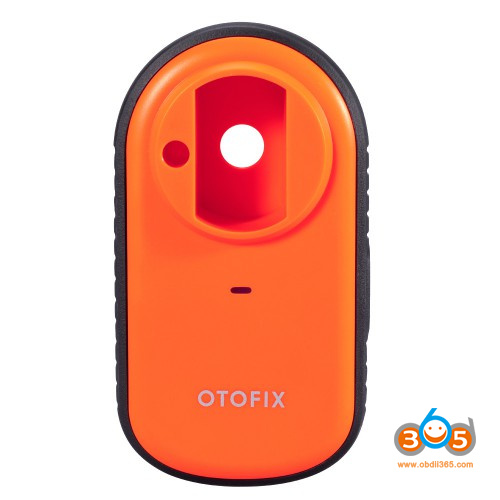
Next is OTOFIX XP1
OTOFIX XP1 is specially designed to read transponder data (including Mercedes Benz infrared smart key), clone and generate exclusive keys, read/write on-board EEPROM data, and read/write Freescale 9S12 MCUs. By working with the diagnostic tool and PC that are both loaded with programmer software, the XP1 can read/write transponder data quickly and accurately.
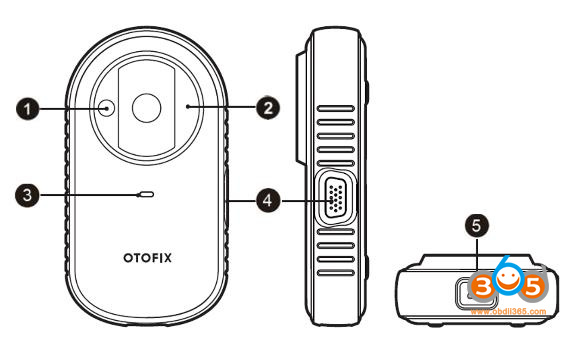
- Vehicle Key Chip Slot—holds the key vehicle key chip
- Vehicle Key Slot —holds the vehicle key
- Status LED Light —indicates the current operating status
- DB15-Pin Port —connects EEPROM Adapter and EEPROM Clamp Integrated MC9S12 Cable
- Mini USB Port —provides data communication and power supply
Part 2. Autel OTOFIX IM1 smart key programmer registration and update
For the first time to use Autel OTOFIX IM1 tablet, it is required to register a member with your email address, password.
After that, the tablet will pop up the newest software version that you are supposed to update so that you will enjoy the newest service.
Follow this .pdf file on how to register / update Autel OTOFIX IM1?
Part 3. get started using Autel OTOFIX IM1
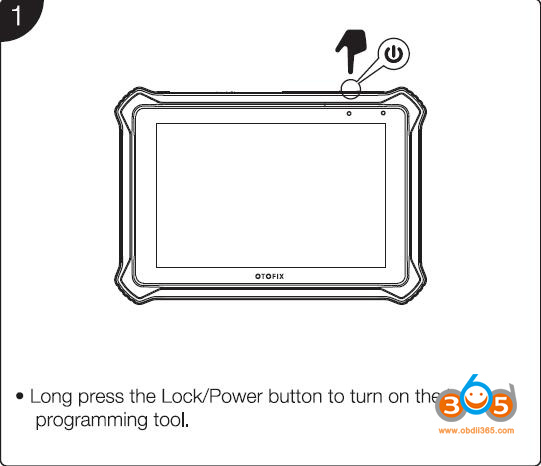
Long press the Lock /Power button to turn on OTOFIX IM1.
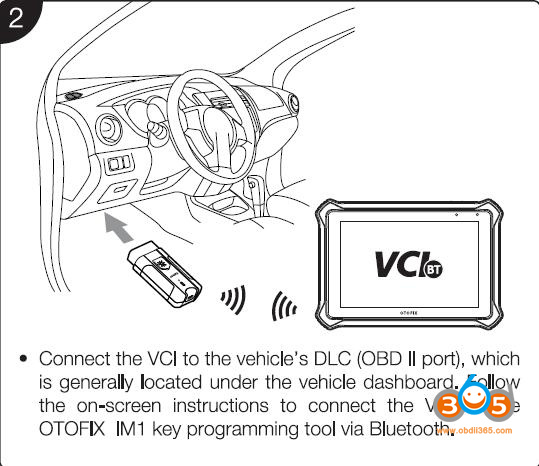
Connect the VCI to the vehicle’s DLC (OBDII port), which is generally located under the vehicle dashboard. Follow the on-screen instructions to connect the VCI to the OTOFIX IM1 via Bluetooth.
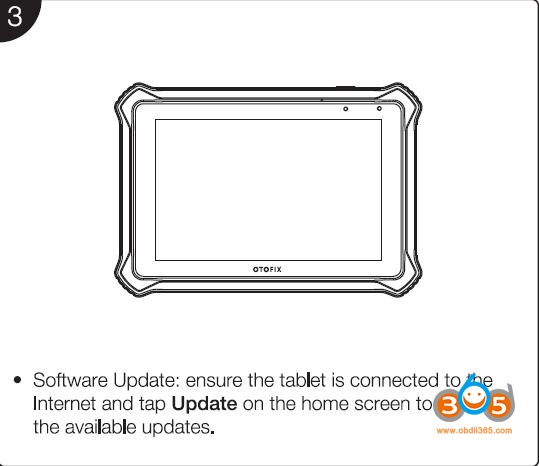
Ensure the tablet is connected to the Internet and tap Update on the home screen to view all the available updates.
- To perform immobilizer function
The IMMO application provides Smart Mode and Expert Mode to guide technicians performing IMMO related functions, including Key Learning, Remote Control Learning, Remote Control Add, and more.
it requires a connection among the vehicle, OTOFIX IM1 key programming tool and the XP1.
- Connect the vehicle and the OTOFIX IM1 via Bluetooth or USB cable.
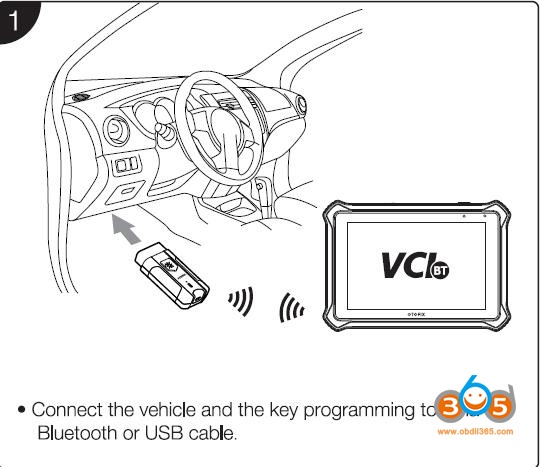
- Connect OTOFIX IM1 and XP1 with the supplied USB cable.
Select the immobilizer function on the main menu and follow the onscreen instructions to continue.

- To perform programming function
The Programmer application, for some vehicles, requires a connection between the tablet and the OTOFIX XP1. In some cases, no vehicle connection is required. This application can access the key chip, read, retrieve and write key information, as well as other key-related functions.
Quick guide:
Connect to the XP1 Programmer first, then follow the on-screen instructions to select a key type. Programming can be accessed from the IMMO app directly following a status scan, or from the Home Screen button. The following describes a programming situation requiring EEPROM programming. These steps should only be carried out by professional technicians.
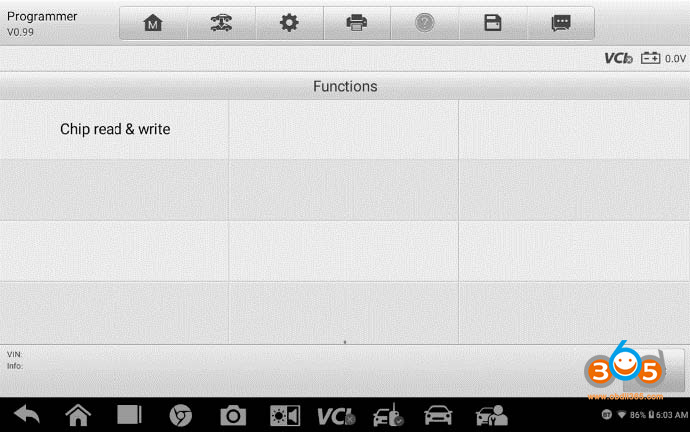
Let’s use Chip Read & Write as an example.
- Select Chip(EERROM,MCU,ECU) from the Type selection menu.
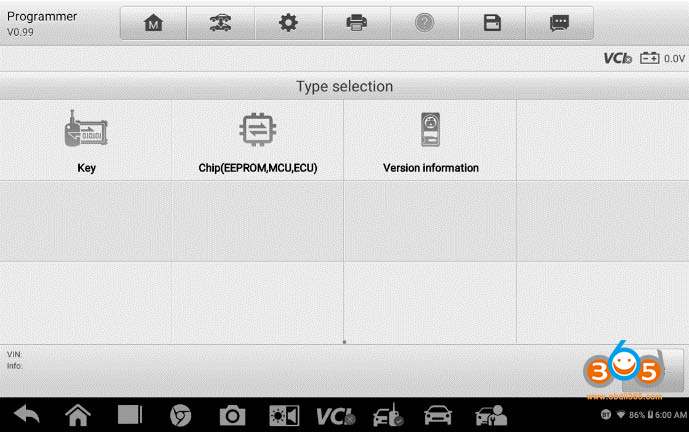
- Tap “Chip Read & Write” from the Functions menu.
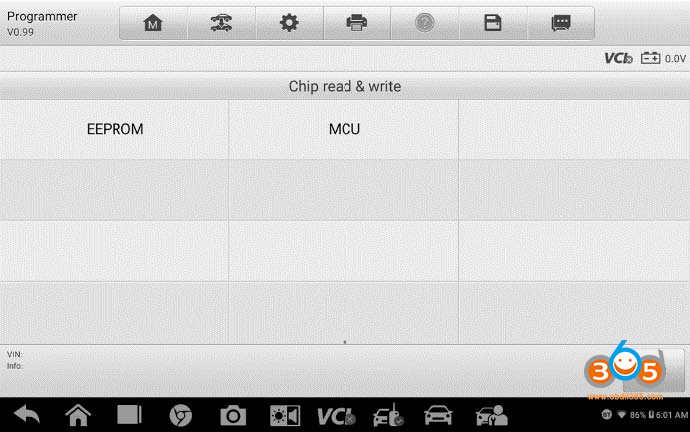
- Select the chip type if needed. In this example, select “EEPROM” and follow the on-screen instructions to continue.
- Select “Read” on the screen.
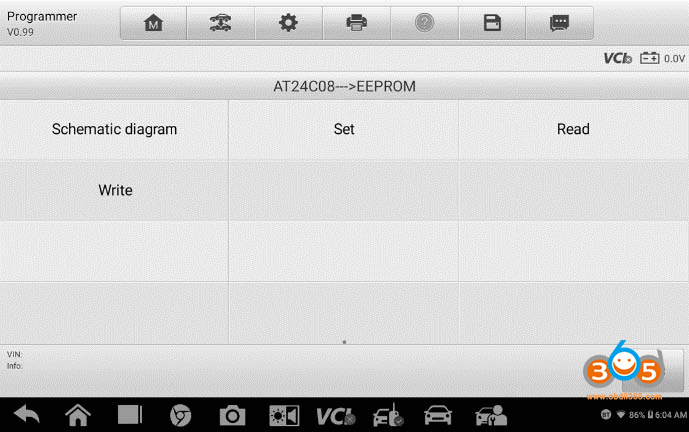
The chip data screen appears. Tap “Save” to save the data, or tap “Cancel” to exit.
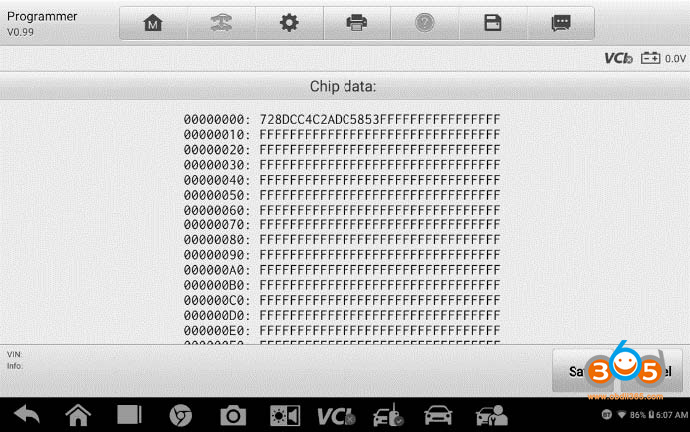
- Type the file name and tap “Confirm”. The chip data will be saved on the tablet. A message “File Saved Successfully” appears.

- Select “Write Operation” from the operations menu. The tablet will open the default folder. Select the saved data and tap “Confirm” to write it into a blank chip.
- Diagnostics
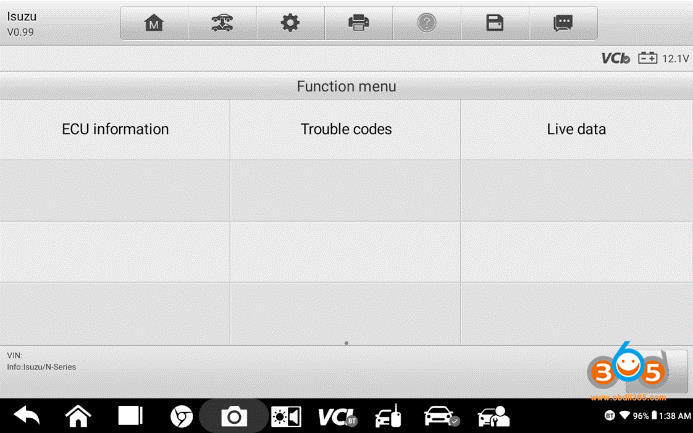
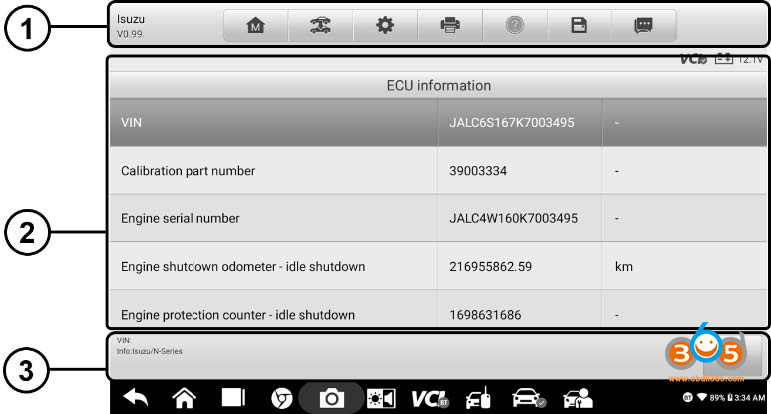
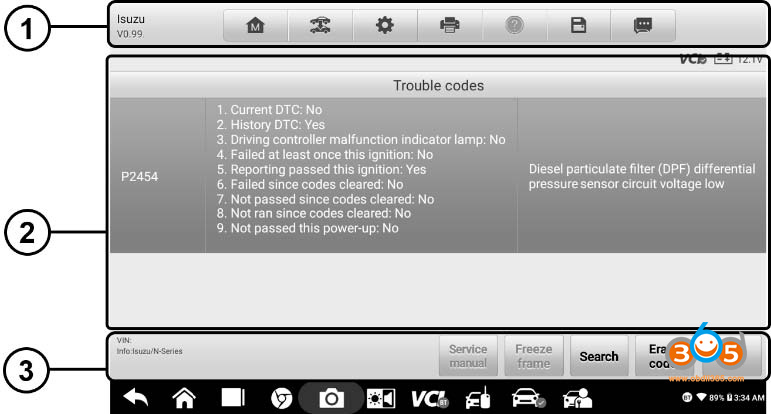
The Diagnostics application can retrieve ECU information, read & erase DTCs, and view live data. The Diagnostics application can access the electronic control unit (ECU) for various vehicle control systems, including engine, transmission, antilock brake system (ABS), and airbag system (SRS).
NOTE:
- The Diagnostics function can only be accessed with a valid subscription.
- A message will appear when tapping the Diagnostics icon on the OTOFIX Job Menu for the first time. Read the message and then tap the Purchase button to purchase the Diagnostics and Service package.
The Diagnostics application enables a data link to the electronic control system of the test vehicle for vehicle diagnosis via OBDII connection. The application performs functional tests, retrieves vehicle diagnostic information such as trouble codes and live data for various vehicle control systems, such as engine, transmission, and ABS.
There are two options available when accessing the Diagnosis section:
- Auto Scan —starts auto scanning for all the available systems on the vehicle.
- Control Units —displays a selection menu of all available control units of the test vehicle.
After a section is made and the tablet establishes communication with the vehicle, the corresponding function menu or selection menu appears.
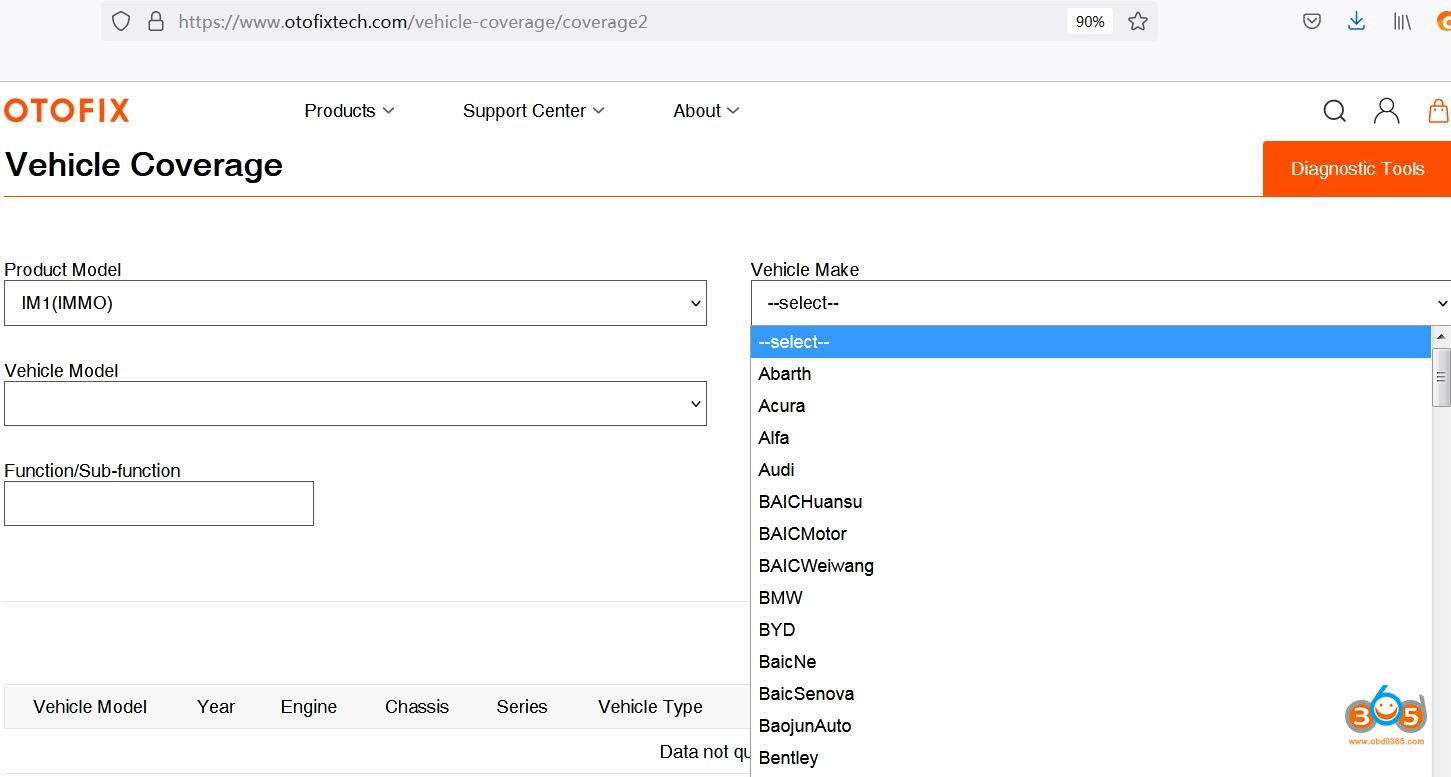
Part 4. Autel OTOFIX IM1 smart key programmer vehicle coverage
Here you go to the official site: https://www.otofixtech.com/vehicle-coverage/coverage2
Look at the image below, select product model: IM1 (IMMO), vehicle make, vehicle model, year, function / Sub-function, and then click on “Search”.
Alright, Autel OTOFIX IM1 is an awesome smart key programmer with diagnostic and programming function, more importantly, it is a cheaper alternative of Autel IM508, recommend it to the locksmith at limited budget.


